

There's a lot of patterns for pillowcase dresses and nightgowns going around. Most seem to not use a pillowcase though! I asked my sew-crafty friend Becca about this and she said it was actually harder to use a pillowcase when she tried it. I had been eyeing this tutorial since from the blog's photo, I thought they were for adults and I need nightgowns in a bad way. I don't like to wear pants or shorts to bed and the hubby is sick of me stealing his t-shirts! I ended up sort of but not really following that link's advice and modifying a lot.
For starters, I bought 2 coordinating knit fabrics, 2 yards of each. 60" across so that was my width, and I laid a t-shirt that I liked the length of down to get my length, about 35". I then cut the panel in half so I had a front and back piece. Each piece was 30" wide by 35" long.
I folded each of the two panels in half- armpit to armpit- and laid them on top of each other to cut the armpit holes. I really had no more measurements after that initial sizing measurement- I just cut a J-shape, with the long part of the J being vertical and the shorter part towards the side seams.
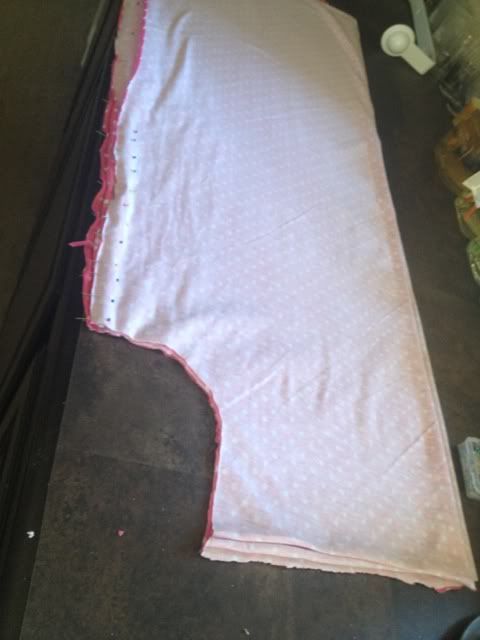
Next, I pinned down the armpit openings around 1/2 inch and sewed. I then folded over the neck/back (shoulder?) areas around 2"-ish and sewed them down across the bottom. Leave the sides open for your sash. I did make the front piece have a larger fold down than the back piece, since I wanted it a bit lower in the front.
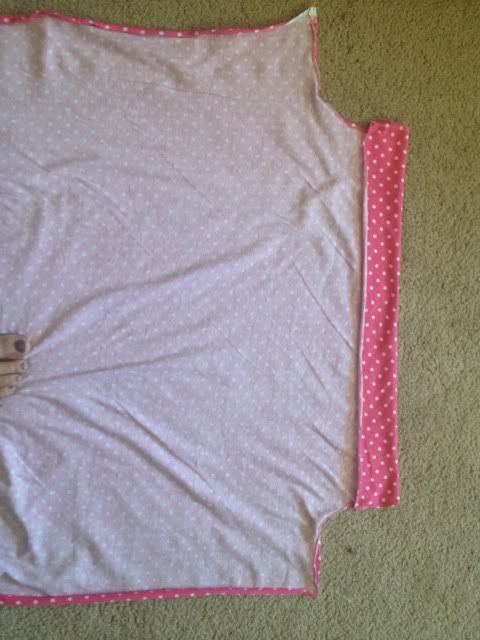
After I did the arm and neck/back of the front and back panels, I pinned them together (right sides facing in) and sewed down the side seams.
I did not hem the bottom. This knit does not fray; instead it rolls up a tiny bit and I think that makes it look really cute and not in any way unfinished.
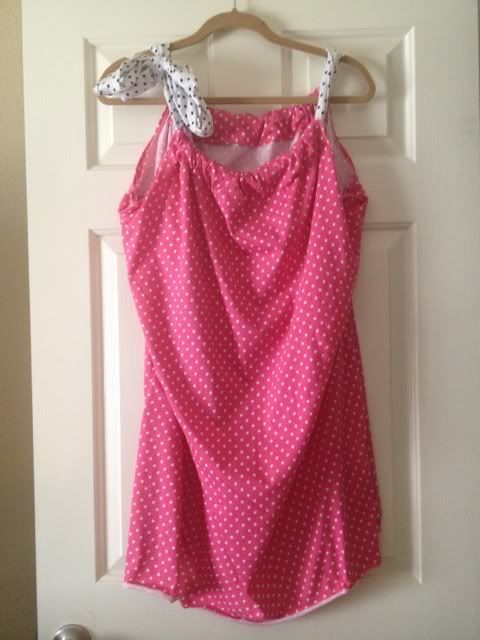
I didn't take pics of this next part, but cut a long strip- mine was 60" x 8", folded in half (right side IN) to make 60" x 4"- and sew into a tube. Leave a spot in the middle open to pull the tube through so it's right side out and then sew that hole shut.
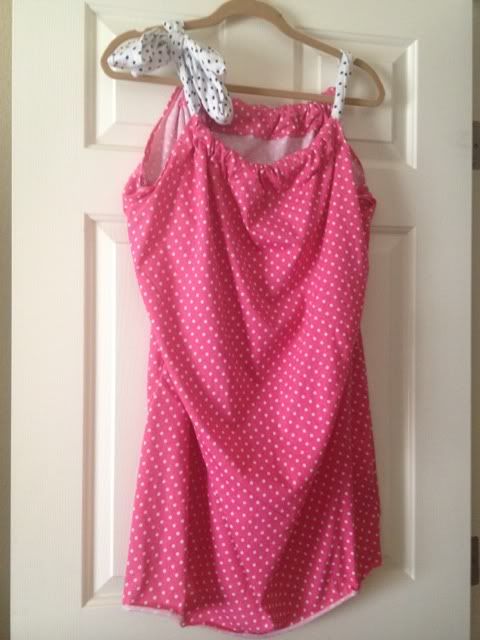
Thread your sash through your neck and back tunnels and voila!
Your measurements will vary depending on your size. I'm 5'1 and this was about knee length for me. I just wrapped the fabric around myself and figured that 60" wide would probably work, especially since the sash gathers the top part tighter than it would be otherwise.
This comment has been removed by the author.
ReplyDeleteO I love it! Super cute!
ReplyDeleteThank you!! I'm headed to Goodwill to find me some knit sheets tomorrow!!
ReplyDeleteI utterly attitude and revalue your bushel on each and every target. Escorts Romania
ReplyDelete