I haven't posted in over a month. Nothing crafty, nothing yummy, nothing breast-pump-y. I still have nothing to talk about except, if you think you are suffering from post partum depression, I recommend two things. One is required. Call your doctor. Don't worry about sounding stupid, about not wanting to talk about things, about medications. Research the medications, especially if you're breastfeeding, and ask for one you're comfortable with. The second thing is optional, but you might find it helpful if you can't talk to your doctor right away (like, say, you hit rock bottom on a Saturday, but aren't a danger and don't want to go to the hospital. DO go straight to the ER if you think you may harm yourself or your kids!). Download or buy Brooke Shields' book "Down Came the Rain" and read it and re-read it until you get help. There are lots of books about PPD out there, but hers really spoke to me.
Help is out there and if you ask for it, that makes you stronger than you realize.

12.31.2013
11.23.2013
Medela Easy Expression Bustier vs Simple Wishes Hands Free Pumping Bra
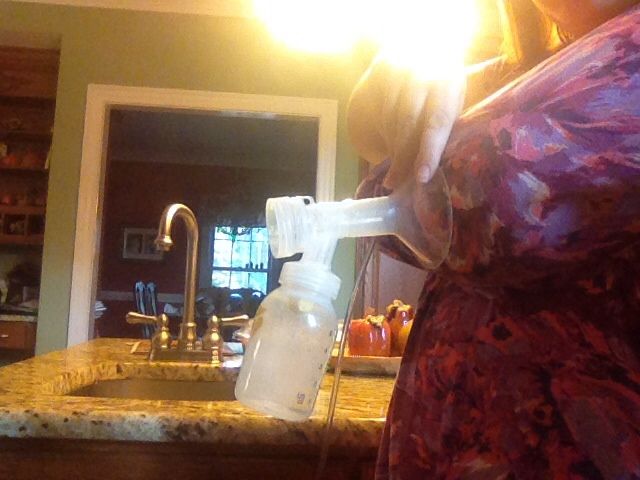
When I was first starting out with my breast pump I quickly realized that hands-free pumping is the way to go. Hands free means I can feed the baby, help my toddler, browse on my laptop, read on my iPad, or even just have two free hands to massage my boobs. I started out by cutting slits in some comfy, stretchy nursing bras (these ones, in fact) and then I realized well, I just cut holes in the only two nursing bras that I have. With nursing pads in and nursing shirts, which tend to have two layers over the chest area, you couldn't tell but it was not pretty. I'll pull up my shirt for my personal trainer to measure my stomach and it'd be awkward. On the other hand, they worked GREAT and since I would wear them all day it made setting up for pumping pretty quick.
I then bought some "real" nursing bras and did not want to cut them but also didn't want to change my bra just to pump hands free, so I bought the Medela Easy Expressions Bustier. It took a few minutes to get it on and off and it's certainly not pretty but it was functional. I kept reading that the Simple Wishes bras were much better than the Medela bustier, but I didn't really think much of it because a bra with hole is a bra with holes, ya know? But then curiosity got the better of me the more I got frustrated with my Medela, so I ordered the Simple Wishes. This post is for anyone out there who thinks the bra doesn't really matter...it does!!! There IS a big difference.
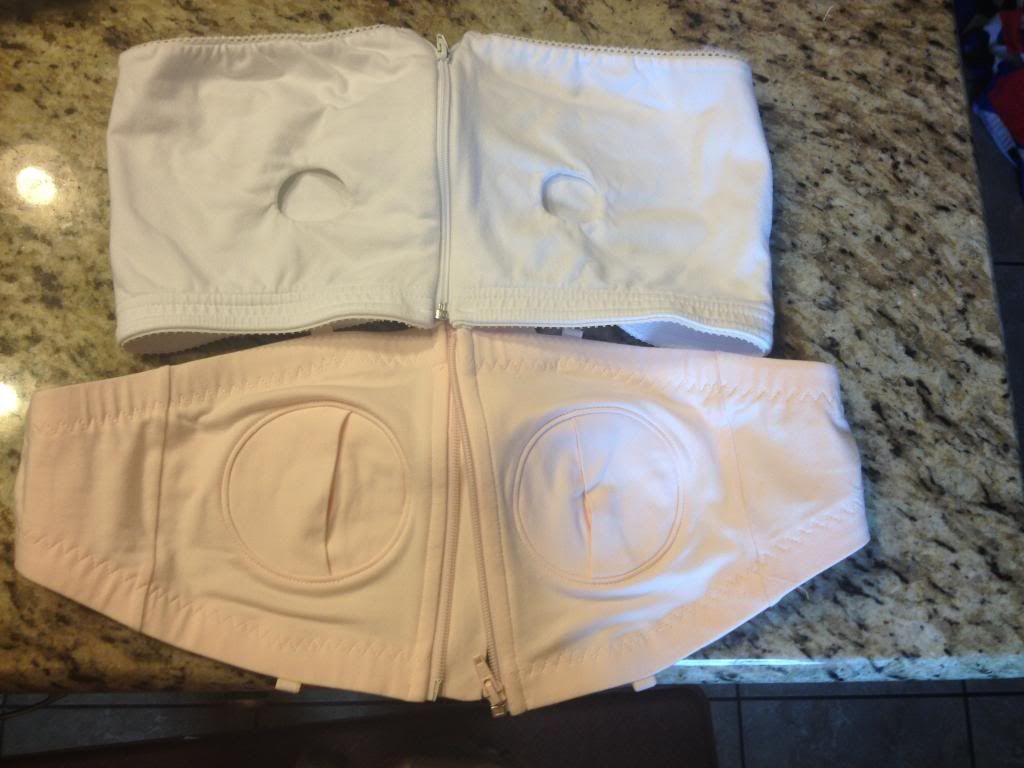
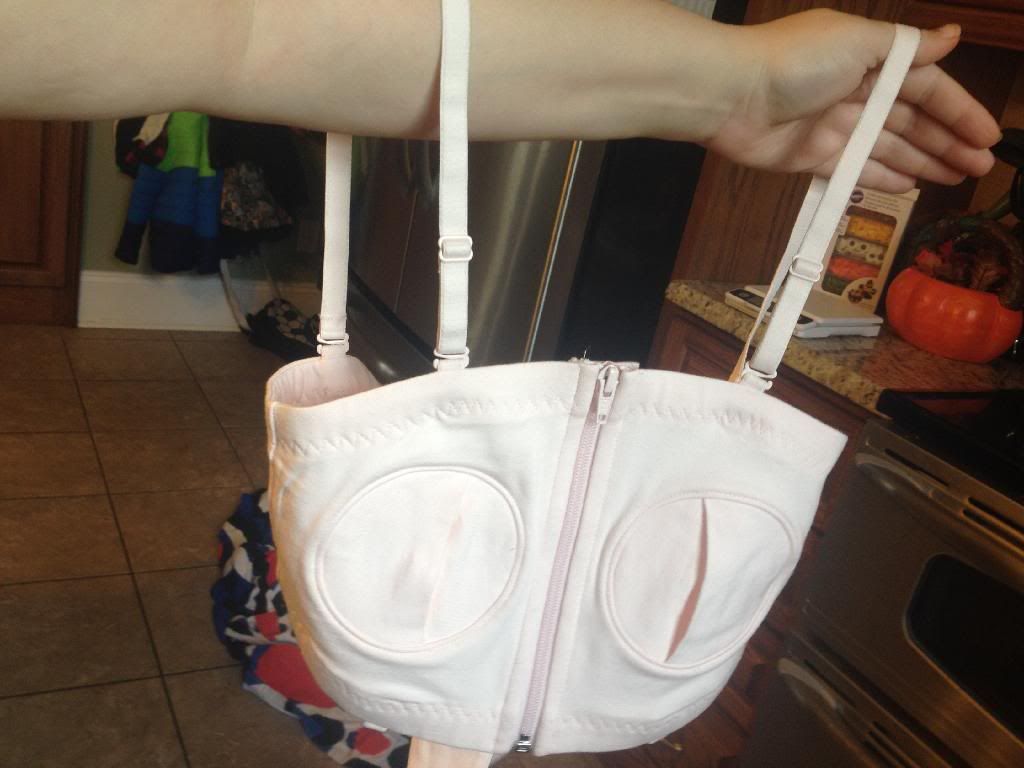
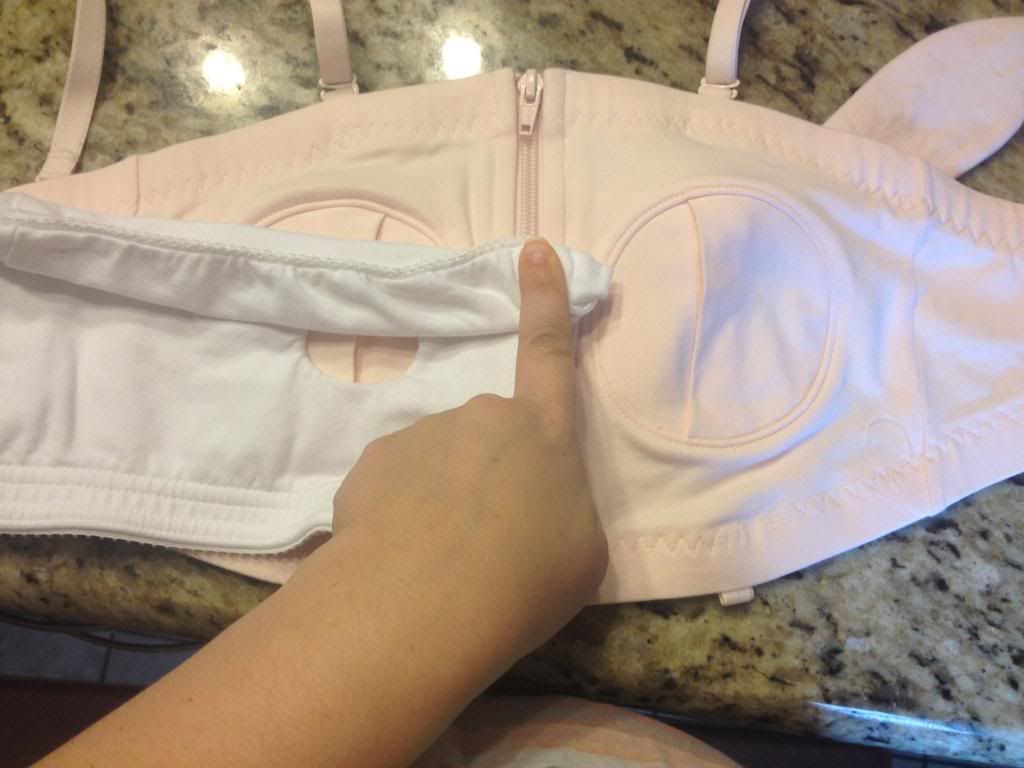
First of all, the Medela bustier zips up the front. The Simple Wishes both zips up the front AND ties in the back. There's also a velcro backed version. Simple Wishes also sells 1" and 2" extenders that you would zip into the front like an extra panel to adjust the width and therefore the spacing of the holes. Speaking of the zipper, Simple Wishes has fabric behind the zipper so it doesn't dig into your skin. The Medela has much stretchier fabric in my opinion. I think that is why the Simple Wishes looks so much larger in this first photo.
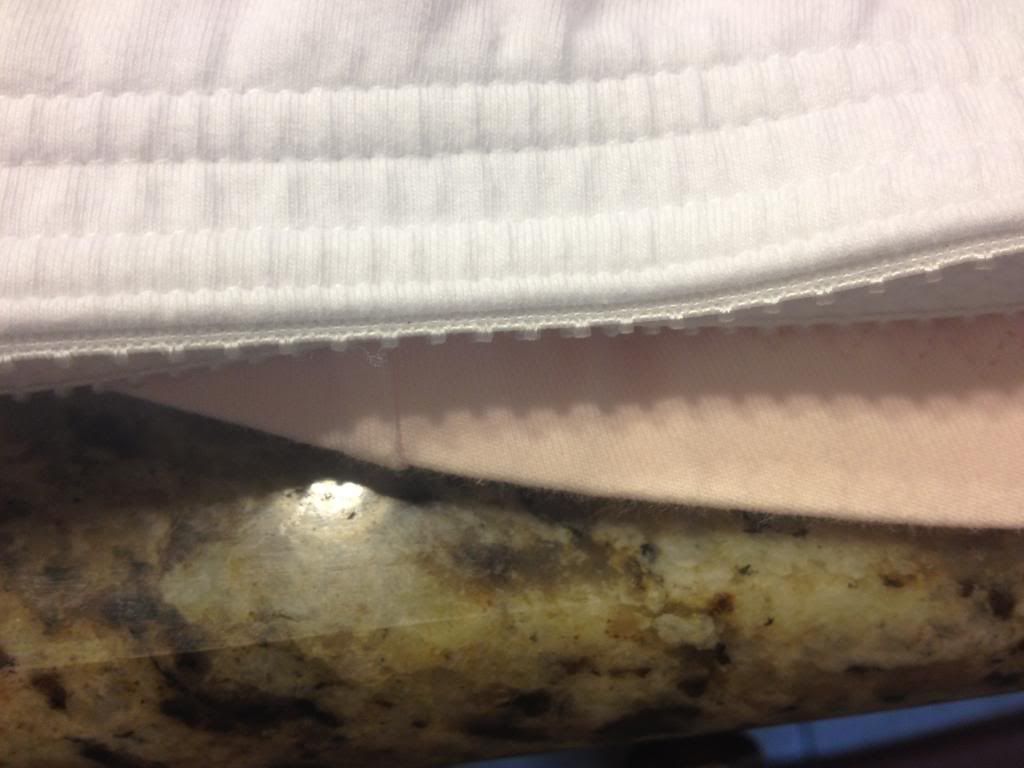
The next difference for me was comfort. The Medela has a little bit of decorative scallopy lacy something on the bottom and it's a bit more pronounced on the top. It irritates my skin. The Simple Wishes is bound smoothly.
Also in the Comfort area is the shape. The Simple Wishes is angled towards the back to naturally go under your armpits. The Medela tends to dig into my armpits.

The Simple Wishes has optional bra straps. The Medela does not.
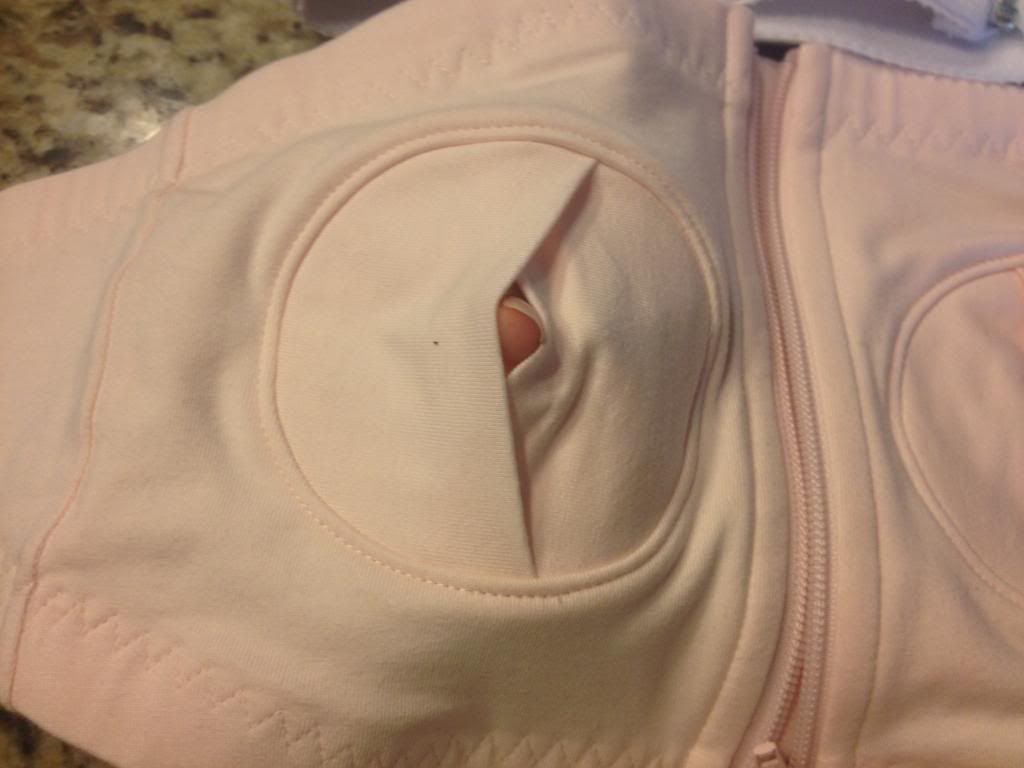
Ok so, modesty. It's hard to be modest while pumping and chances are if you're pumping around someone you already don't care if they get a peek. The Simple Wishes is at least a little less "these are UDDERS!" looking. It has two panels on the front and the back that form the opening and hide most of the flared part of the flange. The Medela just has holes.
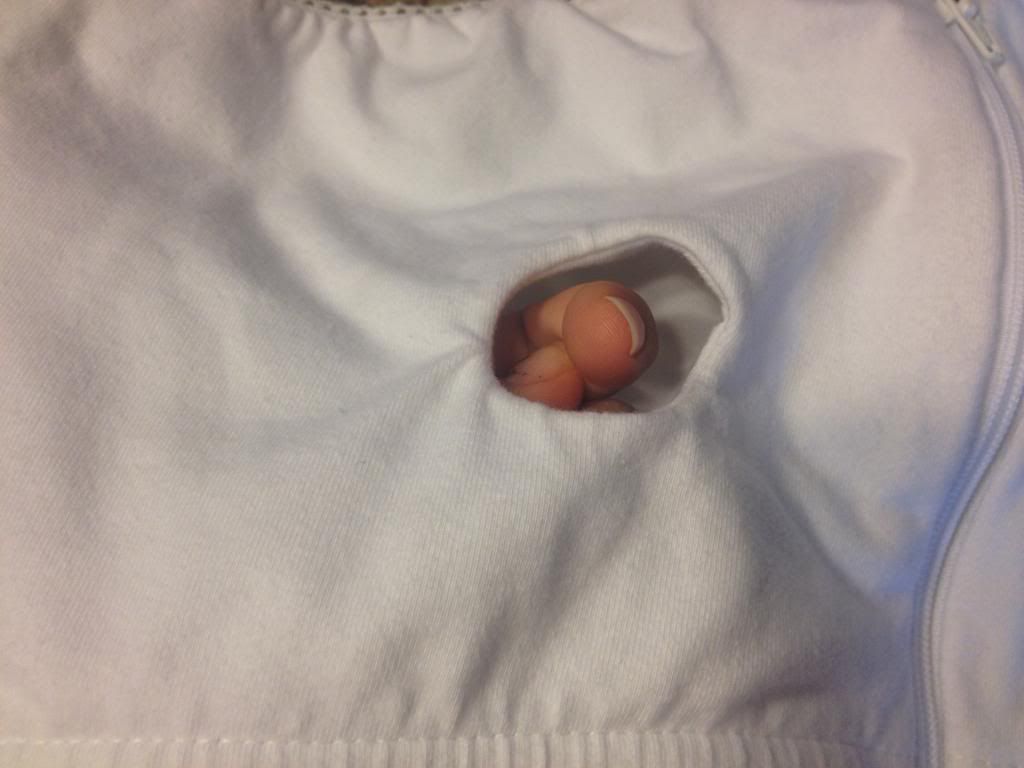
Speaking of the holes, the Medela holes are kind of angled down. I feel like they make my nipples point down and it makes my boobs look saggy. I know pumping isn't exactly attractive to start with, but why torture yourself? I tried to line up the two on top of each other so you could see what I mean. The Medela holes are clearly lined up to be where the bottom of the Simple Wishes holes are. This makes me feel like the Medela is just going to slide down off my chest. The Medela is folded down to help you see the comparison to the Simple Wishes holes.
The one thing i would change is make the entire panel taller so that it covers my entire breast. The way it hits underneath my breasts feels odd. I also don't know why it has bra strap loops on the bottom, but they don't bother me. The big clip is from my nursing bra being unsnapped for pumping. Also, see the part for the flange? You can't see the flange!

I don't have a photo for this one, but speed. Because I don't have to stretch the Simple Wishes as I wrap it around me I can put it on much faster than the Medela. A bigger size Medela wouldn't hold the flanges against me, so I know it's not that mine is too small. I leave the Simple Wishes tied in the back and just zip up the front and it's so much easier.
This might seem like a crazy long and detailed review of something pretty insignificant, but if you spend any length of time pumping you'll learn how important it is to have a good-fitting bra, just like any other time. Overall the Simple Wishes is quicker to put on, more comfortable to wear, more modest, and gives you a more custom fit. I personally didn't feel that there was a difference until I tried it for myself.
Since I've reviewed a lot of stuff lately I felt the need to point out, I do not get product to review, I do not get free products, I do not get paid for reviews, and I make no money doing this. I realized when I first started using Pinterest that unbiased reviews were few and far between so I set out to fill that gap. Even if a blogger truly LOVES a product when I realize they either got it for free in exchange for the review or were paid for the review, I feel the credibility of the review is undermined.
I then bought some "real" nursing bras and did not want to cut them but also didn't want to change my bra just to pump hands free, so I bought the Medela Easy Expressions Bustier. It took a few minutes to get it on and off and it's certainly not pretty but it was functional. I kept reading that the Simple Wishes bras were much better than the Medela bustier, but I didn't really think much of it because a bra with hole is a bra with holes, ya know? But then curiosity got the better of me the more I got frustrated with my Medela, so I ordered the Simple Wishes. This post is for anyone out there who thinks the bra doesn't really matter...it does!!! There IS a big difference.
First of all, the Medela bustier zips up the front. The Simple Wishes both zips up the front AND ties in the back. There's also a velcro backed version. Simple Wishes also sells 1" and 2" extenders that you would zip into the front like an extra panel to adjust the width and therefore the spacing of the holes. Speaking of the zipper, Simple Wishes has fabric behind the zipper so it doesn't dig into your skin. The Medela has much stretchier fabric in my opinion. I think that is why the Simple Wishes looks so much larger in this first photo.
The next difference for me was comfort. The Medela has a little bit of decorative scallopy lacy something on the bottom and it's a bit more pronounced on the top. It irritates my skin. The Simple Wishes is bound smoothly.
 |
| Top of bras |
 |
| Bottom of bras |
Also in the Comfort area is the shape. The Simple Wishes is angled towards the back to naturally go under your armpits. The Medela tends to dig into my armpits.
The Simple Wishes has optional bra straps. The Medela does not.
Ok so, modesty. It's hard to be modest while pumping and chances are if you're pumping around someone you already don't care if they get a peek. The Simple Wishes is at least a little less "these are UDDERS!" looking. It has two panels on the front and the back that form the opening and hide most of the flared part of the flange. The Medela just has holes.
Speaking of the holes, the Medela holes are kind of angled down. I feel like they make my nipples point down and it makes my boobs look saggy. I know pumping isn't exactly attractive to start with, but why torture yourself? I tried to line up the two on top of each other so you could see what I mean. The Medela holes are clearly lined up to be where the bottom of the Simple Wishes holes are. This makes me feel like the Medela is just going to slide down off my chest. The Medela is folded down to help you see the comparison to the Simple Wishes holes.
The one thing i would change is make the entire panel taller so that it covers my entire breast. The way it hits underneath my breasts feels odd. I also don't know why it has bra strap loops on the bottom, but they don't bother me. The big clip is from my nursing bra being unsnapped for pumping. Also, see the part for the flange? You can't see the flange!
I don't have a photo for this one, but speed. Because I don't have to stretch the Simple Wishes as I wrap it around me I can put it on much faster than the Medela. A bigger size Medela wouldn't hold the flanges against me, so I know it's not that mine is too small. I leave the Simple Wishes tied in the back and just zip up the front and it's so much easier.
This might seem like a crazy long and detailed review of something pretty insignificant, but if you spend any length of time pumping you'll learn how important it is to have a good-fitting bra, just like any other time. Overall the Simple Wishes is quicker to put on, more comfortable to wear, more modest, and gives you a more custom fit. I personally didn't feel that there was a difference until I tried it for myself.
Since I've reviewed a lot of stuff lately I felt the need to point out, I do not get product to review, I do not get free products, I do not get paid for reviews, and I make no money doing this. I realized when I first started using Pinterest that unbiased reviews were few and far between so I set out to fill that gap. Even if a blogger truly LOVES a product when I realize they either got it for free in exchange for the review or were paid for the review, I feel the credibility of the review is undermined.
11.22.2013
The Freemie Update, 1 Week Later
So about a week ago I got my Freemie Cups. You can see my initial review and my "later that same day" review here.
I've been using, washing, and experimenting with these on and off all week. They have not replaced my normal Medela parts but they do have their moments of usefulness. Cradling my baby is MUCH easier with the Freemies, in fact, it's nearly impossible with Medela bottles hanging down. I also don't mind pumping around other people as much since my shirt covers everything. On the flip side, you need a stretchy bra that you don't care about eventually stretching out. Non-stretchy bras probably won't accommodate a Freemie cup. If you don't want to stretch out a bra or buy a stretchy one I think the Simple Wishes Special Edition Hands Free Bra (the cheaper version with the tie-back) is a great choice as you can adjust the band by tying it looser or tighter, thus accommodating more or less space as needed. Note- I have a review of the Simple Wishes Bra vs the Medela Bustier, with tons of side by side pics, coming in the next day or so.
So, later impressions.
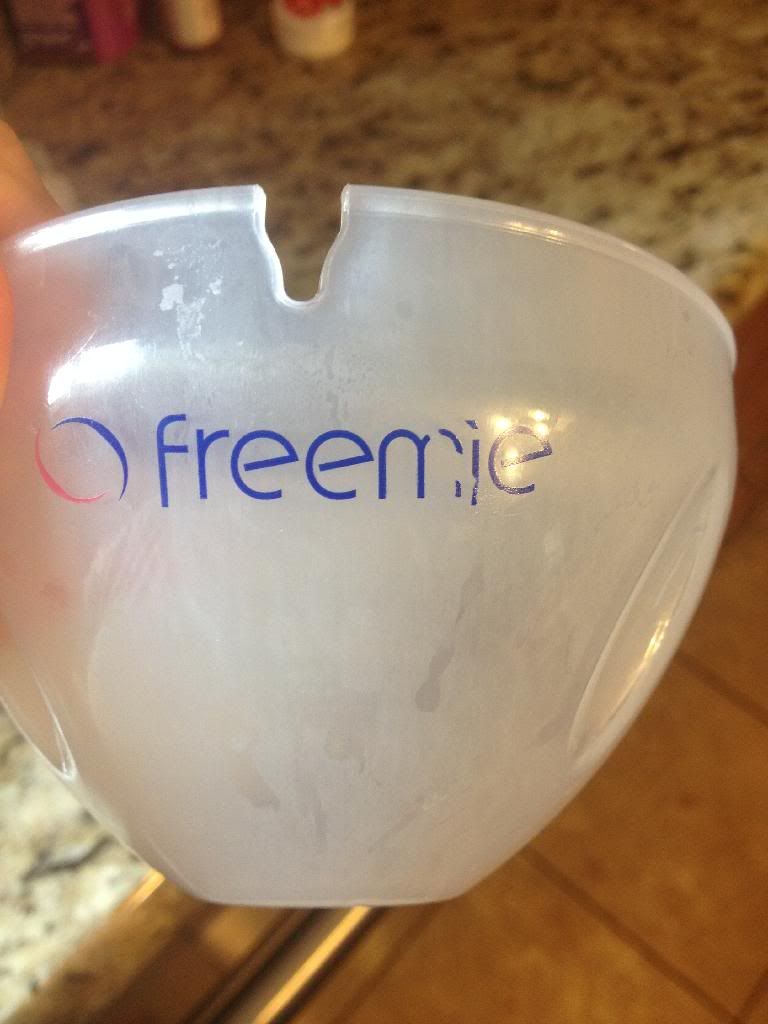
1) The branding on the cups isn't meant to stand up to washing, it seems. I use them 1-2x day and only steam sanitized before first use. I wash in Medela Breastmilk Dissolving Soap. I'm disappointed to see this happening, though it doesn't effect function obviously.
2) Pumpin Pals in the Freemie Cups. This is probably the question I have been asked the most. It makes me think I should do a side by side review of the Pumpin Pals vs the Medela Flanges because now I'll probably get more questions! For the sake of brevity I'll just say for now that Pumpin Pals fit and are angled differently, yet fit in your Medela connectors, for comfort, some say increased supply, and mimic baby's mouth action better. They have die-hard fans who won't (or can't, due to pain) use anything else.
So I stuck a Pumpin Pal in a Freemie Cup. First impression here- it sticks out a LOT. I think the ONLY way to accommodate this setup would be the Simple Wishes tie-back bra so you could leave enough room in the band to hold everything against you.
Second impression...wow! I turned my Medela Symphony on Let Down 5 as I normally do and didn't feel much. Bumped it up to Let Down 8 and it felt just like Let Down 5 normally! I got good suction and no leaks as the long part of the flange was deep enough inside the Freemie for the milk to collect as normal. Color me SHOCKED, I advised people not to get their hopes up, but I do think it's a possibly (but awkward) set up.
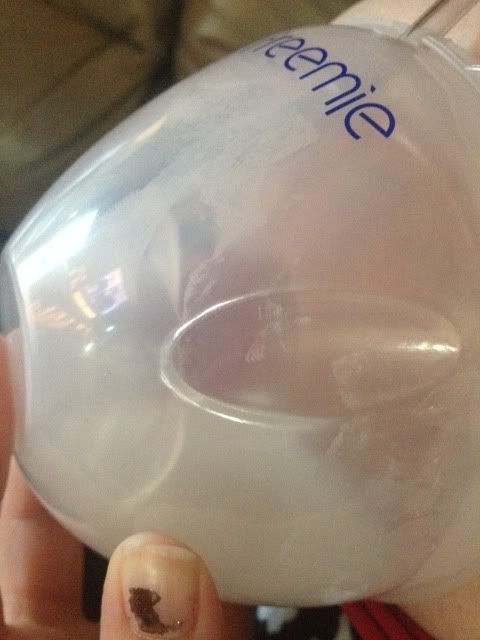
3) Milk collection. Freemie states "Freemie Collection Cups feature two 8-oz concealable collection cups (16-oz capacity total) for hands-free double pumping." (it's right under Add to Cart- http://www.freemie.com/freemie-collection-cups/medela/medela-25mm). I'm going to have to disagree with that one, Freemie.
This was harder to experiment but basically I measured out water and added it to the cups and then put them back on and tried to pump to evaluate suction as the valve gets covered. I'm happy to say that they did not leak where the two halves of the cup connect which is a worry I have (they connect like tupperware).
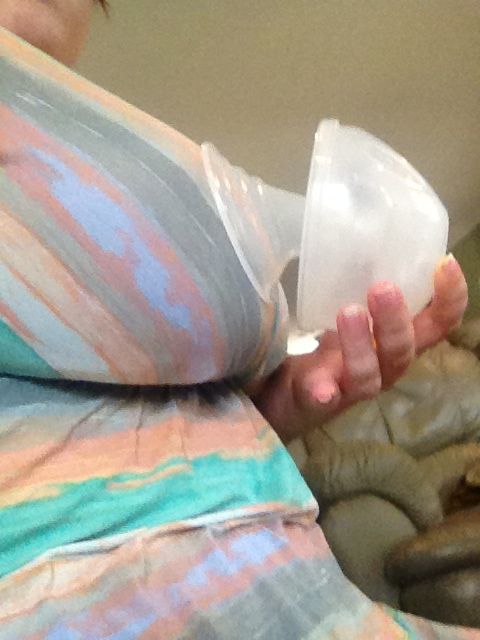
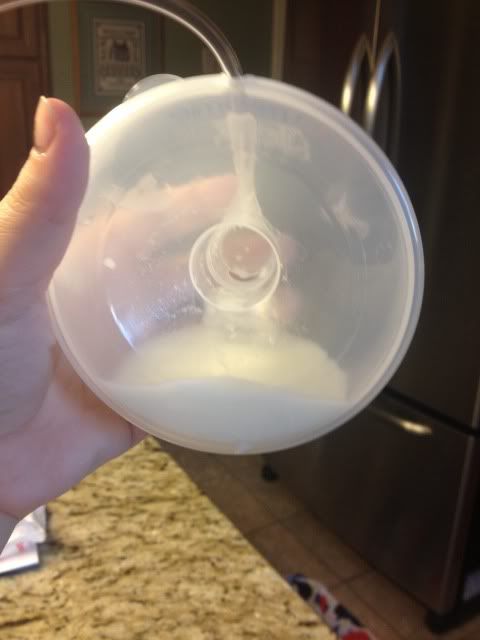
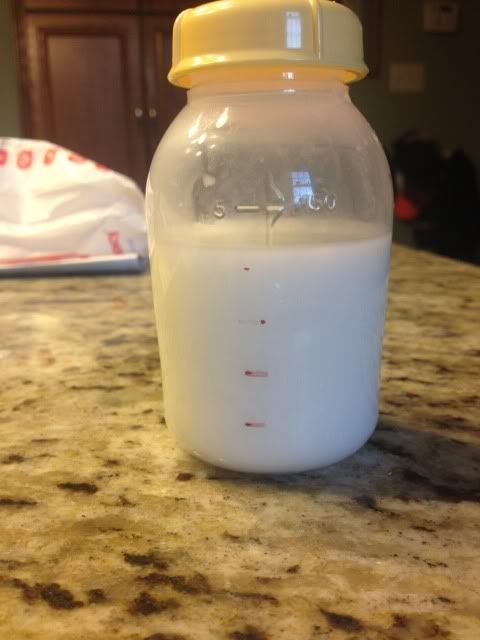
Now, look at your boobs and think about how the Freemie would be positioned. Mostly upright, correct? I held these against my boobs and then kept them steady as I moved them out and photographed the water level.
This is 4 ounces. At this point, suction stopped, and no more water would go down the valve, even with the pump on. This absolutely seems like the "overfill" line to me. I went back and checked to see if Freemie said "8oz total" and I misread. Nope. There is water in the tube where you nipple goes in this photo. It literally would not go down into the cup.

I've been using, washing, and experimenting with these on and off all week. They have not replaced my normal Medela parts but they do have their moments of usefulness. Cradling my baby is MUCH easier with the Freemies, in fact, it's nearly impossible with Medela bottles hanging down. I also don't mind pumping around other people as much since my shirt covers everything. On the flip side, you need a stretchy bra that you don't care about eventually stretching out. Non-stretchy bras probably won't accommodate a Freemie cup. If you don't want to stretch out a bra or buy a stretchy one I think the Simple Wishes Special Edition Hands Free Bra (the cheaper version with the tie-back) is a great choice as you can adjust the band by tying it looser or tighter, thus accommodating more or less space as needed. Note- I have a review of the Simple Wishes Bra vs the Medela Bustier, with tons of side by side pics, coming in the next day or so.
So, later impressions.
1) The branding on the cups isn't meant to stand up to washing, it seems. I use them 1-2x day and only steam sanitized before first use. I wash in Medela Breastmilk Dissolving Soap. I'm disappointed to see this happening, though it doesn't effect function obviously.
2) Pumpin Pals in the Freemie Cups. This is probably the question I have been asked the most. It makes me think I should do a side by side review of the Pumpin Pals vs the Medela Flanges because now I'll probably get more questions! For the sake of brevity I'll just say for now that Pumpin Pals fit and are angled differently, yet fit in your Medela connectors, for comfort, some say increased supply, and mimic baby's mouth action better. They have die-hard fans who won't (or can't, due to pain) use anything else.
So I stuck a Pumpin Pal in a Freemie Cup. First impression here- it sticks out a LOT. I think the ONLY way to accommodate this setup would be the Simple Wishes tie-back bra so you could leave enough room in the band to hold everything against you.
Second impression...wow! I turned my Medela Symphony on Let Down 5 as I normally do and didn't feel much. Bumped it up to Let Down 8 and it felt just like Let Down 5 normally! I got good suction and no leaks as the long part of the flange was deep enough inside the Freemie for the milk to collect as normal. Color me SHOCKED, I advised people not to get their hopes up, but I do think it's a possibly (but awkward) set up.
3) Milk collection. Freemie states "Freemie Collection Cups feature two 8-oz concealable collection cups (16-oz capacity total) for hands-free double pumping." (it's right under Add to Cart- http://www.freemie.com/freemie-collection-cups/medela/medela-25mm). I'm going to have to disagree with that one, Freemie.
This was harder to experiment but basically I measured out water and added it to the cups and then put them back on and tried to pump to evaluate suction as the valve gets covered. I'm happy to say that they did not leak where the two halves of the cup connect which is a worry I have (they connect like tupperware).
Now, look at your boobs and think about how the Freemie would be positioned. Mostly upright, correct? I held these against my boobs and then kept them steady as I moved them out and photographed the water level.
This is 4 ounces. At this point, suction stopped, and no more water would go down the valve, even with the pump on. This absolutely seems like the "overfill" line to me. I went back and checked to see if Freemie said "8oz total" and I misread. Nope. There is water in the tube where you nipple goes in this photo. It literally would not go down into the cup.
I could not fill them with 8 oz unless I lay them down flat, filled, snapped on the top, and lifted them upright, at which most of the extra ounces leaked out the collection hole. Seriously. How does Freemie say that these hold 8 ounces each?
I am considering one more experiment in the morning when I regularly pump 9 oz from one boob alone but I don't want to waste any breast milk, so we'll see if I am brave enough to try.
11.18.2013
The Freemie System for use with Medela- review
Today I got my Freemie system for my pump. I use a Medela Symphony with 27 mm shields in the house and a PISA when out and about. I got the Freemie in size 28 mm for $49.95 here. You can also buy kits for use with the Ameda Purely Yours or the Philips Avent Twin Electric. The Medela kit works with the Symphony, Lactina, and PISA.


I noticed something interesting right away- on their website it looks like the tubes go down along your belly. Well, the tubes actually come out of the top of the cups. Trying to run them down is possible but they will kind of stick up right above your boob which is kind of awkward.

This is how the valve and tubing are positioned when in use- tubing up, valve pointed down.

Bottom line:
I *really* wanted to love the Freemie cups. I do think that they work OK as far as suction, but the sizes are different than Medela sizing, so guessing your size is just that, a guess. I think I did ok, but time will tell.
Pros:
They felt comfortable but I think I got lucky in guessing my size right.
The suction seemed the same as using my typical Medela parts. I did let down quickly and pump more than I normally do this time of day.
These *are* less noticeable than the Medela parts, but see cons for an expansion on this statement.
Because they don't hang down in the slightest, let alone to nearly your hips as the Medela bottles do when sitting, you can hold your baby, get closer to your table/desk/laptop, or drive easier. I drive while pumping a LOT so this is a big deal.
Cons:
The frosted plastic means you can't see if you are spraying milk or how much milk is in there. There is no way to measure how much milk you've pumped. You really can't even see your nipple to see if it's positioned correctly.
They are NOT unobtrusive. Maybe under looser clothes they would be. I'm thinking a giant sweatshirt? Lol. You will show less skin than even a hands free bra because you can have your shirt completely over your boobs. Again this means you can't see what is going on.
The tubes don't really attach to any parts and it seems like the Medela connector part would get lost easily.
I'm worried that I wouldn't get the cups completely snapped together and leak/spill milk if they are cracked open or even pop apart.
Since the milk is collected in the cup I wonder what happens when you completely cover the valve? The nipple opening? etc. (with milk, that is).
UPDATED AFTER 2ND USE:
I've had some questions and some more picture requests that I'll update on here-
1) The Medela connectors plug directly into your tubes. I guess technically the tubes from my Symphony plug into the connectors, not the other way around. I did not notice any suction issues at this part. When I noticed less suction in my left boob it was fixed by pushing the tube that comes out of the cup in deeper.
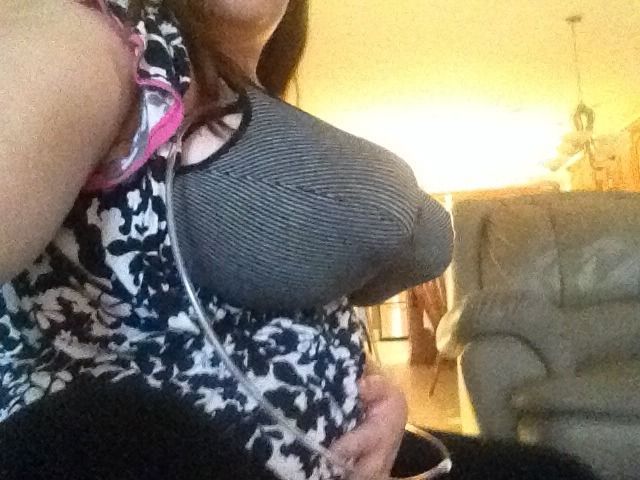
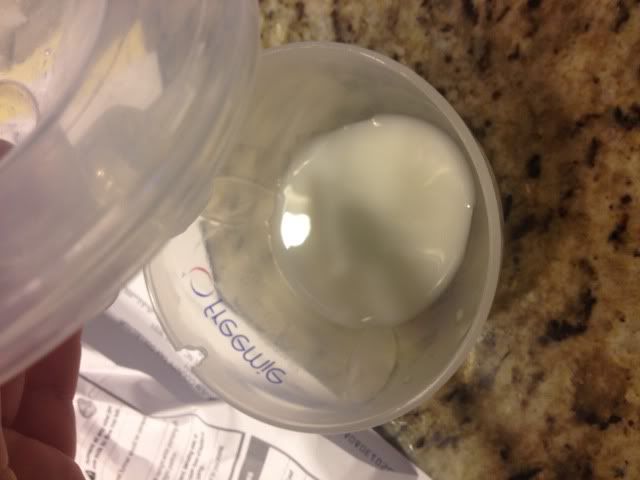
3) Please understand this is a cell phone pic but this should give you a rough idea of how well (or not well...) that you can see inside the cups as you pump. I can see my nipple expanding so I know it's in the right space. I can't see the milk expressing. I can kind of see the line of the milk gathering in the cup.
You can see the milk much better when you take the cup all the way off. Again, no measurements. For the record this was about 3 oz.
4) Pouring can be tricky. The cup itself lays flat on it's "front" and the "top (this is the part against your boobs) snaps off. I used the little notch for the tube as kind of a spout to pour into the bottle.
I then attached my normal Medela flanges and pumped for 15 more minutes. Guess what, I was almost empty already!

6) This is a terrible picture. I will try to have a family member take better ones later. This is me holding my baby in a cradle position with the pumps on and working. Normally the Medela bottles dangle right where his body would go, so this was MUCH better! Holding him upright against my shoulder was fine for me but I worry that it was uncomfortable for him so I kind of had him to the side.

7) The cups themselves feel very secure, but if my bra was stretched out I'm not sure I'd feel the same. I was able to stand up and pick up my baby from the cradle but I squatted down rather than bending over to do so. I also lay down on the couch on my side, torso leaning over the arm of the couch, legs bent on the couch...this is an awful description, isn't it? I'll get some pics. I didn't have a problem with leaking. I do worry that the back and front of the cup will randomly unsnap. They snap together like tupperware.
8) As to car pumping, I realized that with the Medela bottles at least I can just take them off and slap a cap on them. These would have to be poured into a bottle, so you're bringing these AND bottles and figure out how to pour while parked in your car. I guess you could wear them inside wherever you are going and find a table or counter to unload onto but that would depend on how comfortable you are walking in with these on your chest.
Will update more as I continue to use these.
I noticed something interesting right away- on their website it looks like the tubes go down along your belly. Well, the tubes actually come out of the top of the cups. Trying to run them down is possible but they will kind of stick up right above your boob which is kind of awkward.
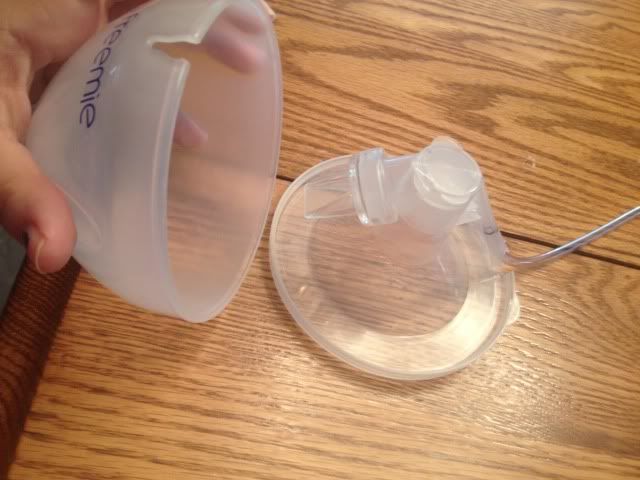
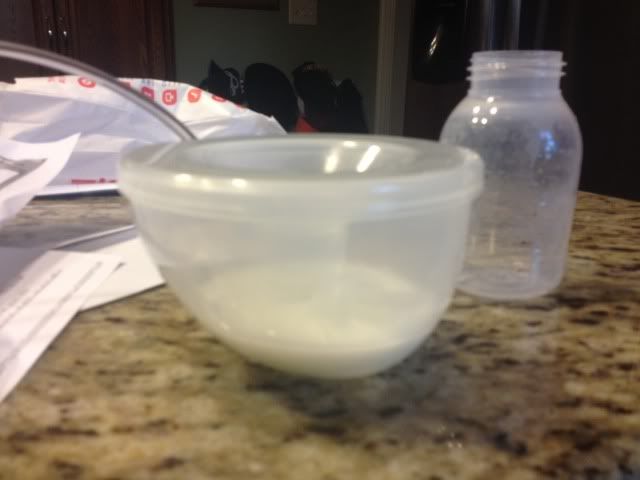
The cup itself is where the milk collects, around the valve. It just pops off and has a flat bottom (or front, when it's on your boob) so you can lay it down. You are supposed to pour into a bottle after pumping.
Here you can see the cup in my left hand and the valve/tube/etc on the right.
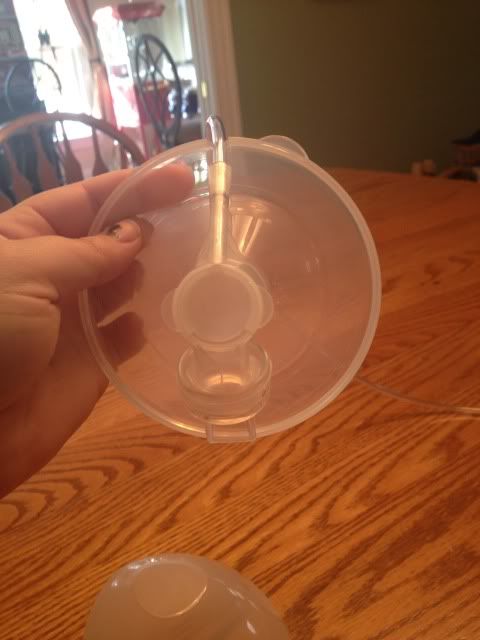
This is how the valve and tubing are positioned when in use- tubing up, valve pointed down.
The tubing just slides into a little tunnel. I was worried that it wouldn't be all that secure but it seems ok.
 |
| i.need.a.manicure. |
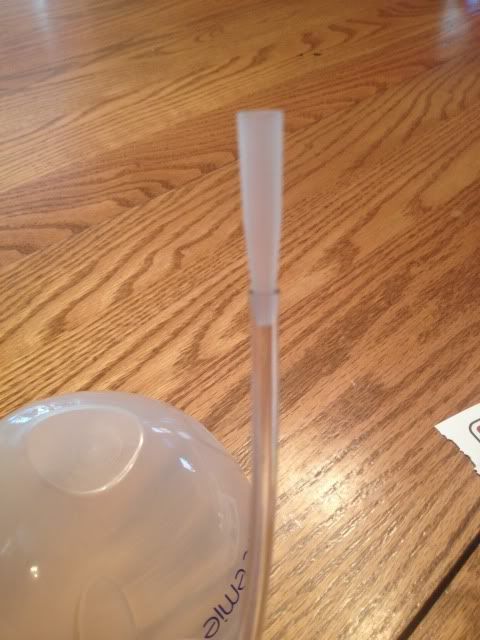
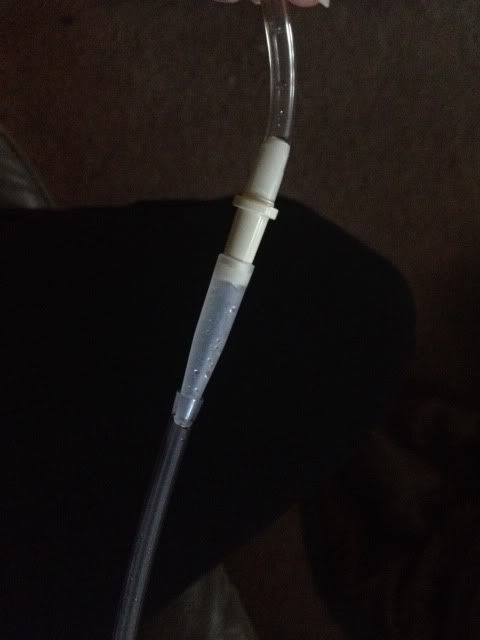
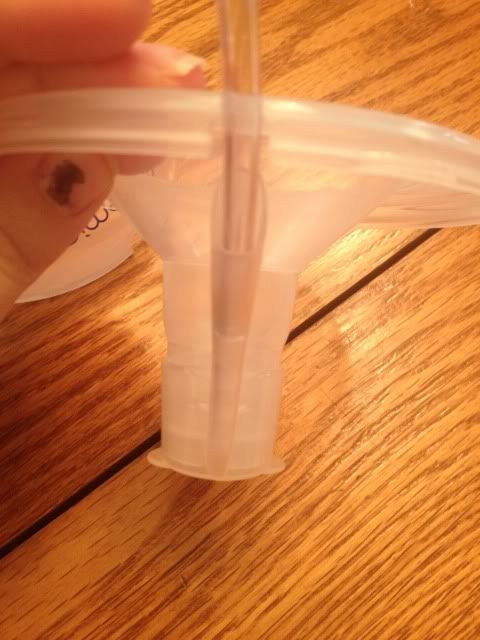
So, the Medela kit! At first I thought nothing was in the box and got nervous. The cups, an extra valve, and 4 tubes (2 extra, obviously) were easy to identify but the Medela kit? It's this. This little pointy thing. You stick it into the other end of the Freemie's tube and then stick your pump's tube into that instead of into the Medela connector/flange part.
Again, I was worried about it being secure and if it could possibly generate a good suction.
I was also worried about losing them. Freemie included one extra for a total of 3.
Ok, onto wearing the cups!
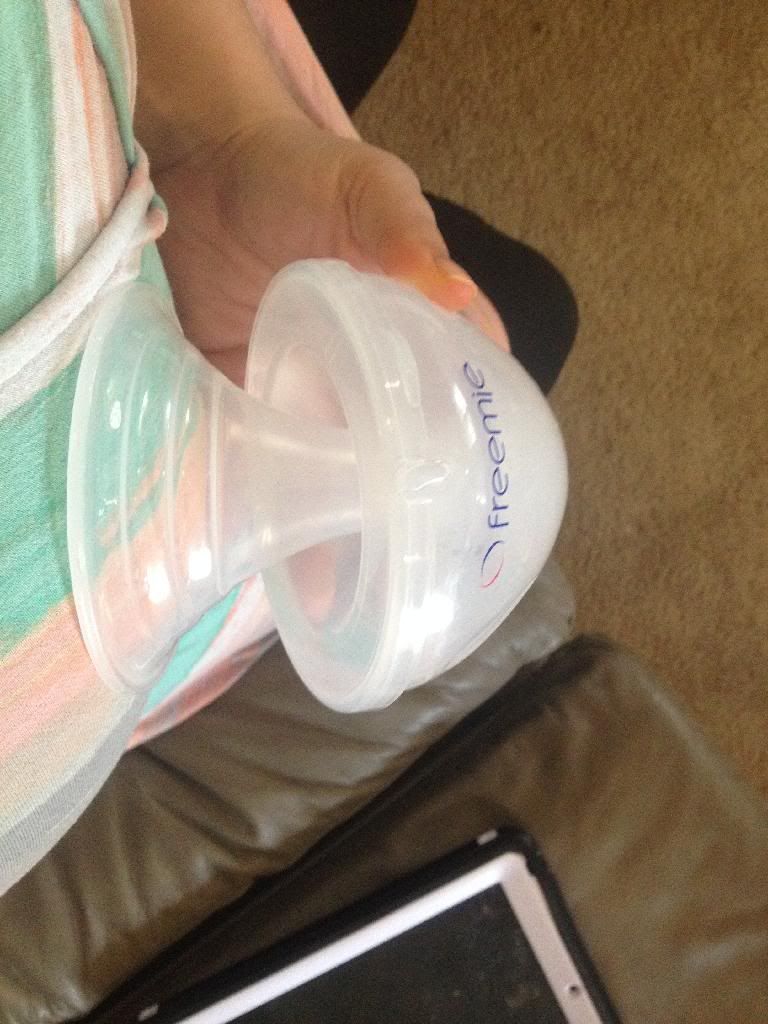
Here I am wearing the freemie cup on the boob closest to the camera and holding the Medela cup to the boob further from the camera. The freemie is large, but it doesn't hang down like the Medela bottle does. This makes it easier if you have a laptop on your lap, or you're holding/feeding your baby, etc.
Here's from the other side. Medela closest to camera, Freemie on the boob further from camera.
Here's a view from above. Nothing in the left boob, Freemie on the right boob. See the tube?
Now on to suction.
One thing that really bothers me is that the cups are pretty frosted. I can't see inside them. I have no idea how much milk is in there and even if I could see the line at the top of the liquid there are no measurements on the cups.
When hooked up to the Symphony the suction felt the same as it does with my Medela cups. I normally pump until I don't see milk coming out any more. Since that's not an option, I pumped for 15 minutes and got 8.25 oz. Normally I get 4.5-6.25 oz this time of day. While that seems like a good increase, overall I'm down 1.25 oz from this time the day before and I just recently got my period back which can mess with your supply. I'd need more than one use to really get an idea of how much milk these are able to get, but it really is a pain to not be able to measure as you are pumping or see if the milk is spraying out or not. Since I cycle back to the Letdown setting when the milk stops, and do that 2-3 times each session, it really is making me question if I want to use these long term.
Bottom line:
I *really* wanted to love the Freemie cups. I do think that they work OK as far as suction, but the sizes are different than Medela sizing, so guessing your size is just that, a guess. I think I did ok, but time will tell.
Pros:
They felt comfortable but I think I got lucky in guessing my size right.
The suction seemed the same as using my typical Medela parts. I did let down quickly and pump more than I normally do this time of day.
These *are* less noticeable than the Medela parts, but see cons for an expansion on this statement.
Because they don't hang down in the slightest, let alone to nearly your hips as the Medela bottles do when sitting, you can hold your baby, get closer to your table/desk/laptop, or drive easier. I drive while pumping a LOT so this is a big deal.
Cons:
The frosted plastic means you can't see if you are spraying milk or how much milk is in there. There is no way to measure how much milk you've pumped. You really can't even see your nipple to see if it's positioned correctly.
They are NOT unobtrusive. Maybe under looser clothes they would be. I'm thinking a giant sweatshirt? Lol. You will show less skin than even a hands free bra because you can have your shirt completely over your boobs. Again this means you can't see what is going on.
The tubes don't really attach to any parts and it seems like the Medela connector part would get lost easily.
I'm worried that I wouldn't get the cups completely snapped together and leak/spill milk if they are cracked open or even pop apart.
Since the milk is collected in the cup I wonder what happens when you completely cover the valve? The nipple opening? etc. (with milk, that is).
UPDATED AFTER 2ND USE:
I've had some questions and some more picture requests that I'll update on here-
1) The Medela connectors plug directly into your tubes. I guess technically the tubes from my Symphony plug into the connectors, not the other way around. I did not notice any suction issues at this part. When I noticed less suction in my left boob it was fixed by pushing the tube that comes out of the cup in deeper.
2) I absolutely worry that these will stretch out my bra, but while it's not stretched out, it does hold them nice and snug against my chest.
3) Please understand this is a cell phone pic but this should give you a rough idea of how well (or not well...) that you can see inside the cups as you pump. I can see my nipple expanding so I know it's in the right space. I can't see the milk expressing. I can kind of see the line of the milk gathering in the cup.
You can see the milk much better when you take the cup all the way off. Again, no measurements. For the record this was about 3 oz.
4) Pouring can be tricky. The cup itself lays flat on it's "front" and the "top (this is the part against your boobs) snaps off. I used the little notch for the tube as kind of a spout to pour into the bottle.
5) It had been 2 hours since my last pump. I generally pump 3-6 oz at a time and it varies, but towards the lower end when it's only been two hours. I normally only need to pump for 10-15 minutes during the day.
I pumped for 15 minutes and from both cups combined got just under 4.5 oz.
6) This is a terrible picture. I will try to have a family member take better ones later. This is me holding my baby in a cradle position with the pumps on and working. Normally the Medela bottles dangle right where his body would go, so this was MUCH better! Holding him upright against my shoulder was fine for me but I worry that it was uncomfortable for him so I kind of had him to the side.
7) The cups themselves feel very secure, but if my bra was stretched out I'm not sure I'd feel the same. I was able to stand up and pick up my baby from the cradle but I squatted down rather than bending over to do so. I also lay down on the couch on my side, torso leaning over the arm of the couch, legs bent on the couch...this is an awful description, isn't it? I'll get some pics. I didn't have a problem with leaking. I do worry that the back and front of the cup will randomly unsnap. They snap together like tupperware.
8) As to car pumping, I realized that with the Medela bottles at least I can just take them off and slap a cap on them. These would have to be poured into a bottle, so you're bringing these AND bottles and figure out how to pour while parked in your car. I guess you could wear them inside wherever you are going and find a table or counter to unload onto but that would depend on how comfortable you are walking in with these on your chest.
Will update more as I continue to use these.
11.14.2013
Make your own All Purpose Nipple Ointment (APNO)
I've been nursing for a little over two months and the pain of breastfeeding hasn't completely gone away. I also seem to be prone to mild thrush, though I have been good at keeping the baby unaffected. The other day I got ANOTHER blister and decided to look into getting Dr. Newman's All Purpose Nipple Ointment prescribed.
The RX info is here- http://www.nbci.ca/index.php?option=com_content&id=76:all-purpose-nipple-ointment-apno&Itemid=17
My insurance doesn't cover it and the out of pocket price is $85. The pharmacist showed me the over-the-counter versions of the 3 ingredients and told me to mix equal parts and store in a jar. If you are prone to thrush, blisters, or general nipple pain, this is recommended and you only use a tiny bit. They say a tiny bit is OK but I still wipe off before breastfeeding cause it can't taste pleasant and I'm still not sure about the steroid part for a baby.

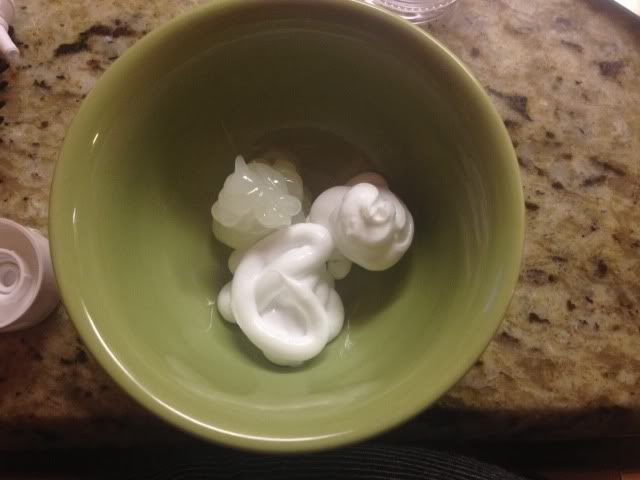
You need- an antibiotic ointment, a steroid, and an anti-fungal. That's actually pretty easy to infer from the RX link but I never thought of trying to DIY it til she suggested it. I found the little jars in the "trial and travel size" section for 99 cents.
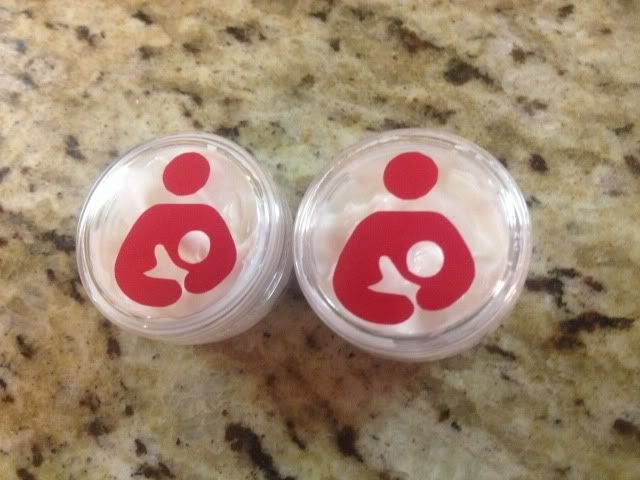
I just stuck equal parts in a small bowl (I used all of the antibiotic ointment and while the cortisone on the bottom looks like more, it's wider but shorter than the other two) and mixed them all together.
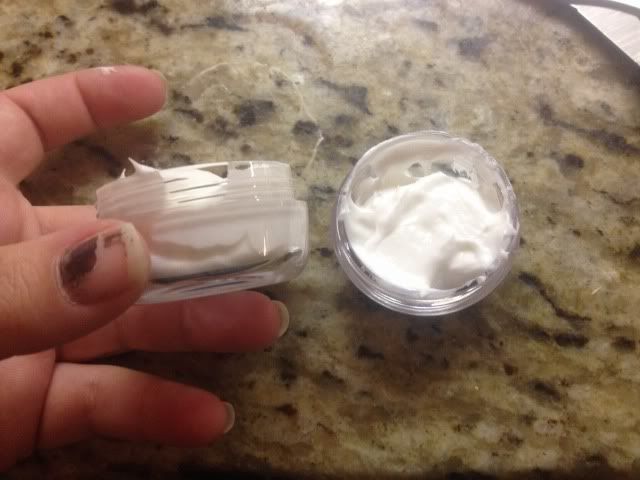
Using all of the antibiotic and matching parts of the other two, it filled both jars perfectly! Showing jar sizing-ignore my awful (lack of) manicure!
Then just for fun and identification I cut two breast feeding awareness stickers with my Cameo.
My insurance doesn't cover it and the out of pocket price is $85. The pharmacist showed me the over-the-counter versions of the 3 ingredients and told me to mix equal parts and store in a jar. If you are prone to thrush, blisters, or general nipple pain, this is recommended and you only use a tiny bit. They say a tiny bit is OK but I still wipe off before breastfeeding cause it can't taste pleasant and I'm still not sure about the steroid part for a baby.

You need- an antibiotic ointment, a steroid, and an anti-fungal. That's actually pretty easy to infer from the RX link but I never thought of trying to DIY it til she suggested it. I found the little jars in the "trial and travel size" section for 99 cents.
I just stuck equal parts in a small bowl (I used all of the antibiotic ointment and while the cortisone on the bottom looks like more, it's wider but shorter than the other two) and mixed them all together.

Using all of the antibiotic and matching parts of the other two, it filled both jars perfectly! Showing jar sizing-ignore my awful (lack of) manicure!

Then just for fun and identification I cut two breast feeding awareness stickers with my Cameo.

I hope this helps someone else out there! Hang in there!
11.05.2013
Healthier Lactation Cookies- Lactation Cookie Recipe #3
So the last two recipes I posted for lactation cookies are delicious, but the jury is out on effectiveness at the moment. This recipe, I saw an increase right away in my breast milk BUT you are going to spend more $ on ingredients and the cookies are not as yummy. Maybe that's good, I won't overeat them, that's for sure. This also only makes around half the cookies compared to the other recipes.
Ingredients:

Ingredients:
·
1 cup coconut flour
·
1/2 cup virgin coconut oil
·
1/2 cup brown sugar
·
2 tablespoons flax seed meal
· 2 tablespoons of water
·
2 eggs
·
1 tablespoon vanilla extract
·
1 teaspoon cinnamon
·
1/4 cup of Brewer's Yeast
·
1/2 teaspoon salt
·
1 & 1/2 cups steel cut oats (NOT instant oats)
·
1 cup chocolate chips
Preheat oven to 350 degrees.
Mix the flax seed and water together in a small bowl and set aside for now.
Cream together coconut oil and brown sugar. Add the eggs and vanilla extract and mix well.
Add coconut flour, cinnamon, brewer's yeast, and salt. Mix well.
Stir in oats and chocolate chips.
Roll into balls (again, I use the OK symbol with my thumb and pointer finger and make balls about the size of the empty circle) and place onto a silicon baking sheet. Smash them flat a little- these will not spread out like other cookies.
Bake for 12-15 minutes depending on your oven.
Make about 36 cookies.
Results- Well, the day I made these, I ate about 9 (they are very small) and it was my best producing day ever, up just under 2 oz from the day before and also the day before that. The 2nd day, I only ate 6, and am back down to where I was in the days before eating these. They are somewhat dry and crumbly, stay in their ball shape after baking, and very, very not-sweet. You will taste the Brewer's Yeast, but, if you do the math, 1/4 cup of Brewer's Yeast in 36 cookies is less than 1/2 teaspoon per cookie, and it's one of the main things to help your milk supply. I don't find the taste bad, though some of you certainly will, but I also won't snack on these like I do the other recipes.
Updated results: While I was still working on this post, on day 3 after making these cookies, I woke up with a small lump that turned into a full fledged clog by noon. After LOTS of time with a heat pack, my pump and Lecithin pills, I think it's out, but if you've ever had a clog you know that the pain lasts for a few days after it's gone. At least it's not Mastitis, I suppose. I NEVER get clogs since starting a Lecithin regime, so I'm wondering if it's these cookies causing a slight increase and me not getting all the milk out as a result. I will be getting into my breastfeeding regime later.
Updated results: While I was still working on this post, on day 3 after making these cookies, I woke up with a small lump that turned into a full fledged clog by noon. After LOTS of time with a heat pack, my pump and Lecithin pills, I think it's out, but if you've ever had a clog you know that the pain lasts for a few days after it's gone. At least it's not Mastitis, I suppose. I NEVER get clogs since starting a Lecithin regime, so I'm wondering if it's these cookies causing a slight increase and me not getting all the milk out as a result. I will be getting into my breastfeeding regime later.
11.04.2013
Chocolate Chip Lactation Cookies- Lactation Cookie Recipe #2
So yesterday I shared my first lactation cookie recipe, made with M&Ms. This recipe is pretty much the same but made with chocolate chips instead. The difference is in the sweetness. I feel like the M&Ms really made the cookie overwhelming and since due to the brewer's yeast this is a less sweet cookie in general, that's alarming.
Take note, tomorrow I'll post a healthier version of a lactation cookie, at least, compared to this recipe and yesterday's recipe.
I'll go ahead with results before I get into the recipe & photo this time, since it's very similar. I could easily eat 10 of these cookies per day. They are delicious. However, any slight increase in breast milk did not require me to continue taking them to maintain, so I'm not really sure if they *really* were doing anything. On the other hand, I haven't gotten into my whole arsenal of breast feeding tricks yet, so what you don't know is that I pretty much have oversupply and did it to myself on purpose so I can pump lots and wean earlier, plus not stress about milk supply. You may see a noticeable increase if your supply is low. I mean, there must be a reason the recipes are so enduring.
Ingredients:
2 tablespoons flax seed meal (found at GNC. Alternative- buy flax seed and stick it in your food processor)
1/4 cup water
1 cup butter1 cup white sugar
1/2 cup brown sugar
3 eggs
2 teaspoons vanilla extract
2 cups flour
1/4 cup brewer's yeast (found at GNC. NO OTHER TYPE OF YEAST!)
1 teaspoon baking soda
1/2 teaspoon salt
3 cups oats
2 cups chocolate chips
Preheat oven to 350 degrees.
Mix water and flax seed meal into a small bowl and set aside for the moment.
Cream together butter, white sugar, and brown sugar.
Add eggs and vanilla extract and mix well.
Add flax seed meal mixture and mix well.
Add flour, brewer's yeast, baking soda, and salt. Some like to mix dry ingredients in a separate bowl. I like to do less dishes so I just throw it all into the mixer bowl with the wet ingredients. Mix well.
Stir in oats and chocolate chips.
Form and set on baking sheets. I don't really have a set size, in general the little dough balls are around the size of the hole when I put my pointer finger to my thumb and make a circle, like making the "OK" sign.
I bake on silicone sheets for about 15 minutes in an electric oven. From owning a gas oven previously I know to remind you that your oven may be different and keep an eye on your cookies the first time you make them.
Recipe makes about 50 cookies.
11.03.2013
M&M Lactation Cookies- Lactation Cookie Recipe #1
I have a whole thing planned around breastfeeding and pumping, but as I'm only 8 weeks post partum, I'm still trying out a lot of stuff.
One thing I love to do to help is make lactation cookies. I don't know if my supply is increasing because that's just what happens when you consistently empty your breasts, because of my supplementation, or both.
Regardless, I like lactation cookies. They are yummy, they have some things in them that are good for you, and they certainly don't hurt supply. The cons, well, they are cookies. I will be posting some other recipes and tweaks to make them healthier in the coming days but in the meantime, enjoy a cookie, moms! You deserve it.
Ingredients:
2 tablespoons flax seed meal (found at GNC. Alternative- buy flax seed and stick it in your food processor)
1/4 cup water
1 cup butter
1 cup white sugar
1/2 cup brown sugar
3 eggs
2 teaspoons vanilla extract
2 cups flour
1/4 cup brewer's yeast (found at GNC. NO OTHER TYPE OF YEAST!)
1 teaspoon baking soda
1/2 teaspoon salt
3 cups oats
2 cups M&Ms
Preheat oven to 350 degrees.
Mix water and flax seed meal into a small bowl and set aside for the moment.
Cream together butter, white sugar, and brown sugar.
Add eggs and vanilla extract and mix well.
Add flax seed meal mixture and mix well.
Add flour, brewer's yeast, baking soda, and salt. Some like to mix dry ingredients in a separate bowl. I like to do less dishes so I just throw it all into the mixer bowl with the wet ingredients. Mix well.
Stir in oats and M&Ms.
Form and set on baking sheets. I don't really have a set size, in general the little dough balls are around the size of the hole when I put my pointer finger to my thumb and make a circle, like making the "OK" sign. I bake on silicone sheets for about 15 minutes in an electric oven. From owning a gas oven previously I know to remind you that your oven may be different and keep an eye on your cookies the first time you make them.
Recipe makes about 50 cookies.
Results:
Well, they are delicious, but almost too sweet with the M&Ms, which is why the next recipe I'll share will have something else. My supply steadily increase small amounts daily while eating (6-8 per day.../hides) but continued to increase after as well, so I don't know if I can give cookies all the credit.
Well, they are delicious, but almost too sweet with the M&Ms, which is why the next recipe I'll share will have something else. My supply steadily increase small amounts daily while eating (6-8 per day.../hides) but continued to increase after as well, so I don't know if I can give cookies all the credit.
10.31.2013
Happy Halloween! DIY Decor
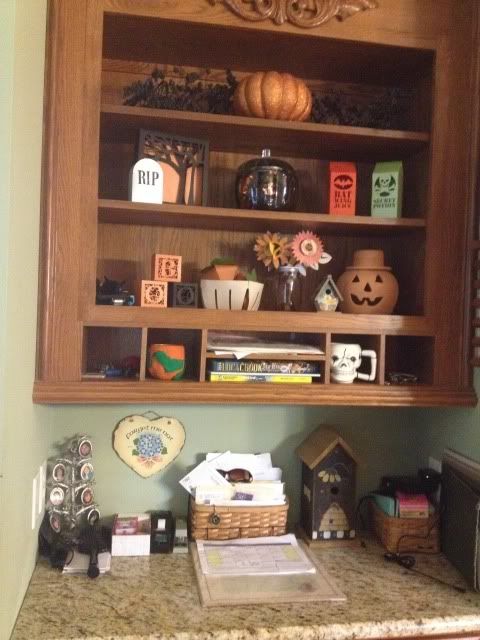
Happy Halloween! Free time has been scarce around here. I can't believe my little one is almost two months old already! I love Halloween so did take the time to set up this little decorated desk area in the kitchen.
Most of this is DIY- one painted pumpkin and 8 files from the Silhouette online store!
Top shelf- garland from Michael's. Pumpkin from Michael's, glittered by me.
Middle shelf- tombstone and spooky tree frame from Silhouette store. Glass pumpkin from Walmart and filled with a cheap tinsel Halloween garland. Bat Wing Juice and Poison cartons from Silhouette store.
Bottom shelf- BOO boxes, fruit basket, 3D pumpkins, and paper flowers from Silhouette store. Birdhouse is from Tuesday Morning. Terra Cotta pumpkin is from HomeGoods.
Special mention- the weird looking pumpkin thing with green vines in that little nook shelf was made by me in elementary school! The skull mug in the nook is from the dollar store.
The 3D pumpkins in the fruit crate are probably my favorite, though the Bat Wing and Poison cartons have inspired me to make a whole apothecary shelf for next year- maybe the mantle? Eyeballs in mason jars and lots of creepy files from the Silhouette store should make it easy!
9.19.2013
Roses and babies!
Life has been crazy busy! Wanna know why? :)
Baby #2 was born on September 8th :) It's been so much fun having a little guy around again, though the lack of sleep and the whole "breast feeding means you're kind of tethered to the baby" feeding thing takes some getting used to again.
He actually came a smidge early, so this project isn't 100% finished but I don't see it getting finished any time soon. All I really want to do is add more of the same thing, so simple enough.


Baby #2 was born on September 8th :) It's been so much fun having a little guy around again, though the lack of sleep and the whole "breast feeding means you're kind of tethered to the baby" feeding thing takes some getting used to again.
 |
| Sorry for the giant watermark- sharing pics of my children online makes me nervous, to be honest. |
He actually came a smidge early, so this project isn't 100% finished but I don't see it getting finished any time soon. All I really want to do is add more of the same thing, so simple enough.
The roses are from the Mom's Garden Gifts kit from svgcuts.com. Their files are very intimidating when downloaded and I had to watch the video several times, but it's fairly easy to do. I bought 3/16" dowel rods at Michael's for like 30 cents each and had my dad cut them into thirds, and then wrapped them in floral tape. Pretty easy.
I used normal school glue for the roses. My beloved glue dots ARE easier but they add a bit of dimension where placed which wasn't a good fit for this project.
Anyway, it used to be a vase of old musty silk flowers, and I decided to do a fall themed bouquet instead.
It makes me smile when I walk past the table- they are very realistic looking for paper flowers, and super cute!
Back to my new baby now :)
8.22.2013
Cards with print and cut, mod podge, embossing, and more!
I've been having a little fun doing something I don't normally do, which is make cards. Normally I feel like cards are kind of a waste of paper. People rarely save them and paper = trees, ya know?
Regardless, I did want to make a few cards recently, and here are the results.
The first one was for my mother in law's birthday. This card was made with print and cut, my favorite feature of the Silhouette Cameo. The card itself is pale pink cardstock but everything else is print and cut. I filled the background shape with the pretty rose pattern, use the color matching dropper tool to pick out pinks from the roses and make a gradient of colors for the cake, and filled in the cake stand and candle parts with solid colors. Print, cut, glue, voila!

I'm considering making our holiday cards this year instead of ordering the ever-present Shutterfly photo card, but we'll see if I have the patience for that (especially with a newborn coming soon!).
Regardless, I did want to make a few cards recently, and here are the results.
The first one was for my mother in law's birthday. This card was made with print and cut, my favorite feature of the Silhouette Cameo. The card itself is pale pink cardstock but everything else is print and cut. I filled the background shape with the pretty rose pattern, use the color matching dropper tool to pick out pinks from the roses and make a gradient of colors for the cake, and filled in the cake stand and candle parts with solid colors. Print, cut, glue, voila!
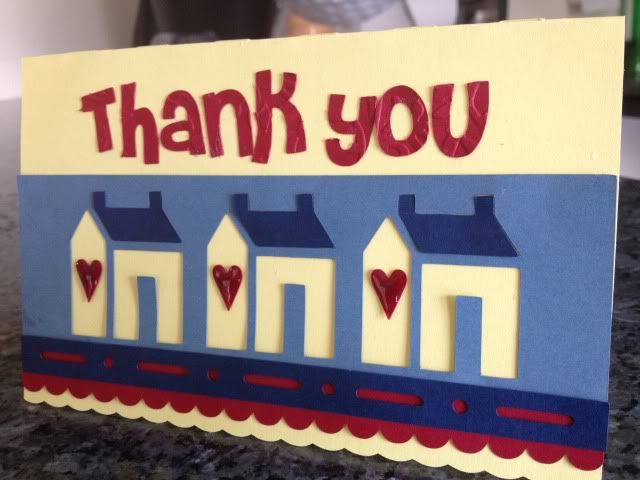
The second card I made is for our awesome, patient, and hard working Realtor. This card is actually a "Welcome to the Neighborhood" card in the Silhouette store but I just deleted the text and added "Thank you" instead (Font name- Cheri).
Before cutting the letters I ran the paper through my Sizzix Big Shot using a Cuttlebug embossing folder. I had to bump my blade up from 3 to 5 to cut through the cardstock after that, but I like the delicate detail it gives.
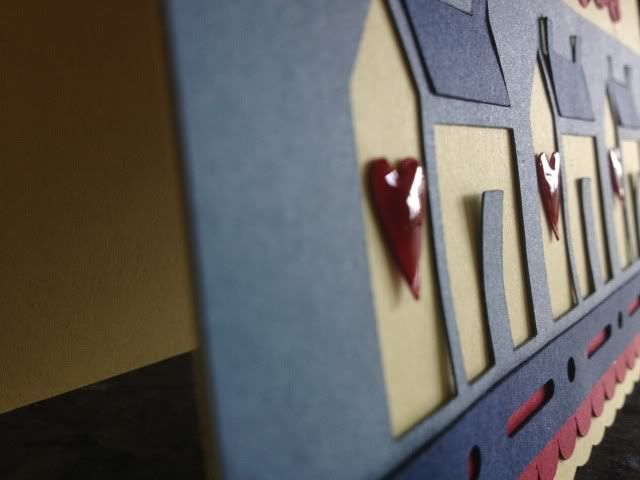
Everything on this card is colored card stock, no print and cut this time! The hearts have Mod Podge Dimensional Magic on them which is really fun as it dries clear but hard, smooth, shiny, and raised up.
I'm considering making our holiday cards this year instead of ordering the ever-present Shutterfly photo card, but we'll see if I have the patience for that (especially with a newborn coming soon!).
8.21.2013
Diary of our short sale home purchase
We just bought a new house! Last time we built a house which I found very stressful and didn't enjoy. This time we wanted to buy an existing home. As luck would have it, we fell in love with a short sale. We had looked for over a month before finding this house and knew that it was ours as soon as it was listed.
This was not a smooth process. It was about 4.5 months from offer to closing, which is miraculous compared to some short sales, but it was still a long, stressful, sucky waiting period.
Throughout that time I kept googling for info on short sales- timelines, how the banks involve handle short sales, etc- and quickly found out that there IS no real good guideline for how a short sale will go. Nonetheless I decided to document and share the progress in the hopes that it helps someone out there. This is exactly the type of info I would have loved to find in my searches.
Things I want to point out:
-Having 2 liens against a short sale = probably would run if the situation ever came up again. They spent over a month just hashing out who got how much money from the sale between them.
-We got incredibly lucky. This house was only built a few years ago, was kept pristine, and the owners short-sold due to job relocation, not financial hardship. They were great every step of the way. Some sellers don't really want to lose their house and can make things difficult or even trash the house. Ours not only kept it gorgeous but left behind things like a lawn mower, stainless steel fridge (all other appliances included in sale), and tools.
-We got early access to the house to allow for cleaning, mowing/weedwhacking, and to get our household goods delivered. This isn't really normal and may be confusing in the timeline- remember how I mentioned the sellers were great? They really were!
Ok, let's get down to the info! Lien #1 on the house was with Nationstar, who I had never heard of prior to this. Lien #2 was with Bank of America. Bank of America used to hold both liens but shortly before the house was listed, Lien #1 was sold to Nationstar.
March 30, 2013: Saw house listed online
March 31, 2013: Submitted offer ($2,500 above asking price) based on photos alone as we are both out of state and want to move fast. We know several people in the area which makes us confident in the neighborhood.
April 1, 2013: Sellers (not their bank) accepted our offer and sent it to their lender
April 16, 2013: My negotiator "urgently" requests my lender info (and gets my hopes up)
April 30, 2013: We sign to extend contract
May 2, 2013: In my previously mentioned googling for info, I find out that Lien #1 is notorious for making sellers use auction.com for short sales even if there are offers on the property in order to solicit a better price. In addition I read that Lien #1 is known to not give any sort of closing cost assistance unless you finance through them. Most alarming, however, is that I read that Lien #1 requires the short sale buyers to apply to finance through them regardless of if the buyer already has financing already. It's emphasized that the buyer does not have to use them, but that the application is part of the approval process. I flat out will not agree to this if it comes to it- every application like that is a credit hit, for one thing- and e-mail my Realtor all the info I've found. She passes it on to the Negotiator for our side who assures her he has not dealt with that before. *Note that in the end, NONE of this came up, for which I am very grateful!*
May 14, 2013: Short sale lender completed their appraisal and accepted it without contesting it. We extend contract again and are told 5-7 days to finish up paperwork. We are told the appraisal belongs to them and can't see the information, which is annoying.
May 20, 2013: It is suggested that we schedule the home inspection to start getting ready to close, and we agree. After a few days of no contact from the seller's bank, we cancel this for now.
May 24, 2013: Hubby has arrived at his new duty station and is able to actually go see the house in person for the first time. I am unable to travel due to pregnancy so he sends me a video. Luckily, we still love the house after seeing it for real!
May 30, 2013: Seller's lenders request info from us such as SSNs and our mortgage lender. Again we get our hopes up.
June 6, 2013: We sign to extend contract for the 3rd time after spending a weekend house-hunting for non-short-sale alternatives with no results.
June 10, 2013: We keep hearing "Any day now!" from negotiator and no longer believe it (a month ago we were told 5-7 days, remember?). Our contract was only re-signed for a week so we make an offer on a newly built home. Builder counters for more than it's listed for. We decline.
June 13, 2013: We sign to extend contract for the 4th time.
June 17, 2013: Seller's lenders AGAIN request info similar to May 30th request.
July 15, 2013: Yes, a month went by with NOTHING happening. The 2nd smaller lien on the house wanted more money in the deal, and sellers agreed to kick that money in, so 2nd lien gives approval verbally.
July 16, 2013: On the good news of one lien giving verbal approval, we go ahead with the inspection. Overall it went well, but roof has some storm damage. Sellers agree to pay to fix the damage (it's minimal).
July 17, 2013: Hubby and I have both signed mortgage paperwork on the house.
July 26, 2013: Mortgage approved, underwriting completed pending appraisal and cleared title. Lien #1 still has not given approval. Roof repairs completed.
July 29, 2013: Lien #1 is waiting on Lien #2 to give their approval in writing. We were told they would send it on 23rd. Did not receive it until today.
July 31, 2013: Lien #1 counters the closing cost assistance in the contract. We asked for $2500 (and offered $2500 above asking), they counter with $2000. We aren't going to kill the deal over $500 after all this time and I'm sure they know that. We accept and sign. We think this means approval coming soon.
August 7, 2013: Appraisal came in and it's great news for us! Still no approval from Lien #1. Someone either at my lender or Lien #1 is having issues with the HUD-1 form, not sure who. As usual we're told this is "THE LAST STEP" until Lien #1 approves the sale.
August 8, 2013: Seller's bank's appraisal has expired and it must be current to close. The ball was dropped due to bank's negotiator's wife giving birth and no one else handling the paperwork in the meantime. Same day appraisal is scheduled.
August 9, 2013: Lien #1 approves! We are good to move forwards! Sign contract amendments to close on the 15th.
August 15, 2013: This is the day we are supposed to close. We were told all our paperwork is at the title company and they are trying to rush it. Things are made complicated because both of the sellers and myself will have to sign, notarize, and overnight documents back. Only hubby is in San Antonio.
August 16, 2013: We are told that the title company had to correct the HUD-1 form and that first our lender and then the two short sale lenders have to approve it before we can close. They now believe we will close on the 20th or 21st and fund (and get keys) on the 21st or 22nd.
August 17, 2013: In a twist I've never heard of, without even having to lease the house before closing or anything like that, hubby is given access to the house to get it cleaned and ready to have our things delivered.
August 19, 2013: I am told that our lender has approved the HUD-1 form and that Lien #1 has approved as well. I have seen Lien #1's approval. Unsure where Lien #2 stands- may be done since Lien #1 usually makes them go first. A local notary (I am out of state) calls me to talk about signing tomorrow but notes that he has not received title company's paperwork to do so yet. Title company does not return my phone calls trying to find out what is going on. Realtor requests HUD-1 from title company so that we can see what we need to pay at closing.
9:15 PM Local Time, 10:15 PM for me in NC, August 19, 2013: Title company calls me with the clear to close, e-mails me paperwork, and tells me we will be signing tomorrow and hopefully funding/keys the day after! I am in shock that she is still at work but quickly panic when I see the closing documents list that we owe $8100 in closing costs. I call my Realtor (around 9:30 PM her time at this point) who goes over the HUD-1 form with me and realize that actually, we're getting credited $500, so we actually owe $0! Our estimate was $2500-3500 (went up after Lien #1 countered our closing cost assistance request). I still don't believe it until the closing is over.
August 20, 2013: Title company calls me again, goes over paperwork (all 105 pages!), and tells me sellers will be signing today. Hubby is scheduled to go in person to close tomorrow at 11 AM. Our household goods arrive at the new house! Early in the afternoon I get all my copies of the closing papers signed, notarized, and taken to FedEx to be shipped overnight mail to the title company.
August 21, 2013: At 11 AM local time hubby signs closing documents. At 2:30 PM local time, we get a message that the closing and funding have been completed! The house is finally ours!
Still to do: We still have to switch utilities into our name (will be done tomorrow), set up our HOA account (will be done when title company sends HOA the settlement statement), update things like our bank account with our new address, file change of address form with post office (both on tomorrow's list as well), and of course unpack, decorate, re-landscape, buy a new dryer (ours is gas and the new house needs an electric one), a new kitchen table (we didn't have a formal dining room- now we do, and our current marble topped kitchen table is perfect for it!), replace some broken furniture (mostly our desks), replace guest room bed (the mattress sucked so we ditched it), consider replacing couch (it didn't come out of storage smelling all that great), aaaaaand last but not least, in a few months move myself, our toddler, our soon-to-be-born baby, and allllll of our toddler's bedroom furniture from NC to TX.
Whew!
8.17.2013
Faux Bojangles Biscuits
Wow, I never shared this recipe??? I loooove biscuits and used to make this every week, keeping them in tupperware and re-heating in the toaster oven as needed. They are great for breakfast sandwiches, dinner rolls, snacks...did I mention I love biscuits?
Biscuits are probably the only thing at Bojangle's that I actually eat and they do a really yummy biscuit, so I convinced a friend of mine who managed one to snag me the recipe and adapted it a little to what I usually have on hand.

Ingredients:
3 cups self-rising flour OR 3 cups all-purpose flour with 3 & 3/4 tsp baking power and 3/4 tsp salt mixed in
2 tsp powdered sugar
3 tsp baking powder
1/2 cup salted butter (or unsalted, if you converted all-purpose flour to substitute for self-rising; I've found otherwise it's too salty)
1 & 1/2 cup buttermilk OR 1 & 1/2 cup milk (I use skim) and 2 tsp cream of tartar- mix and let stand for 5 min
Directions:
Pre-heat oven to 450 degrees. Mix dry ingredients, then add butter (softened is best, and I use my Kitchenaid with paddle attachment to mix it all in). Add buttermilk and mix well.
Spread flour on your counter and dump out dough. Knead until non-sticky, then roll it out to about 1/2" thickness. Use a cup or a biscuit cutter (I use a child size drinking glass) to cut out circles and place them on baking tray (I prefer stoneware- up to you! You may have to spray your tray if it's not non-stick). Keep rolling and cutting to use up all the dough. Place biscuits touching each other on tray.
Bake for 15 minutes. If you want (I do!) at about 13 minutes, carefully spread some butter over the top of the biscuits and finish baking to get that greasy golden Bojangles biscuit sheen.
When I want to re-heat them I pop them in my toaster oven for 3 minutes, but I'm sure you could easily warm them in a regular oven as well.
Biscuits are probably the only thing at Bojangle's that I actually eat and they do a really yummy biscuit, so I convinced a friend of mine who managed one to snag me the recipe and adapted it a little to what I usually have on hand.
Ingredients:
3 cups self-rising flour OR 3 cups all-purpose flour with 3 & 3/4 tsp baking power and 3/4 tsp salt mixed in
2 tsp powdered sugar
3 tsp baking powder
1/2 cup salted butter (or unsalted, if you converted all-purpose flour to substitute for self-rising; I've found otherwise it's too salty)
1 & 1/2 cup buttermilk OR 1 & 1/2 cup milk (I use skim) and 2 tsp cream of tartar- mix and let stand for 5 min
Directions:
Pre-heat oven to 450 degrees. Mix dry ingredients, then add butter (softened is best, and I use my Kitchenaid with paddle attachment to mix it all in). Add buttermilk and mix well.
Spread flour on your counter and dump out dough. Knead until non-sticky, then roll it out to about 1/2" thickness. Use a cup or a biscuit cutter (I use a child size drinking glass) to cut out circles and place them on baking tray (I prefer stoneware- up to you! You may have to spray your tray if it's not non-stick). Keep rolling and cutting to use up all the dough. Place biscuits touching each other on tray.
Bake for 15 minutes. If you want (I do!) at about 13 minutes, carefully spread some butter over the top of the biscuits and finish baking to get that greasy golden Bojangles biscuit sheen.
When I want to re-heat them I pop them in my toaster oven for 3 minutes, but I'm sure you could easily warm them in a regular oven as well.
Subscribe to:
Posts (Atom)
12.31.2013
The dark side
I haven't posted in over a month. Nothing crafty, nothing yummy, nothing breast-pump-y. I still have nothing to talk about except, if you think you are suffering from post partum depression, I recommend two things. One is required. Call your doctor. Don't worry about sounding stupid, about not wanting to talk about things, about medications. Research the medications, especially if you're breastfeeding, and ask for one you're comfortable with. The second thing is optional, but you might find it helpful if you can't talk to your doctor right away (like, say, you hit rock bottom on a Saturday, but aren't a danger and don't want to go to the hospital. DO go straight to the ER if you think you may harm yourself or your kids!). Download or buy Brooke Shields' book "Down Came the Rain" and read it and re-read it until you get help. There are lots of books about PPD out there, but hers really spoke to me.
Help is out there and if you ask for it, that makes you stronger than you realize.
Help is out there and if you ask for it, that makes you stronger than you realize.
11.23.2013
Medela Easy Expression Bustier vs Simple Wishes Hands Free Pumping Bra
When I was first starting out with my breast pump I quickly realized that hands-free pumping is the way to go. Hands free means I can feed the baby, help my toddler, browse on my laptop, read on my iPad, or even just have two free hands to massage my boobs. I started out by cutting slits in some comfy, stretchy nursing bras (these ones, in fact) and then I realized well, I just cut holes in the only two nursing bras that I have. With nursing pads in and nursing shirts, which tend to have two layers over the chest area, you couldn't tell but it was not pretty. I'll pull up my shirt for my personal trainer to measure my stomach and it'd be awkward. On the other hand, they worked GREAT and since I would wear them all day it made setting up for pumping pretty quick.
I then bought some "real" nursing bras and did not want to cut them but also didn't want to change my bra just to pump hands free, so I bought the Medela Easy Expressions Bustier. It took a few minutes to get it on and off and it's certainly not pretty but it was functional. I kept reading that the Simple Wishes bras were much better than the Medela bustier, but I didn't really think much of it because a bra with hole is a bra with holes, ya know? But then curiosity got the better of me the more I got frustrated with my Medela, so I ordered the Simple Wishes. This post is for anyone out there who thinks the bra doesn't really matter...it does!!! There IS a big difference.
First of all, the Medela bustier zips up the front. The Simple Wishes both zips up the front AND ties in the back. There's also a velcro backed version. Simple Wishes also sells 1" and 2" extenders that you would zip into the front like an extra panel to adjust the width and therefore the spacing of the holes. Speaking of the zipper, Simple Wishes has fabric behind the zipper so it doesn't dig into your skin. The Medela has much stretchier fabric in my opinion. I think that is why the Simple Wishes looks so much larger in this first photo.
The next difference for me was comfort. The Medela has a little bit of decorative scallopy lacy something on the bottom and it's a bit more pronounced on the top. It irritates my skin. The Simple Wishes is bound smoothly.
Also in the Comfort area is the shape. The Simple Wishes is angled towards the back to naturally go under your armpits. The Medela tends to dig into my armpits.
The Simple Wishes has optional bra straps. The Medela does not.
Ok so, modesty. It's hard to be modest while pumping and chances are if you're pumping around someone you already don't care if they get a peek. The Simple Wishes is at least a little less "these are UDDERS!" looking. It has two panels on the front and the back that form the opening and hide most of the flared part of the flange. The Medela just has holes.
Speaking of the holes, the Medela holes are kind of angled down. I feel like they make my nipples point down and it makes my boobs look saggy. I know pumping isn't exactly attractive to start with, but why torture yourself? I tried to line up the two on top of each other so you could see what I mean. The Medela holes are clearly lined up to be where the bottom of the Simple Wishes holes are. This makes me feel like the Medela is just going to slide down off my chest. The Medela is folded down to help you see the comparison to the Simple Wishes holes.
The one thing i would change is make the entire panel taller so that it covers my entire breast. The way it hits underneath my breasts feels odd. I also don't know why it has bra strap loops on the bottom, but they don't bother me. The big clip is from my nursing bra being unsnapped for pumping. Also, see the part for the flange? You can't see the flange!
I don't have a photo for this one, but speed. Because I don't have to stretch the Simple Wishes as I wrap it around me I can put it on much faster than the Medela. A bigger size Medela wouldn't hold the flanges against me, so I know it's not that mine is too small. I leave the Simple Wishes tied in the back and just zip up the front and it's so much easier.
This might seem like a crazy long and detailed review of something pretty insignificant, but if you spend any length of time pumping you'll learn how important it is to have a good-fitting bra, just like any other time. Overall the Simple Wishes is quicker to put on, more comfortable to wear, more modest, and gives you a more custom fit. I personally didn't feel that there was a difference until I tried it for myself.
Since I've reviewed a lot of stuff lately I felt the need to point out, I do not get product to review, I do not get free products, I do not get paid for reviews, and I make no money doing this. I realized when I first started using Pinterest that unbiased reviews were few and far between so I set out to fill that gap. Even if a blogger truly LOVES a product when I realize they either got it for free in exchange for the review or were paid for the review, I feel the credibility of the review is undermined.
I then bought some "real" nursing bras and did not want to cut them but also didn't want to change my bra just to pump hands free, so I bought the Medela Easy Expressions Bustier. It took a few minutes to get it on and off and it's certainly not pretty but it was functional. I kept reading that the Simple Wishes bras were much better than the Medela bustier, but I didn't really think much of it because a bra with hole is a bra with holes, ya know? But then curiosity got the better of me the more I got frustrated with my Medela, so I ordered the Simple Wishes. This post is for anyone out there who thinks the bra doesn't really matter...it does!!! There IS a big difference.
First of all, the Medela bustier zips up the front. The Simple Wishes both zips up the front AND ties in the back. There's also a velcro backed version. Simple Wishes also sells 1" and 2" extenders that you would zip into the front like an extra panel to adjust the width and therefore the spacing of the holes. Speaking of the zipper, Simple Wishes has fabric behind the zipper so it doesn't dig into your skin. The Medela has much stretchier fabric in my opinion. I think that is why the Simple Wishes looks so much larger in this first photo.
The next difference for me was comfort. The Medela has a little bit of decorative scallopy lacy something on the bottom and it's a bit more pronounced on the top. It irritates my skin. The Simple Wishes is bound smoothly.
|
| Top of bras |
|
| Bottom of bras |
Also in the Comfort area is the shape. The Simple Wishes is angled towards the back to naturally go under your armpits. The Medela tends to dig into my armpits.
The Simple Wishes has optional bra straps. The Medela does not.
Ok so, modesty. It's hard to be modest while pumping and chances are if you're pumping around someone you already don't care if they get a peek. The Simple Wishes is at least a little less "these are UDDERS!" looking. It has two panels on the front and the back that form the opening and hide most of the flared part of the flange. The Medela just has holes.
Speaking of the holes, the Medela holes are kind of angled down. I feel like they make my nipples point down and it makes my boobs look saggy. I know pumping isn't exactly attractive to start with, but why torture yourself? I tried to line up the two on top of each other so you could see what I mean. The Medela holes are clearly lined up to be where the bottom of the Simple Wishes holes are. This makes me feel like the Medela is just going to slide down off my chest. The Medela is folded down to help you see the comparison to the Simple Wishes holes.
The one thing i would change is make the entire panel taller so that it covers my entire breast. The way it hits underneath my breasts feels odd. I also don't know why it has bra strap loops on the bottom, but they don't bother me. The big clip is from my nursing bra being unsnapped for pumping. Also, see the part for the flange? You can't see the flange!
I don't have a photo for this one, but speed. Because I don't have to stretch the Simple Wishes as I wrap it around me I can put it on much faster than the Medela. A bigger size Medela wouldn't hold the flanges against me, so I know it's not that mine is too small. I leave the Simple Wishes tied in the back and just zip up the front and it's so much easier.
This might seem like a crazy long and detailed review of something pretty insignificant, but if you spend any length of time pumping you'll learn how important it is to have a good-fitting bra, just like any other time. Overall the Simple Wishes is quicker to put on, more comfortable to wear, more modest, and gives you a more custom fit. I personally didn't feel that there was a difference until I tried it for myself.
Since I've reviewed a lot of stuff lately I felt the need to point out, I do not get product to review, I do not get free products, I do not get paid for reviews, and I make no money doing this. I realized when I first started using Pinterest that unbiased reviews were few and far between so I set out to fill that gap. Even if a blogger truly LOVES a product when I realize they either got it for free in exchange for the review or were paid for the review, I feel the credibility of the review is undermined.
11.22.2013
The Freemie Update, 1 Week Later
So about a week ago I got my Freemie Cups. You can see my initial review and my "later that same day" review here.
I've been using, washing, and experimenting with these on and off all week. They have not replaced my normal Medela parts but they do have their moments of usefulness. Cradling my baby is MUCH easier with the Freemies, in fact, it's nearly impossible with Medela bottles hanging down. I also don't mind pumping around other people as much since my shirt covers everything. On the flip side, you need a stretchy bra that you don't care about eventually stretching out. Non-stretchy bras probably won't accommodate a Freemie cup. If you don't want to stretch out a bra or buy a stretchy one I think the Simple Wishes Special Edition Hands Free Bra (the cheaper version with the tie-back) is a great choice as you can adjust the band by tying it looser or tighter, thus accommodating more or less space as needed. Note- I have a review of the Simple Wishes Bra vs the Medela Bustier, with tons of side by side pics, coming in the next day or so.
So, later impressions.
1) The branding on the cups isn't meant to stand up to washing, it seems. I use them 1-2x day and only steam sanitized before first use. I wash in Medela Breastmilk Dissolving Soap. I'm disappointed to see this happening, though it doesn't effect function obviously.
2) Pumpin Pals in the Freemie Cups. This is probably the question I have been asked the most. It makes me think I should do a side by side review of the Pumpin Pals vs the Medela Flanges because now I'll probably get more questions! For the sake of brevity I'll just say for now that Pumpin Pals fit and are angled differently, yet fit in your Medela connectors, for comfort, some say increased supply, and mimic baby's mouth action better. They have die-hard fans who won't (or can't, due to pain) use anything else.
So I stuck a Pumpin Pal in a Freemie Cup. First impression here- it sticks out a LOT. I think the ONLY way to accommodate this setup would be the Simple Wishes tie-back bra so you could leave enough room in the band to hold everything against you.
Second impression...wow! I turned my Medela Symphony on Let Down 5 as I normally do and didn't feel much. Bumped it up to Let Down 8 and it felt just like Let Down 5 normally! I got good suction and no leaks as the long part of the flange was deep enough inside the Freemie for the milk to collect as normal. Color me SHOCKED, I advised people not to get their hopes up, but I do think it's a possibly (but awkward) set up.
3) Milk collection. Freemie states "Freemie Collection Cups feature two 8-oz concealable collection cups (16-oz capacity total) for hands-free double pumping." (it's right under Add to Cart- http://www.freemie.com/freemie-collection-cups/medela/medela-25mm). I'm going to have to disagree with that one, Freemie.
This was harder to experiment but basically I measured out water and added it to the cups and then put them back on and tried to pump to evaluate suction as the valve gets covered. I'm happy to say that they did not leak where the two halves of the cup connect which is a worry I have (they connect like tupperware).
Now, look at your boobs and think about how the Freemie would be positioned. Mostly upright, correct? I held these against my boobs and then kept them steady as I moved them out and photographed the water level.
This is 4 ounces. At this point, suction stopped, and no more water would go down the valve, even with the pump on. This absolutely seems like the "overfill" line to me. I went back and checked to see if Freemie said "8oz total" and I misread. Nope. There is water in the tube where you nipple goes in this photo. It literally would not go down into the cup.
I could not fill them with 8 oz unless I lay them down flat, filled, snapped on the top, and lifted them upright, at which most of the extra ounces leaked out the collection hole. Seriously. How does Freemie say that these hold 8 ounces each?
I am considering one more experiment in the morning when I regularly pump 9 oz from one boob alone but I don't want to waste any breast milk, so we'll see if I am brave enough to try.
11.18.2013
The Freemie System for use with Medela- review
Today I got my Freemie system for my pump. I use a Medela Symphony with 27 mm shields in the house and a PISA when out and about. I got the Freemie in size 28 mm for $49.95 here. You can also buy kits for use with the Ameda Purely Yours or the Philips Avent Twin Electric. The Medela kit works with the Symphony, Lactina, and PISA.
I noticed something interesting right away- on their website it looks like the tubes go down along your belly. Well, the tubes actually come out of the top of the cups. Trying to run them down is possible but they will kind of stick up right above your boob which is kind of awkward.
This is how the valve and tubing are positioned when in use- tubing up, valve pointed down.
Bottom line:
I *really* wanted to love the Freemie cups. I do think that they work OK as far as suction, but the sizes are different than Medela sizing, so guessing your size is just that, a guess. I think I did ok, but time will tell.
Pros:
They felt comfortable but I think I got lucky in guessing my size right.
The suction seemed the same as using my typical Medela parts. I did let down quickly and pump more than I normally do this time of day.
These *are* less noticeable than the Medela parts, but see cons for an expansion on this statement.
Because they don't hang down in the slightest, let alone to nearly your hips as the Medela bottles do when sitting, you can hold your baby, get closer to your table/desk/laptop, or drive easier. I drive while pumping a LOT so this is a big deal.
Cons:
The frosted plastic means you can't see if you are spraying milk or how much milk is in there. There is no way to measure how much milk you've pumped. You really can't even see your nipple to see if it's positioned correctly.
They are NOT unobtrusive. Maybe under looser clothes they would be. I'm thinking a giant sweatshirt? Lol. You will show less skin than even a hands free bra because you can have your shirt completely over your boobs. Again this means you can't see what is going on.
The tubes don't really attach to any parts and it seems like the Medela connector part would get lost easily.
I'm worried that I wouldn't get the cups completely snapped together and leak/spill milk if they are cracked open or even pop apart.
Since the milk is collected in the cup I wonder what happens when you completely cover the valve? The nipple opening? etc. (with milk, that is).
UPDATED AFTER 2ND USE:
I've had some questions and some more picture requests that I'll update on here-
1) The Medela connectors plug directly into your tubes. I guess technically the tubes from my Symphony plug into the connectors, not the other way around. I did not notice any suction issues at this part. When I noticed less suction in my left boob it was fixed by pushing the tube that comes out of the cup in deeper.
3) Please understand this is a cell phone pic but this should give you a rough idea of how well (or not well...) that you can see inside the cups as you pump. I can see my nipple expanding so I know it's in the right space. I can't see the milk expressing. I can kind of see the line of the milk gathering in the cup.
You can see the milk much better when you take the cup all the way off. Again, no measurements. For the record this was about 3 oz.
4) Pouring can be tricky. The cup itself lays flat on it's "front" and the "top (this is the part against your boobs) snaps off. I used the little notch for the tube as kind of a spout to pour into the bottle.
I then attached my normal Medela flanges and pumped for 15 more minutes. Guess what, I was almost empty already!
6) This is a terrible picture. I will try to have a family member take better ones later. This is me holding my baby in a cradle position with the pumps on and working. Normally the Medela bottles dangle right where his body would go, so this was MUCH better! Holding him upright against my shoulder was fine for me but I worry that it was uncomfortable for him so I kind of had him to the side.
7) The cups themselves feel very secure, but if my bra was stretched out I'm not sure I'd feel the same. I was able to stand up and pick up my baby from the cradle but I squatted down rather than bending over to do so. I also lay down on the couch on my side, torso leaning over the arm of the couch, legs bent on the couch...this is an awful description, isn't it? I'll get some pics. I didn't have a problem with leaking. I do worry that the back and front of the cup will randomly unsnap. They snap together like tupperware.
8) As to car pumping, I realized that with the Medela bottles at least I can just take them off and slap a cap on them. These would have to be poured into a bottle, so you're bringing these AND bottles and figure out how to pour while parked in your car. I guess you could wear them inside wherever you are going and find a table or counter to unload onto but that would depend on how comfortable you are walking in with these on your chest.
Will update more as I continue to use these.
I noticed something interesting right away- on their website it looks like the tubes go down along your belly. Well, the tubes actually come out of the top of the cups. Trying to run them down is possible but they will kind of stick up right above your boob which is kind of awkward.
The cup itself is where the milk collects, around the valve. It just pops off and has a flat bottom (or front, when it's on your boob) so you can lay it down. You are supposed to pour into a bottle after pumping.
Here you can see the cup in my left hand and the valve/tube/etc on the right.
This is how the valve and tubing are positioned when in use- tubing up, valve pointed down.
The tubing just slides into a little tunnel. I was worried that it wouldn't be all that secure but it seems ok.
|
| i.need.a.manicure. |
So, the Medela kit! At first I thought nothing was in the box and got nervous. The cups, an extra valve, and 4 tubes (2 extra, obviously) were easy to identify but the Medela kit? It's this. This little pointy thing. You stick it into the other end of the Freemie's tube and then stick your pump's tube into that instead of into the Medela connector/flange part.
Again, I was worried about it being secure and if it could possibly generate a good suction.
I was also worried about losing them. Freemie included one extra for a total of 3.
Ok, onto wearing the cups!
Here I am wearing the freemie cup on the boob closest to the camera and holding the Medela cup to the boob further from the camera. The freemie is large, but it doesn't hang down like the Medela bottle does. This makes it easier if you have a laptop on your lap, or you're holding/feeding your baby, etc.
Here's from the other side. Medela closest to camera, Freemie on the boob further from camera.
Here's a view from above. Nothing in the left boob, Freemie on the right boob. See the tube?
Now on to suction.
One thing that really bothers me is that the cups are pretty frosted. I can't see inside them. I have no idea how much milk is in there and even if I could see the line at the top of the liquid there are no measurements on the cups.
When hooked up to the Symphony the suction felt the same as it does with my Medela cups. I normally pump until I don't see milk coming out any more. Since that's not an option, I pumped for 15 minutes and got 8.25 oz. Normally I get 4.5-6.25 oz this time of day. While that seems like a good increase, overall I'm down 1.25 oz from this time the day before and I just recently got my period back which can mess with your supply. I'd need more than one use to really get an idea of how much milk these are able to get, but it really is a pain to not be able to measure as you are pumping or see if the milk is spraying out or not. Since I cycle back to the Letdown setting when the milk stops, and do that 2-3 times each session, it really is making me question if I want to use these long term.
Bottom line:
I *really* wanted to love the Freemie cups. I do think that they work OK as far as suction, but the sizes are different than Medela sizing, so guessing your size is just that, a guess. I think I did ok, but time will tell.
Pros:
They felt comfortable but I think I got lucky in guessing my size right.
The suction seemed the same as using my typical Medela parts. I did let down quickly and pump more than I normally do this time of day.
These *are* less noticeable than the Medela parts, but see cons for an expansion on this statement.
Because they don't hang down in the slightest, let alone to nearly your hips as the Medela bottles do when sitting, you can hold your baby, get closer to your table/desk/laptop, or drive easier. I drive while pumping a LOT so this is a big deal.
Cons:
The frosted plastic means you can't see if you are spraying milk or how much milk is in there. There is no way to measure how much milk you've pumped. You really can't even see your nipple to see if it's positioned correctly.
They are NOT unobtrusive. Maybe under looser clothes they would be. I'm thinking a giant sweatshirt? Lol. You will show less skin than even a hands free bra because you can have your shirt completely over your boobs. Again this means you can't see what is going on.
The tubes don't really attach to any parts and it seems like the Medela connector part would get lost easily.
I'm worried that I wouldn't get the cups completely snapped together and leak/spill milk if they are cracked open or even pop apart.
Since the milk is collected in the cup I wonder what happens when you completely cover the valve? The nipple opening? etc. (with milk, that is).
UPDATED AFTER 2ND USE:
I've had some questions and some more picture requests that I'll update on here-
1) The Medela connectors plug directly into your tubes. I guess technically the tubes from my Symphony plug into the connectors, not the other way around. I did not notice any suction issues at this part. When I noticed less suction in my left boob it was fixed by pushing the tube that comes out of the cup in deeper.
2) I absolutely worry that these will stretch out my bra, but while it's not stretched out, it does hold them nice and snug against my chest.
3) Please understand this is a cell phone pic but this should give you a rough idea of how well (or not well...) that you can see inside the cups as you pump. I can see my nipple expanding so I know it's in the right space. I can't see the milk expressing. I can kind of see the line of the milk gathering in the cup.
You can see the milk much better when you take the cup all the way off. Again, no measurements. For the record this was about 3 oz.
4) Pouring can be tricky. The cup itself lays flat on it's "front" and the "top (this is the part against your boobs) snaps off. I used the little notch for the tube as kind of a spout to pour into the bottle.
5) It had been 2 hours since my last pump. I generally pump 3-6 oz at a time and it varies, but towards the lower end when it's only been two hours. I normally only need to pump for 10-15 minutes during the day.
I pumped for 15 minutes and from both cups combined got just under 4.5 oz.
6) This is a terrible picture. I will try to have a family member take better ones later. This is me holding my baby in a cradle position with the pumps on and working. Normally the Medela bottles dangle right where his body would go, so this was MUCH better! Holding him upright against my shoulder was fine for me but I worry that it was uncomfortable for him so I kind of had him to the side.
7) The cups themselves feel very secure, but if my bra was stretched out I'm not sure I'd feel the same. I was able to stand up and pick up my baby from the cradle but I squatted down rather than bending over to do so. I also lay down on the couch on my side, torso leaning over the arm of the couch, legs bent on the couch...this is an awful description, isn't it? I'll get some pics. I didn't have a problem with leaking. I do worry that the back and front of the cup will randomly unsnap. They snap together like tupperware.
8) As to car pumping, I realized that with the Medela bottles at least I can just take them off and slap a cap on them. These would have to be poured into a bottle, so you're bringing these AND bottles and figure out how to pour while parked in your car. I guess you could wear them inside wherever you are going and find a table or counter to unload onto but that would depend on how comfortable you are walking in with these on your chest.
Will update more as I continue to use these.
11.14.2013
Make your own All Purpose Nipple Ointment (APNO)
I've been nursing for a little over two months and the pain of breastfeeding hasn't completely gone away. I also seem to be prone to mild thrush, though I have been good at keeping the baby unaffected. The other day I got ANOTHER blister and decided to look into getting Dr. Newman's All Purpose Nipple Ointment prescribed.
The RX info is here- http://www.nbci.ca/index.php?option=com_content&id=76:all-purpose-nipple-ointment-apno&Itemid=17
My insurance doesn't cover it and the out of pocket price is $85. The pharmacist showed me the over-the-counter versions of the 3 ingredients and told me to mix equal parts and store in a jar. If you are prone to thrush, blisters, or general nipple pain, this is recommended and you only use a tiny bit. They say a tiny bit is OK but I still wipe off before breastfeeding cause it can't taste pleasant and I'm still not sure about the steroid part for a baby.
You need- an antibiotic ointment, a steroid, and an anti-fungal. That's actually pretty easy to infer from the RX link but I never thought of trying to DIY it til she suggested it. I found the little jars in the "trial and travel size" section for 99 cents.
I just stuck equal parts in a small bowl (I used all of the antibiotic ointment and while the cortisone on the bottom looks like more, it's wider but shorter than the other two) and mixed them all together.
Using all of the antibiotic and matching parts of the other two, it filled both jars perfectly! Showing jar sizing-ignore my awful (lack of) manicure!
Then just for fun and identification I cut two breast feeding awareness stickers with my Cameo.
I hope this helps someone else out there! Hang in there!
11.05.2013
Healthier Lactation Cookies- Lactation Cookie Recipe #3
So the last two recipes I posted for lactation cookies are delicious, but the jury is out on effectiveness at the moment. This recipe, I saw an increase right away in my breast milk BUT you are going to spend more $ on ingredients and the cookies are not as yummy. Maybe that's good, I won't overeat them, that's for sure. This also only makes around half the cookies compared to the other recipes.
Ingredients:
Ingredients:
·
1 cup coconut flour
·
1/2 cup virgin coconut oil
·
1/2 cup brown sugar
·
2 tablespoons flax seed meal
· 2 tablespoons of water
·
2 eggs
·
1 tablespoon vanilla extract
·
1 teaspoon cinnamon
·
1/4 cup of Brewer's Yeast
·
1/2 teaspoon salt
·
1 & 1/2 cups steel cut oats (NOT instant oats)
·
1 cup chocolate chips
Preheat oven to 350 degrees.
Mix the flax seed and water together in a small bowl and set aside for now.
Cream together coconut oil and brown sugar. Add the eggs and vanilla extract and mix well.
Add coconut flour, cinnamon, brewer's yeast, and salt. Mix well.
Stir in oats and chocolate chips.
Roll into balls (again, I use the OK symbol with my thumb and pointer finger and make balls about the size of the empty circle) and place onto a silicon baking sheet. Smash them flat a little- these will not spread out like other cookies.
Bake for 12-15 minutes depending on your oven.
Make about 36 cookies.
Results- Well, the day I made these, I ate about 9 (they are very small) and it was my best producing day ever, up just under 2 oz from the day before and also the day before that. The 2nd day, I only ate 6, and am back down to where I was in the days before eating these. They are somewhat dry and crumbly, stay in their ball shape after baking, and very, very not-sweet. You will taste the Brewer's Yeast, but, if you do the math, 1/4 cup of Brewer's Yeast in 36 cookies is less than 1/2 teaspoon per cookie, and it's one of the main things to help your milk supply. I don't find the taste bad, though some of you certainly will, but I also won't snack on these like I do the other recipes.
Updated results: While I was still working on this post, on day 3 after making these cookies, I woke up with a small lump that turned into a full fledged clog by noon. After LOTS of time with a heat pack, my pump and Lecithin pills, I think it's out, but if you've ever had a clog you know that the pain lasts for a few days after it's gone. At least it's not Mastitis, I suppose. I NEVER get clogs since starting a Lecithin regime, so I'm wondering if it's these cookies causing a slight increase and me not getting all the milk out as a result. I will be getting into my breastfeeding regime later.
Updated results: While I was still working on this post, on day 3 after making these cookies, I woke up with a small lump that turned into a full fledged clog by noon. After LOTS of time with a heat pack, my pump and Lecithin pills, I think it's out, but if you've ever had a clog you know that the pain lasts for a few days after it's gone. At least it's not Mastitis, I suppose. I NEVER get clogs since starting a Lecithin regime, so I'm wondering if it's these cookies causing a slight increase and me not getting all the milk out as a result. I will be getting into my breastfeeding regime later.
11.04.2013
Chocolate Chip Lactation Cookies- Lactation Cookie Recipe #2
So yesterday I shared my first lactation cookie recipe, made with M&Ms. This recipe is pretty much the same but made with chocolate chips instead. The difference is in the sweetness. I feel like the M&Ms really made the cookie overwhelming and since due to the brewer's yeast this is a less sweet cookie in general, that's alarming.
Take note, tomorrow I'll post a healthier version of a lactation cookie, at least, compared to this recipe and yesterday's recipe.
I'll go ahead with results before I get into the recipe & photo this time, since it's very similar. I could easily eat 10 of these cookies per day. They are delicious. However, any slight increase in breast milk did not require me to continue taking them to maintain, so I'm not really sure if they *really* were doing anything. On the other hand, I haven't gotten into my whole arsenal of breast feeding tricks yet, so what you don't know is that I pretty much have oversupply and did it to myself on purpose so I can pump lots and wean earlier, plus not stress about milk supply. You may see a noticeable increase if your supply is low. I mean, there must be a reason the recipes are so enduring.
Ingredients:
2 tablespoons flax seed meal (found at GNC. Alternative- buy flax seed and stick it in your food processor)
1/4 cup water
1 cup butter1 cup white sugar
1/2 cup brown sugar
3 eggs
2 teaspoons vanilla extract
2 cups flour
1/4 cup brewer's yeast (found at GNC. NO OTHER TYPE OF YEAST!)
1 teaspoon baking soda
1/2 teaspoon salt
3 cups oats
2 cups chocolate chips
Preheat oven to 350 degrees.
Mix water and flax seed meal into a small bowl and set aside for the moment.
Cream together butter, white sugar, and brown sugar.
Add eggs and vanilla extract and mix well.
Add flax seed meal mixture and mix well.
Add flour, brewer's yeast, baking soda, and salt. Some like to mix dry ingredients in a separate bowl. I like to do less dishes so I just throw it all into the mixer bowl with the wet ingredients. Mix well.
Stir in oats and chocolate chips.
Form and set on baking sheets. I don't really have a set size, in general the little dough balls are around the size of the hole when I put my pointer finger to my thumb and make a circle, like making the "OK" sign.
I bake on silicone sheets for about 15 minutes in an electric oven. From owning a gas oven previously I know to remind you that your oven may be different and keep an eye on your cookies the first time you make them.
Recipe makes about 50 cookies.
11.03.2013
M&M Lactation Cookies- Lactation Cookie Recipe #1
I have a whole thing planned around breastfeeding and pumping, but as I'm only 8 weeks post partum, I'm still trying out a lot of stuff.
One thing I love to do to help is make lactation cookies. I don't know if my supply is increasing because that's just what happens when you consistently empty your breasts, because of my supplementation, or both.
Regardless, I like lactation cookies. They are yummy, they have some things in them that are good for you, and they certainly don't hurt supply. The cons, well, they are cookies. I will be posting some other recipes and tweaks to make them healthier in the coming days but in the meantime, enjoy a cookie, moms! You deserve it.
Ingredients:
2 tablespoons flax seed meal (found at GNC. Alternative- buy flax seed and stick it in your food processor)
1/4 cup water
1 cup butter
1 cup white sugar
1/2 cup brown sugar
3 eggs
2 teaspoons vanilla extract
2 cups flour
1/4 cup brewer's yeast (found at GNC. NO OTHER TYPE OF YEAST!)
1 teaspoon baking soda
1/2 teaspoon salt
3 cups oats
2 cups M&Ms
Preheat oven to 350 degrees.
Mix water and flax seed meal into a small bowl and set aside for the moment.
Cream together butter, white sugar, and brown sugar.
Add eggs and vanilla extract and mix well.
Add flax seed meal mixture and mix well.
Add flour, brewer's yeast, baking soda, and salt. Some like to mix dry ingredients in a separate bowl. I like to do less dishes so I just throw it all into the mixer bowl with the wet ingredients. Mix well.
Stir in oats and M&Ms.
Form and set on baking sheets. I don't really have a set size, in general the little dough balls are around the size of the hole when I put my pointer finger to my thumb and make a circle, like making the "OK" sign. I bake on silicone sheets for about 15 minutes in an electric oven. From owning a gas oven previously I know to remind you that your oven may be different and keep an eye on your cookies the first time you make them.
Recipe makes about 50 cookies.
Results:
Well, they are delicious, but almost too sweet with the M&Ms, which is why the next recipe I'll share will have something else. My supply steadily increase small amounts daily while eating (6-8 per day.../hides) but continued to increase after as well, so I don't know if I can give cookies all the credit.
Well, they are delicious, but almost too sweet with the M&Ms, which is why the next recipe I'll share will have something else. My supply steadily increase small amounts daily while eating (6-8 per day.../hides) but continued to increase after as well, so I don't know if I can give cookies all the credit.
10.31.2013
Happy Halloween! DIY Decor
Happy Halloween! Free time has been scarce around here. I can't believe my little one is almost two months old already! I love Halloween so did take the time to set up this little decorated desk area in the kitchen.
Most of this is DIY- one painted pumpkin and 8 files from the Silhouette online store!
Top shelf- garland from Michael's. Pumpkin from Michael's, glittered by me.
Middle shelf- tombstone and spooky tree frame from Silhouette store. Glass pumpkin from Walmart and filled with a cheap tinsel Halloween garland. Bat Wing Juice and Poison cartons from Silhouette store.
Bottom shelf- BOO boxes, fruit basket, 3D pumpkins, and paper flowers from Silhouette store. Birdhouse is from Tuesday Morning. Terra Cotta pumpkin is from HomeGoods.
Special mention- the weird looking pumpkin thing with green vines in that little nook shelf was made by me in elementary school! The skull mug in the nook is from the dollar store.
Most of this is DIY- one painted pumpkin and 8 files from the Silhouette online store!
Top shelf- garland from Michael's. Pumpkin from Michael's, glittered by me.
Middle shelf- tombstone and spooky tree frame from Silhouette store. Glass pumpkin from Walmart and filled with a cheap tinsel Halloween garland. Bat Wing Juice and Poison cartons from Silhouette store.
Bottom shelf- BOO boxes, fruit basket, 3D pumpkins, and paper flowers from Silhouette store. Birdhouse is from Tuesday Morning. Terra Cotta pumpkin is from HomeGoods.
Special mention- the weird looking pumpkin thing with green vines in that little nook shelf was made by me in elementary school! The skull mug in the nook is from the dollar store.
The 3D pumpkins in the fruit crate are probably my favorite, though the Bat Wing and Poison cartons have inspired me to make a whole apothecary shelf for next year- maybe the mantle? Eyeballs in mason jars and lots of creepy files from the Silhouette store should make it easy!
9.19.2013
Roses and babies!
Life has been crazy busy! Wanna know why? :)
Baby #2 was born on September 8th :) It's been so much fun having a little guy around again, though the lack of sleep and the whole "breast feeding means you're kind of tethered to the baby" feeding thing takes some getting used to again.
He actually came a smidge early, so this project isn't 100% finished but I don't see it getting finished any time soon. All I really want to do is add more of the same thing, so simple enough.
Baby #2 was born on September 8th :) It's been so much fun having a little guy around again, though the lack of sleep and the whole "breast feeding means you're kind of tethered to the baby" feeding thing takes some getting used to again.
|
| Sorry for the giant watermark- sharing pics of my children online makes me nervous, to be honest. |
He actually came a smidge early, so this project isn't 100% finished but I don't see it getting finished any time soon. All I really want to do is add more of the same thing, so simple enough.
The roses are from the Mom's Garden Gifts kit from svgcuts.com. Their files are very intimidating when downloaded and I had to watch the video several times, but it's fairly easy to do. I bought 3/16" dowel rods at Michael's for like 30 cents each and had my dad cut them into thirds, and then wrapped them in floral tape. Pretty easy.
I used normal school glue for the roses. My beloved glue dots ARE easier but they add a bit of dimension where placed which wasn't a good fit for this project.
Anyway, it used to be a vase of old musty silk flowers, and I decided to do a fall themed bouquet instead.
It makes me smile when I walk past the table- they are very realistic looking for paper flowers, and super cute!
Back to my new baby now :)
8.22.2013
Cards with print and cut, mod podge, embossing, and more!
I've been having a little fun doing something I don't normally do, which is make cards. Normally I feel like cards are kind of a waste of paper. People rarely save them and paper = trees, ya know?
Regardless, I did want to make a few cards recently, and here are the results.
The first one was for my mother in law's birthday. This card was made with print and cut, my favorite feature of the Silhouette Cameo. The card itself is pale pink cardstock but everything else is print and cut. I filled the background shape with the pretty rose pattern, use the color matching dropper tool to pick out pinks from the roses and make a gradient of colors for the cake, and filled in the cake stand and candle parts with solid colors. Print, cut, glue, voila!
I'm considering making our holiday cards this year instead of ordering the ever-present Shutterfly photo card, but we'll see if I have the patience for that (especially with a newborn coming soon!).
Regardless, I did want to make a few cards recently, and here are the results.
The first one was for my mother in law's birthday. This card was made with print and cut, my favorite feature of the Silhouette Cameo. The card itself is pale pink cardstock but everything else is print and cut. I filled the background shape with the pretty rose pattern, use the color matching dropper tool to pick out pinks from the roses and make a gradient of colors for the cake, and filled in the cake stand and candle parts with solid colors. Print, cut, glue, voila!
The second card I made is for our awesome, patient, and hard working Realtor. This card is actually a "Welcome to the Neighborhood" card in the Silhouette store but I just deleted the text and added "Thank you" instead (Font name- Cheri).
Before cutting the letters I ran the paper through my Sizzix Big Shot using a Cuttlebug embossing folder. I had to bump my blade up from 3 to 5 to cut through the cardstock after that, but I like the delicate detail it gives.
Everything on this card is colored card stock, no print and cut this time! The hearts have Mod Podge Dimensional Magic on them which is really fun as it dries clear but hard, smooth, shiny, and raised up.
I'm considering making our holiday cards this year instead of ordering the ever-present Shutterfly photo card, but we'll see if I have the patience for that (especially with a newborn coming soon!).
8.21.2013
Diary of our short sale home purchase
We just bought a new house! Last time we built a house which I found very stressful and didn't enjoy. This time we wanted to buy an existing home. As luck would have it, we fell in love with a short sale. We had looked for over a month before finding this house and knew that it was ours as soon as it was listed.
This was not a smooth process. It was about 4.5 months from offer to closing, which is miraculous compared to some short sales, but it was still a long, stressful, sucky waiting period.
Throughout that time I kept googling for info on short sales- timelines, how the banks involve handle short sales, etc- and quickly found out that there IS no real good guideline for how a short sale will go. Nonetheless I decided to document and share the progress in the hopes that it helps someone out there. This is exactly the type of info I would have loved to find in my searches.
Things I want to point out:
-Having 2 liens against a short sale = probably would run if the situation ever came up again. They spent over a month just hashing out who got how much money from the sale between them.
-We got incredibly lucky. This house was only built a few years ago, was kept pristine, and the owners short-sold due to job relocation, not financial hardship. They were great every step of the way. Some sellers don't really want to lose their house and can make things difficult or even trash the house. Ours not only kept it gorgeous but left behind things like a lawn mower, stainless steel fridge (all other appliances included in sale), and tools.
-We got early access to the house to allow for cleaning, mowing/weedwhacking, and to get our household goods delivered. This isn't really normal and may be confusing in the timeline- remember how I mentioned the sellers were great? They really were!
Ok, let's get down to the info! Lien #1 on the house was with Nationstar, who I had never heard of prior to this. Lien #2 was with Bank of America. Bank of America used to hold both liens but shortly before the house was listed, Lien #1 was sold to Nationstar.
March 30, 2013: Saw house listed online
March 31, 2013: Submitted offer ($2,500 above asking price) based on photos alone as we are both out of state and want to move fast. We know several people in the area which makes us confident in the neighborhood.
April 1, 2013: Sellers (not their bank) accepted our offer and sent it to their lender
April 16, 2013: My negotiator "urgently" requests my lender info (and gets my hopes up)
April 30, 2013: We sign to extend contract
May 2, 2013: In my previously mentioned googling for info, I find out that Lien #1 is notorious for making sellers use auction.com for short sales even if there are offers on the property in order to solicit a better price. In addition I read that Lien #1 is known to not give any sort of closing cost assistance unless you finance through them. Most alarming, however, is that I read that Lien #1 requires the short sale buyers to apply to finance through them regardless of if the buyer already has financing already. It's emphasized that the buyer does not have to use them, but that the application is part of the approval process. I flat out will not agree to this if it comes to it- every application like that is a credit hit, for one thing- and e-mail my Realtor all the info I've found. She passes it on to the Negotiator for our side who assures her he has not dealt with that before. *Note that in the end, NONE of this came up, for which I am very grateful!*
May 14, 2013: Short sale lender completed their appraisal and accepted it without contesting it. We extend contract again and are told 5-7 days to finish up paperwork. We are told the appraisal belongs to them and can't see the information, which is annoying.
May 20, 2013: It is suggested that we schedule the home inspection to start getting ready to close, and we agree. After a few days of no contact from the seller's bank, we cancel this for now.
May 24, 2013: Hubby has arrived at his new duty station and is able to actually go see the house in person for the first time. I am unable to travel due to pregnancy so he sends me a video. Luckily, we still love the house after seeing it for real!
May 30, 2013: Seller's lenders request info from us such as SSNs and our mortgage lender. Again we get our hopes up.
June 6, 2013: We sign to extend contract for the 3rd time after spending a weekend house-hunting for non-short-sale alternatives with no results.
June 10, 2013: We keep hearing "Any day now!" from negotiator and no longer believe it (a month ago we were told 5-7 days, remember?). Our contract was only re-signed for a week so we make an offer on a newly built home. Builder counters for more than it's listed for. We decline.
June 13, 2013: We sign to extend contract for the 4th time.
June 17, 2013: Seller's lenders AGAIN request info similar to May 30th request.
July 15, 2013: Yes, a month went by with NOTHING happening. The 2nd smaller lien on the house wanted more money in the deal, and sellers agreed to kick that money in, so 2nd lien gives approval verbally.
July 16, 2013: On the good news of one lien giving verbal approval, we go ahead with the inspection. Overall it went well, but roof has some storm damage. Sellers agree to pay to fix the damage (it's minimal).
July 17, 2013: Hubby and I have both signed mortgage paperwork on the house.
July 26, 2013: Mortgage approved, underwriting completed pending appraisal and cleared title. Lien #1 still has not given approval. Roof repairs completed.
July 29, 2013: Lien #1 is waiting on Lien #2 to give their approval in writing. We were told they would send it on 23rd. Did not receive it until today.
July 31, 2013: Lien #1 counters the closing cost assistance in the contract. We asked for $2500 (and offered $2500 above asking), they counter with $2000. We aren't going to kill the deal over $500 after all this time and I'm sure they know that. We accept and sign. We think this means approval coming soon.
August 7, 2013: Appraisal came in and it's great news for us! Still no approval from Lien #1. Someone either at my lender or Lien #1 is having issues with the HUD-1 form, not sure who. As usual we're told this is "THE LAST STEP" until Lien #1 approves the sale.
August 8, 2013: Seller's bank's appraisal has expired and it must be current to close. The ball was dropped due to bank's negotiator's wife giving birth and no one else handling the paperwork in the meantime. Same day appraisal is scheduled.
August 9, 2013: Lien #1 approves! We are good to move forwards! Sign contract amendments to close on the 15th.
August 15, 2013: This is the day we are supposed to close. We were told all our paperwork is at the title company and they are trying to rush it. Things are made complicated because both of the sellers and myself will have to sign, notarize, and overnight documents back. Only hubby is in San Antonio.
August 16, 2013: We are told that the title company had to correct the HUD-1 form and that first our lender and then the two short sale lenders have to approve it before we can close. They now believe we will close on the 20th or 21st and fund (and get keys) on the 21st or 22nd.
August 17, 2013: In a twist I've never heard of, without even having to lease the house before closing or anything like that, hubby is given access to the house to get it cleaned and ready to have our things delivered.
August 19, 2013: I am told that our lender has approved the HUD-1 form and that Lien #1 has approved as well. I have seen Lien #1's approval. Unsure where Lien #2 stands- may be done since Lien #1 usually makes them go first. A local notary (I am out of state) calls me to talk about signing tomorrow but notes that he has not received title company's paperwork to do so yet. Title company does not return my phone calls trying to find out what is going on. Realtor requests HUD-1 from title company so that we can see what we need to pay at closing.
9:15 PM Local Time, 10:15 PM for me in NC, August 19, 2013: Title company calls me with the clear to close, e-mails me paperwork, and tells me we will be signing tomorrow and hopefully funding/keys the day after! I am in shock that she is still at work but quickly panic when I see the closing documents list that we owe $8100 in closing costs. I call my Realtor (around 9:30 PM her time at this point) who goes over the HUD-1 form with me and realize that actually, we're getting credited $500, so we actually owe $0! Our estimate was $2500-3500 (went up after Lien #1 countered our closing cost assistance request). I still don't believe it until the closing is over.
August 20, 2013: Title company calls me again, goes over paperwork (all 105 pages!), and tells me sellers will be signing today. Hubby is scheduled to go in person to close tomorrow at 11 AM. Our household goods arrive at the new house! Early in the afternoon I get all my copies of the closing papers signed, notarized, and taken to FedEx to be shipped overnight mail to the title company.
August 21, 2013: At 11 AM local time hubby signs closing documents. At 2:30 PM local time, we get a message that the closing and funding have been completed! The house is finally ours!
Still to do: We still have to switch utilities into our name (will be done tomorrow), set up our HOA account (will be done when title company sends HOA the settlement statement), update things like our bank account with our new address, file change of address form with post office (both on tomorrow's list as well), and of course unpack, decorate, re-landscape, buy a new dryer (ours is gas and the new house needs an electric one), a new kitchen table (we didn't have a formal dining room- now we do, and our current marble topped kitchen table is perfect for it!), replace some broken furniture (mostly our desks), replace guest room bed (the mattress sucked so we ditched it), consider replacing couch (it didn't come out of storage smelling all that great), aaaaaand last but not least, in a few months move myself, our toddler, our soon-to-be-born baby, and allllll of our toddler's bedroom furniture from NC to TX.
Whew!
This was not a smooth process. It was about 4.5 months from offer to closing, which is miraculous compared to some short sales, but it was still a long, stressful, sucky waiting period.
Throughout that time I kept googling for info on short sales- timelines, how the banks involve handle short sales, etc- and quickly found out that there IS no real good guideline for how a short sale will go. Nonetheless I decided to document and share the progress in the hopes that it helps someone out there. This is exactly the type of info I would have loved to find in my searches.
Things I want to point out:
-Having 2 liens against a short sale = probably would run if the situation ever came up again. They spent over a month just hashing out who got how much money from the sale between them.
-We got incredibly lucky. This house was only built a few years ago, was kept pristine, and the owners short-sold due to job relocation, not financial hardship. They were great every step of the way. Some sellers don't really want to lose their house and can make things difficult or even trash the house. Ours not only kept it gorgeous but left behind things like a lawn mower, stainless steel fridge (all other appliances included in sale), and tools.
-We got early access to the house to allow for cleaning, mowing/weedwhacking, and to get our household goods delivered. This isn't really normal and may be confusing in the timeline- remember how I mentioned the sellers were great? They really were!
Ok, let's get down to the info! Lien #1 on the house was with Nationstar, who I had never heard of prior to this. Lien #2 was with Bank of America. Bank of America used to hold both liens but shortly before the house was listed, Lien #1 was sold to Nationstar.
March 30, 2013: Saw house listed online
March 31, 2013: Submitted offer ($2,500 above asking price) based on photos alone as we are both out of state and want to move fast. We know several people in the area which makes us confident in the neighborhood.
April 1, 2013: Sellers (not their bank) accepted our offer and sent it to their lender
April 16, 2013: My negotiator "urgently" requests my lender info (and gets my hopes up)
April 30, 2013: We sign to extend contract
May 2, 2013: In my previously mentioned googling for info, I find out that Lien #1 is notorious for making sellers use auction.com for short sales even if there are offers on the property in order to solicit a better price. In addition I read that Lien #1 is known to not give any sort of closing cost assistance unless you finance through them. Most alarming, however, is that I read that Lien #1 requires the short sale buyers to apply to finance through them regardless of if the buyer already has financing already. It's emphasized that the buyer does not have to use them, but that the application is part of the approval process. I flat out will not agree to this if it comes to it- every application like that is a credit hit, for one thing- and e-mail my Realtor all the info I've found. She passes it on to the Negotiator for our side who assures her he has not dealt with that before. *Note that in the end, NONE of this came up, for which I am very grateful!*
May 14, 2013: Short sale lender completed their appraisal and accepted it without contesting it. We extend contract again and are told 5-7 days to finish up paperwork. We are told the appraisal belongs to them and can't see the information, which is annoying.
May 20, 2013: It is suggested that we schedule the home inspection to start getting ready to close, and we agree. After a few days of no contact from the seller's bank, we cancel this for now.
May 24, 2013: Hubby has arrived at his new duty station and is able to actually go see the house in person for the first time. I am unable to travel due to pregnancy so he sends me a video. Luckily, we still love the house after seeing it for real!
May 30, 2013: Seller's lenders request info from us such as SSNs and our mortgage lender. Again we get our hopes up.
June 6, 2013: We sign to extend contract for the 3rd time after spending a weekend house-hunting for non-short-sale alternatives with no results.
June 10, 2013: We keep hearing "Any day now!" from negotiator and no longer believe it (a month ago we were told 5-7 days, remember?). Our contract was only re-signed for a week so we make an offer on a newly built home. Builder counters for more than it's listed for. We decline.
June 13, 2013: We sign to extend contract for the 4th time.
June 17, 2013: Seller's lenders AGAIN request info similar to May 30th request.
July 15, 2013: Yes, a month went by with NOTHING happening. The 2nd smaller lien on the house wanted more money in the deal, and sellers agreed to kick that money in, so 2nd lien gives approval verbally.
July 16, 2013: On the good news of one lien giving verbal approval, we go ahead with the inspection. Overall it went well, but roof has some storm damage. Sellers agree to pay to fix the damage (it's minimal).
July 17, 2013: Hubby and I have both signed mortgage paperwork on the house.
July 26, 2013: Mortgage approved, underwriting completed pending appraisal and cleared title. Lien #1 still has not given approval. Roof repairs completed.
July 29, 2013: Lien #1 is waiting on Lien #2 to give their approval in writing. We were told they would send it on 23rd. Did not receive it until today.
July 31, 2013: Lien #1 counters the closing cost assistance in the contract. We asked for $2500 (and offered $2500 above asking), they counter with $2000. We aren't going to kill the deal over $500 after all this time and I'm sure they know that. We accept and sign. We think this means approval coming soon.
August 7, 2013: Appraisal came in and it's great news for us! Still no approval from Lien #1. Someone either at my lender or Lien #1 is having issues with the HUD-1 form, not sure who. As usual we're told this is "THE LAST STEP" until Lien #1 approves the sale.
August 8, 2013: Seller's bank's appraisal has expired and it must be current to close. The ball was dropped due to bank's negotiator's wife giving birth and no one else handling the paperwork in the meantime. Same day appraisal is scheduled.
August 9, 2013: Lien #1 approves! We are good to move forwards! Sign contract amendments to close on the 15th.
August 15, 2013: This is the day we are supposed to close. We were told all our paperwork is at the title company and they are trying to rush it. Things are made complicated because both of the sellers and myself will have to sign, notarize, and overnight documents back. Only hubby is in San Antonio.
August 16, 2013: We are told that the title company had to correct the HUD-1 form and that first our lender and then the two short sale lenders have to approve it before we can close. They now believe we will close on the 20th or 21st and fund (and get keys) on the 21st or 22nd.
August 17, 2013: In a twist I've never heard of, without even having to lease the house before closing or anything like that, hubby is given access to the house to get it cleaned and ready to have our things delivered.
August 19, 2013: I am told that our lender has approved the HUD-1 form and that Lien #1 has approved as well. I have seen Lien #1's approval. Unsure where Lien #2 stands- may be done since Lien #1 usually makes them go first. A local notary (I am out of state) calls me to talk about signing tomorrow but notes that he has not received title company's paperwork to do so yet. Title company does not return my phone calls trying to find out what is going on. Realtor requests HUD-1 from title company so that we can see what we need to pay at closing.
9:15 PM Local Time, 10:15 PM for me in NC, August 19, 2013: Title company calls me with the clear to close, e-mails me paperwork, and tells me we will be signing tomorrow and hopefully funding/keys the day after! I am in shock that she is still at work but quickly panic when I see the closing documents list that we owe $8100 in closing costs. I call my Realtor (around 9:30 PM her time at this point) who goes over the HUD-1 form with me and realize that actually, we're getting credited $500, so we actually owe $0! Our estimate was $2500-3500 (went up after Lien #1 countered our closing cost assistance request). I still don't believe it until the closing is over.
August 20, 2013: Title company calls me again, goes over paperwork (all 105 pages!), and tells me sellers will be signing today. Hubby is scheduled to go in person to close tomorrow at 11 AM. Our household goods arrive at the new house! Early in the afternoon I get all my copies of the closing papers signed, notarized, and taken to FedEx to be shipped overnight mail to the title company.
August 21, 2013: At 11 AM local time hubby signs closing documents. At 2:30 PM local time, we get a message that the closing and funding have been completed! The house is finally ours!
Still to do: We still have to switch utilities into our name (will be done tomorrow), set up our HOA account (will be done when title company sends HOA the settlement statement), update things like our bank account with our new address, file change of address form with post office (both on tomorrow's list as well), and of course unpack, decorate, re-landscape, buy a new dryer (ours is gas and the new house needs an electric one), a new kitchen table (we didn't have a formal dining room- now we do, and our current marble topped kitchen table is perfect for it!), replace some broken furniture (mostly our desks), replace guest room bed (the mattress sucked so we ditched it), consider replacing couch (it didn't come out of storage smelling all that great), aaaaaand last but not least, in a few months move myself, our toddler, our soon-to-be-born baby, and allllll of our toddler's bedroom furniture from NC to TX.
Whew!
8.17.2013
Faux Bojangles Biscuits
Wow, I never shared this recipe??? I loooove biscuits and used to make this every week, keeping them in tupperware and re-heating in the toaster oven as needed. They are great for breakfast sandwiches, dinner rolls, snacks...did I mention I love biscuits?
Biscuits are probably the only thing at Bojangle's that I actually eat and they do a really yummy biscuit, so I convinced a friend of mine who managed one to snag me the recipe and adapted it a little to what I usually have on hand.
Ingredients:
3 cups self-rising flour OR 3 cups all-purpose flour with 3 & 3/4 tsp baking power and 3/4 tsp salt mixed in
2 tsp powdered sugar
3 tsp baking powder
1/2 cup salted butter (or unsalted, if you converted all-purpose flour to substitute for self-rising; I've found otherwise it's too salty)
1 & 1/2 cup buttermilk OR 1 & 1/2 cup milk (I use skim) and 2 tsp cream of tartar- mix and let stand for 5 min
Directions:
Pre-heat oven to 450 degrees. Mix dry ingredients, then add butter (softened is best, and I use my Kitchenaid with paddle attachment to mix it all in). Add buttermilk and mix well.
Spread flour on your counter and dump out dough. Knead until non-sticky, then roll it out to about 1/2" thickness. Use a cup or a biscuit cutter (I use a child size drinking glass) to cut out circles and place them on baking tray (I prefer stoneware- up to you! You may have to spray your tray if it's not non-stick). Keep rolling and cutting to use up all the dough. Place biscuits touching each other on tray.
Bake for 15 minutes. If you want (I do!) at about 13 minutes, carefully spread some butter over the top of the biscuits and finish baking to get that greasy golden Bojangles biscuit sheen.
When I want to re-heat them I pop them in my toaster oven for 3 minutes, but I'm sure you could easily warm them in a regular oven as well.
Subscribe to:
Posts (Atom)