
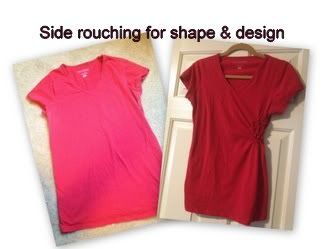
Every since I saw this on Pinterest, I've been wanting to make my own side gathered t-shirt.
Here's what you need:
-a t-shirt- I used a old maternity shirt that I had, knowing it was wide and that I wanted it more fitted since I'm not pregnant. It was a knit shirt. I have no idea how this would work if your shirt was not stretchy
-elastic thread- you'll find this with elastic. I got 30 yards for about $1.97 at Walmart
-regular, colored thread- make sure it matches the color of your t-shirt as closely as possible
-ball point needle- happened to be in my sewing machine and worked fine
-An iron
Here's what you do:
-hand wind your elastic thread onto your bobbin. Don't pull too hard, but do your best to keep it even.
-put your regular, colored thread through your machine & needle.
-test sew on some scrap fabric, especially if you haven't used elastic thread before.
-draw a series of arcs on the front of your t-shirt. I used a pencil. I did 3 arcs, I've seen it done with 4, it kind of depends on how big you want the gather/how big your shirt is. You want to make loops along the arc. I actually did triangles to make it easier to sew, it doesn't matter. The very middle, tiniest arc is really just a line with two loops on it. Here's a little doodle:

.jpg)

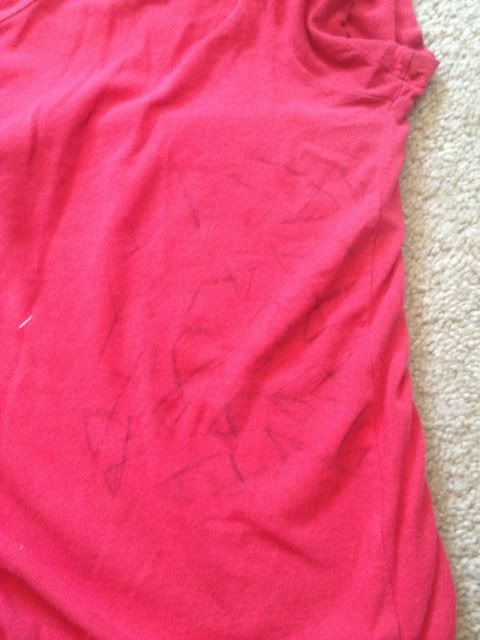
-You are going to sew the loops with your t-shirt right side out. You shouldn't see any white elastic thread that way (plus, your loops are on the front if you listed to me!). This is kind of tedious, but easy. Start with the very center, smallest arc right by the side seam and follow that arc. You'll basically sew one triangle side, put your needle down, lift up your presser foot, turn your fabric, presser foot down, sew another triangle side. And repeat for your entire rainbow shape of arcs. I sewed one continuous thread, so when I reached the end of one arc, I sewed to the side a bit to the beginning of the next arc. These don't have to be perfect- between the gathering and the steaming later, anything other than a massive mistake won't be noticeable.
-At the end, back over your thread a few stitches to finish it and take your shirt out of the machine.
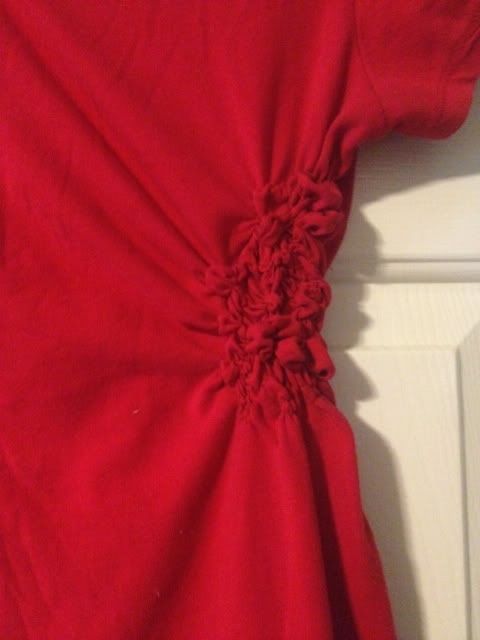
-Go get your iron and steam the elastic thread so it retracts in on itself a bit.
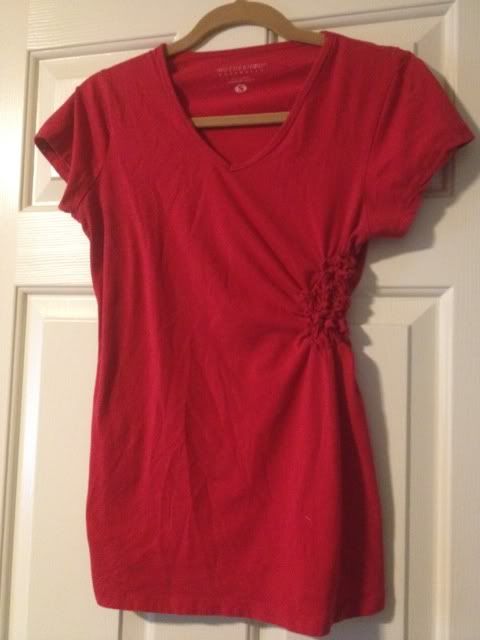
-Wear your shirt and soak up the compliments, because everyone will assume that doing this is harder than it really was!
No comments:
Post a Comment