Showing posts with label t-shirt. Show all posts

1.03.2013

3rd Birthday T-shirt

Someone is turning THREE years old over here! Where did the time go???!!!

I wanted to make him a t-shirt to wear to preschool on his birthday. I already had a black t-shirt and bought some Jolee's heat transfer paper for colored fabrics. I then wasted 2 sheets of it as my Cameo would not cut the design properly.

 I switched to some flat (regular) and flocked (thicker and kind of fuzzy). A lot of people don't like the flat HTV that Silhouette makes. I can see why. It cut ragged and it stretched when weeding, meaning again I trashed the cut.

However, the flocked HTV cut great!

 I had some Siser Easyweed left over from a shirt I made for my husband. It wasn't a color that I wanted to use but it was all I had left. I did end up liking the final product.

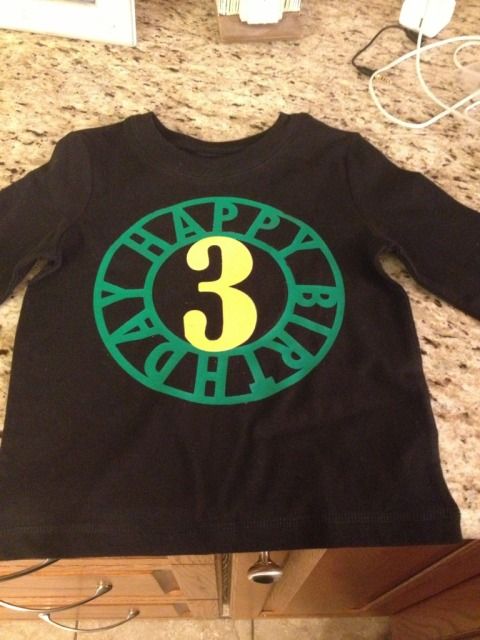
The green is Siser Easyweed and the yellow is the flocked Silhouette HTV.


I tried to take a photo of the flocked vs flat as well
Uploaded from the Photobucket iPhone App

I have a few other crafts to post, a lot to do, and even a bunch of stuff for What I Wore Wednesday- shocking, I know!

Thanks for reading, as always!

10.30.2012

DIY Wickedly Handsome T-Shirt, Plus Warped Text Tutorial

Halloween fun continues!

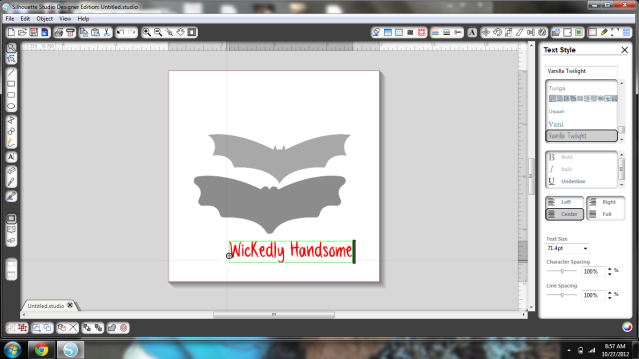
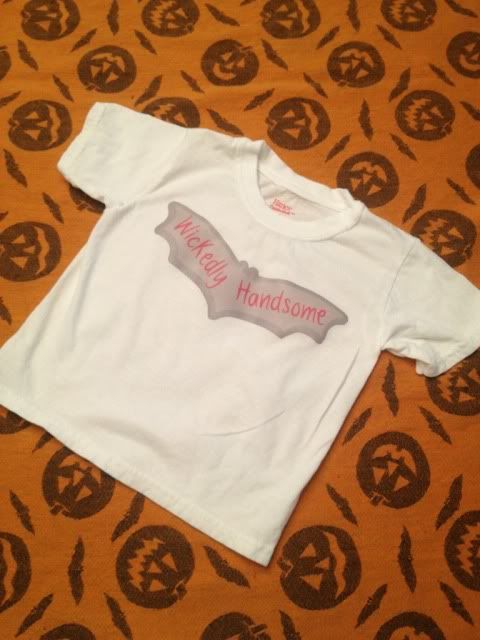
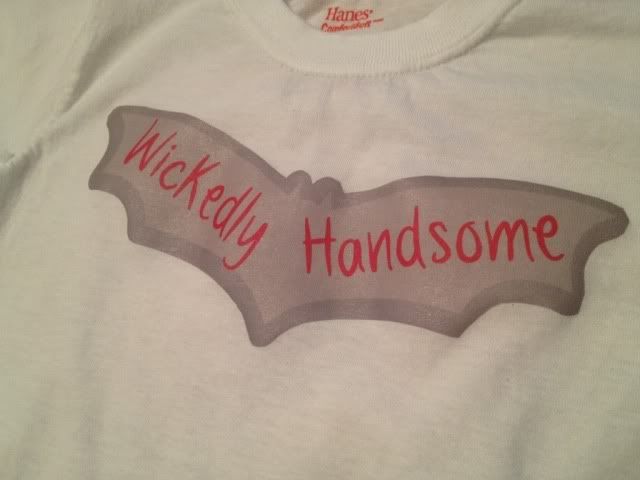
Today I used Avery printable heat transfer material for light colored t-shirts to make this cute little shirt for my son.  I got a pack of 6 t-shirts for about $5 at Target.  The bat shape was free a few weeks ago from the Silhouette store.  He had bones & facial features, but I deleted those and kept the bat outline and then created an offset and made it a darker grey.

The fun part was the text!


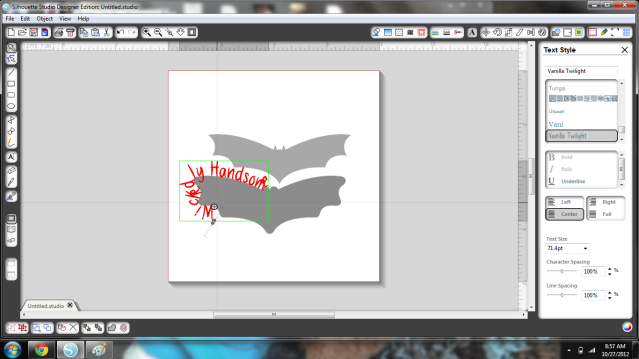
See, right by the W in Wickedly, the little compass-style symbol?  Click on that symbol and drag it to any shape and...


Voila!  Don't let go of your mouse button and you can drag it back and forth around the shape as well as on and off.

Very, very cool, but it wasn't what I wanted.  Rather than just angle the text I decided to try it this way:

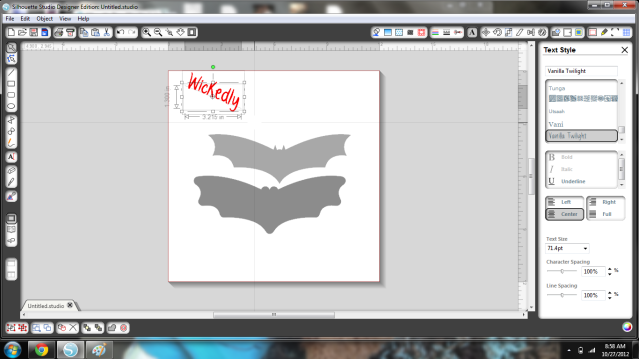
Draw a line (or circle, or rectangle, whatever.  I drew a line).  Drag your text to the line.


You'll see that the line you dragged it to went from red to grey.  That means it won't cut.  But will it print?

Nope!!  Awesome!

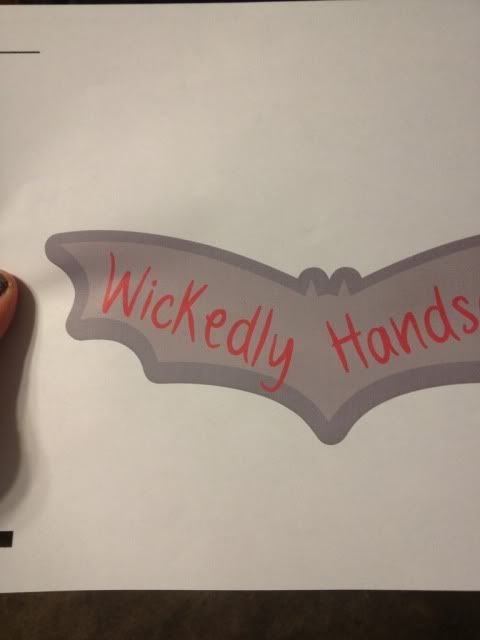
I selected the text + line and dragged it into the shape and did a test print.


Then I went back, flipped the whole thing, and printed on heat transfer paper.


Or, you could adjust the text using the green circle and tilt it however way, but experimenting with new toys (aka my Cameo) is something I'm having fun with.


10.28.2012

DIY Personalized Skeleton T-shirt

***The giveaway for a FREE Chomas Creations Marker Holder for the Silhouette Cameo is coming soon!  Open to blog followers only and you can earn up to 4 entries per person. Follow my blog if you aren't already and stay tuned!***

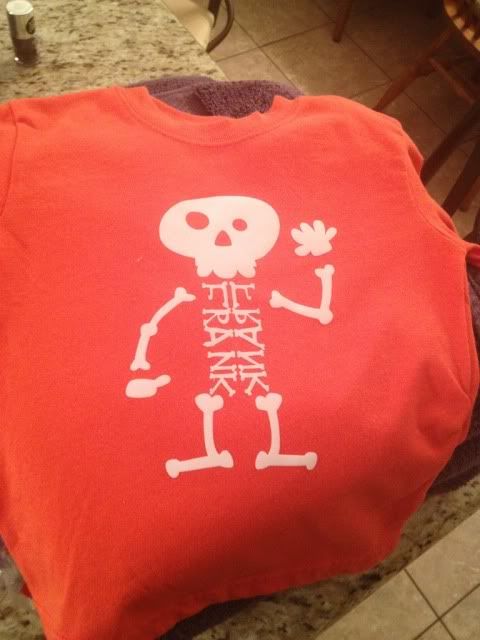
This little shirt was so easy to make!  It's a $4 plain t-shirt from Wal Mart, white flocked heat transfer material (sort of fuzzy & soft, a smidgy bit raised), and the "Skelly" shape from the Silhouette store.

Skelly is really easy to make.  Ungroup him and delete his torso.  I also got rid of the treat basket, but I might add that later since his lower hand is still bent like it's holding something.  If you'd rather not have that, erase that holding hand, duplicate the open hand, and flip it into place.

I found a bone-shaped font and wrote my son's name, mirrored it, and flipped it vertically.  Then it was resized to fit where the rib cage would go (I think I moved the legs a bit lower too.  You can move whatever you want!).  Then, just load the paper into the cameo & hit "Cut."

I used Silhouette brand white flocked heat transfer paper.  I did find that I had to iron directly onto the backing before it would adhere- having a cloth over it was too much of a buffer for flocked material I guess.


I still may cut the treat bag in black HTV and iron it onto that hand- we'll see!

Showing posts with label t-shirt. Show all posts

1.03.2013

3rd Birthday T-shirt

Someone is turning THREE years old over here! Where did the time go???!!!

I wanted to make him a t-shirt to wear to preschool on his birthday. I already had a black t-shirt and bought some Jolee's heat transfer paper for colored fabrics. I then wasted 2 sheets of it as my Cameo would not cut the design properly.

 I switched to some flat (regular) and flocked (thicker and kind of fuzzy). A lot of people don't like the flat HTV that Silhouette makes. I can see why. It cut ragged and it stretched when weeding, meaning again I trashed the cut.

However, the flocked HTV cut great!

 I had some Siser Easyweed left over from a shirt I made for my husband. It wasn't a color that I wanted to use but it was all I had left. I did end up liking the final product.

The green is Siser Easyweed and the yellow is the flocked Silhouette HTV.


I tried to take a photo of the flocked vs flat as well
Uploaded from the Photobucket iPhone App

I have a few other crafts to post, a lot to do, and even a bunch of stuff for What I Wore Wednesday- shocking, I know!

Thanks for reading, as always!

10.30.2012

DIY Wickedly Handsome T-Shirt, Plus Warped Text Tutorial

Halloween fun continues!

Today I used Avery printable heat transfer material for light colored t-shirts to make this cute little shirt for my son.  I got a pack of 6 t-shirts for about $5 at Target.  The bat shape was free a few weeks ago from the Silhouette store.  He had bones & facial features, but I deleted those and kept the bat outline and then created an offset and made it a darker grey.

The fun part was the text!


See, right by the W in Wickedly, the little compass-style symbol?  Click on that symbol and drag it to any shape and...


Voila!  Don't let go of your mouse button and you can drag it back and forth around the shape as well as on and off.

Very, very cool, but it wasn't what I wanted.  Rather than just angle the text I decided to try it this way:

Draw a line (or circle, or rectangle, whatever.  I drew a line).  Drag your text to the line.


You'll see that the line you dragged it to went from red to grey.  That means it won't cut.  But will it print?

Nope!!  Awesome!

I selected the text + line and dragged it into the shape and did a test print.


Then I went back, flipped the whole thing, and printed on heat transfer paper.


Or, you could adjust the text using the green circle and tilt it however way, but experimenting with new toys (aka my Cameo) is something I'm having fun with.


10.28.2012

DIY Personalized Skeleton T-shirt

***The giveaway for a FREE Chomas Creations Marker Holder for the Silhouette Cameo is coming soon!  Open to blog followers only and you can earn up to 4 entries per person. Follow my blog if you aren't already and stay tuned!***

This little shirt was so easy to make!  It's a $4 plain t-shirt from Wal Mart, white flocked heat transfer material (sort of fuzzy & soft, a smidgy bit raised), and the "Skelly" shape from the Silhouette store.

Skelly is really easy to make.  Ungroup him and delete his torso.  I also got rid of the treat basket, but I might add that later since his lower hand is still bent like it's holding something.  If you'd rather not have that, erase that holding hand, duplicate the open hand, and flip it into place.

I found a bone-shaped font and wrote my son's name, mirrored it, and flipped it vertically.  Then it was resized to fit where the rib cage would go (I think I moved the legs a bit lower too.  You can move whatever you want!).  Then, just load the paper into the cameo & hit "Cut."

I used Silhouette brand white flocked heat transfer paper.  I did find that I had to iron directly onto the backing before it would adhere- having a cloth over it was too much of a buffer for flocked material I guess.


I still may cut the treat bag in black HTV and iron it onto that hand- we'll see!