
I think it's pretty obvious that my favorite feature of the Silhouette software is print & cut, since I don't need to have anything on hand but plain white card stock. I bought the blue & brown pattern in the Silhouette store and filled up the shape's triangle banners. I then created a circle inside the triangle, turned off the cut lines, and color matched it. I then used print & cut to make 4 of those. The letters BABY were cut out of white card stock and adhered with rolled glue dots to give them a little dimension.
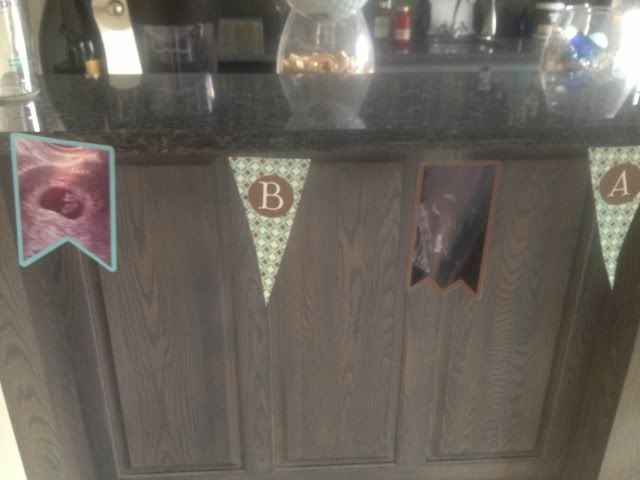
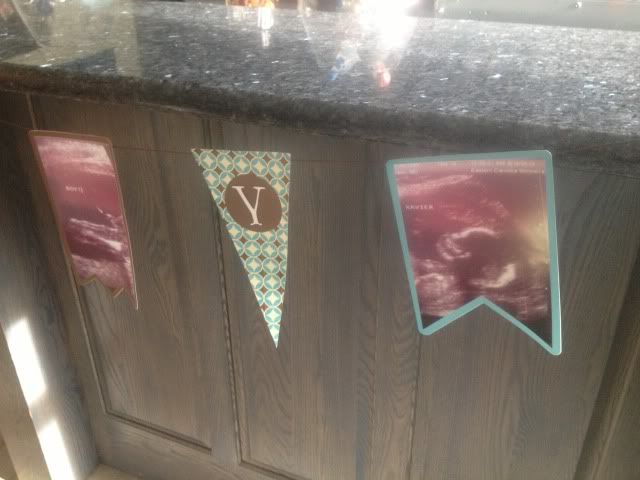
Next came my ultrasound photos. I used the other two shapes from the banner and shape cropped my ultrasound photos. This is really easy to do.
First lay your photo and then choose the shape you want it. Drag that shape over to the photo and align it where you want the crop. It might be hard to see, but that banner shape is over the baby in the ultrasound in the screenshot below.

Next, drag your mouse and highlight/select both the photo and the shape at the same time.

Last, click Modify (top right, looks like a rectangle with a circled M in the upper right corner- see pic below) and then click crop. Voila! Easy peasy! You may have to manually turn the cut lines on the shape when you crop it this way so just go to your cut line window (scissors with red, to the left of the font's A symbol) and click "Cut Edge."

I then created offsets for all 5 of my ultrasound photos and fill color matched them blue and brown to the triangle's pattern (you can see the blue offset for this particular ultrasound in the screenshots above).
Lots of printing & cutting comes next- I love print and cut, have I said that? All I needed to have on hand for this was 12 sheets of plain white card stock and some string.
I used glue dots on the corners of the ultrasound photos and stuck them to the offsets. I then used my bar, which is 8' 5" long, marked off 8' exactly, and measured out the string, taping the ends to the bar. Starting with the center ultrasound photo and working out, I taped the string about 1/2 inch down the back of each banner piece. For the party, this will be strung across the dessert table, with a white tablecloth behind it and white and blue tissue balls at each end (if I can get that particular craft mastered!).
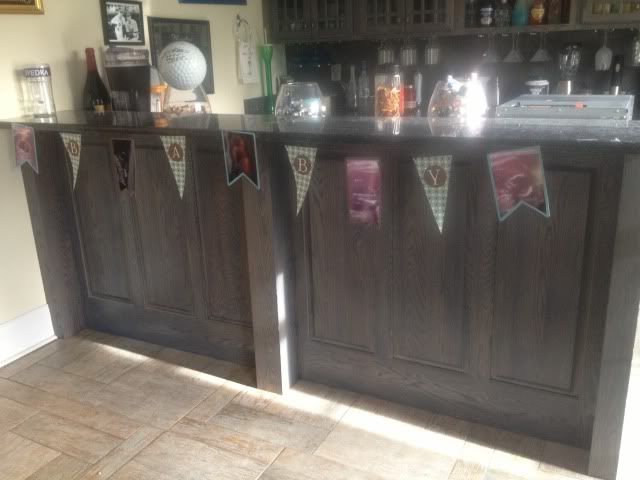

So cute! I love personalized decor and thought this was much more fun than a cluster of framed ultrasound photos.
If you don't like to print, cut, and glue x1000, just make every single banner piece one layer- IE, shape crop your ultrasound, turn off the cut lines, offset it, color it, turn those cut lines on, and print & cut it. That should print you a photo with a border, basically (the offset) and then cut it. Ditto on the letters- just turn off the cut lines and group them in the circle of the pennant and print & cut it into one piece.
Thanks for looking!
Saw this on the silhouette blog...love it! I,m not personally a fan of using print and cut, but I love how you have used it to personalize your decor!
ReplyDeleteHi Gigi! I haven't tried using print and cut but I'm gonna have to try it. Your banner turned out great! I saw you on the Silhouette blog.
ReplyDeleteHi - also just saw your link from the Silhouette blog. This is a very special little project - love what you have done and love those ultrasound pics... so cute. Wish I had a silhouette and that I was crafting when I had my babies (now 20 and 17 - seems like only yesterday!!!).
ReplyDeleteGood luck with the shower and with the baby too.
Paula x x x