Showing posts with label Banner. Show all posts

5.03.2013

Baby banner, and shape cropping with the Silhouette Cameo

I was reading the Silhouette blog for the first time in awhile and noticed that today's posting involved a shape challenge.  You can see it here, along with a link to the shape's download page.  Since I have been trying to make some baby shower decor (so far my tissue balls are more like tissue wheels...) I decided to use this as an opportunity to make a banner to string across the 8' long dessert table at the baby shower.

I think it's pretty obvious that my favorite feature of the Silhouette software is print & cut, since I don't need to have anything on hand but plain white card stock.  I bought the blue & brown pattern in the Silhouette store and filled up the shape's triangle banners.  I then created a circle inside the triangle, turned off the cut lines, and color matched it.  I then used print & cut to make 4 of those.  The letters BABY were cut out of white card stock and adhered with rolled glue dots to give them a little dimension.

Next came my ultrasound photos.  I used the other two shapes from the banner and shape cropped my ultrasound photos.  This is really easy to do.


First lay your photo and then choose the shape you want it.  Drag that shape over to the photo and align it where you want the crop.  It might be hard to see, but that banner shape is over the baby in the ultrasound in the screenshot below.


Next, drag your mouse and highlight/select both the photo and the shape at the same time.

Last, click Modify (top right, looks like a rectangle with a circled M in the upper right corner- see pic below) and then click crop.  Voila!  Easy peasy!  You may have to manually turn the cut lines on the shape when you crop it this way so just go to your cut line window (scissors with red, to the left of the font's A symbol) and click "Cut Edge."


I then created offsets for all 5 of my ultrasound photos and fill color matched them blue and brown to the triangle's pattern (you can see the blue offset for this particular ultrasound in the screenshots above).

Lots of printing & cutting comes next- I love print and cut, have I said that?  All I needed to have on hand for this was 12 sheets of plain white card stock and some string.

I used glue dots on the corners of the ultrasound photos and stuck them to the offsets.  I then used my bar, which is 8' 5" long, marked off 8' exactly, and measured out the string, taping the ends to the bar.  Starting with the center ultrasound photo and working out, I taped the string about 1/2 inch down the back of each banner piece.  For the party, this will be strung across the dessert table, with a white tablecloth behind it and white and blue tissue balls at each end (if I can get that particular craft mastered!).
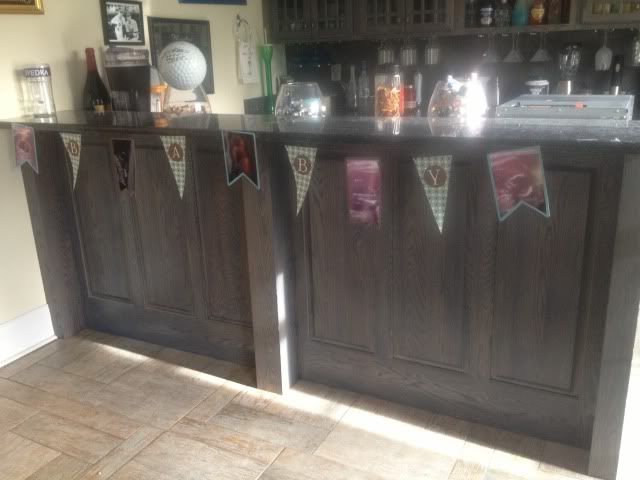
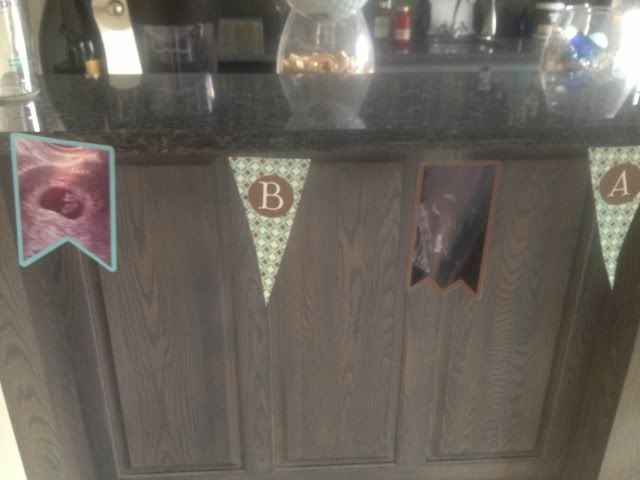

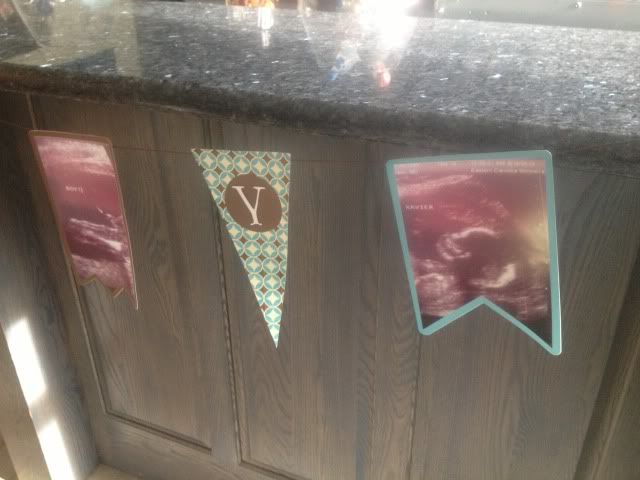


So cute!  I love personalized decor and thought this was much more fun than a cluster of framed ultrasound photos. 

If you don't like to print, cut, and glue x1000, just make every single banner piece one layer- IE, shape crop your ultrasound, turn off the cut lines, offset it, color it, turn those cut lines on, and print & cut it.  That should print you a photo with a border, basically (the offset) and then cut it.  Ditto on the letters- just turn off the cut lines and group them in the circle of the pennant and print & cut it into one piece.

Thanks for looking!


11.14.2012

DIY Harvest Banner with the Silhouette Cameo (Pic heavy!!!)

I have seen lots of fall decor around lately.  I've even seen files to buy all or parts of a banner both in the Silhouette Online Store & for sale around the net by various file makers.

The thing is, I like being creative.  I wish I could freehand draw in Silhouette Studio; that would make it perfect.  I *almost* bought a set of files on the Sil Store for a banner, but each letter in "Harvest" was a different 99c download, and I couldn't find the file for the H!  So, DIY it was!  I managed to make this ALL with shapes I already owned.

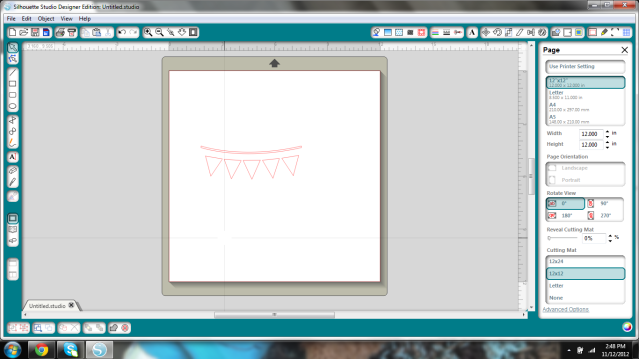
I started with this shape.  I used it to make a tiny print & cut banner that I made to go with a scarecrow in a plant.


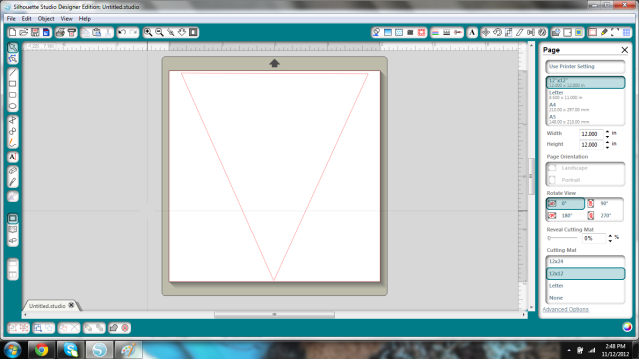
I deleted the rope shape and all of the triangles except for the middle one.

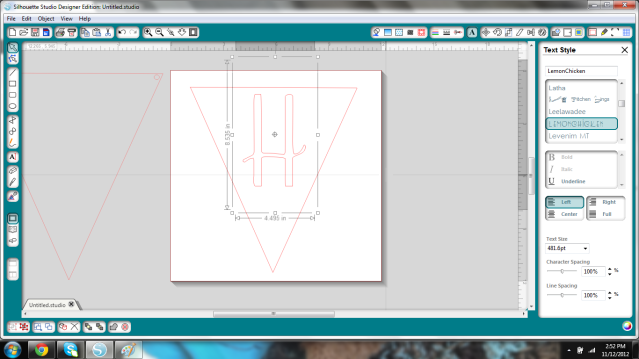
I wanted it to be a large banner so I stretched this as large as would fit on the 12x12" mat.


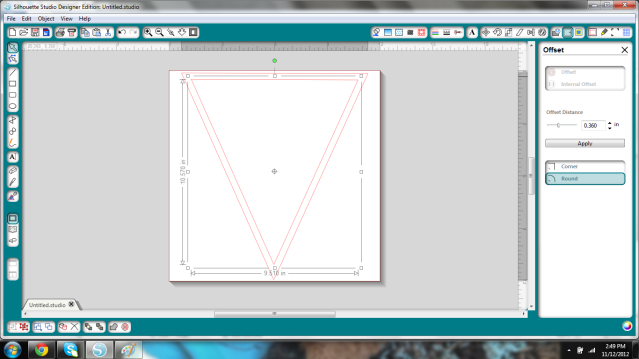
I then created an Internal Offset and increased the offset distance until I liked how it looked.


Next I added two small circles (I made one and duplicated it so they'd be the same, actually) to string my banner up.  Twine in mind at this point.


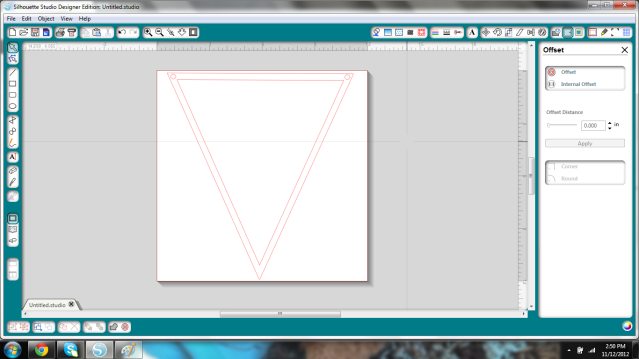
Now- remove your inner pieces, and group the holes & outer triangle.  Save it, as you'll need to cut it for each letter.  I'll need 7 for Harvest.  Set it aside; you don't need it any more.

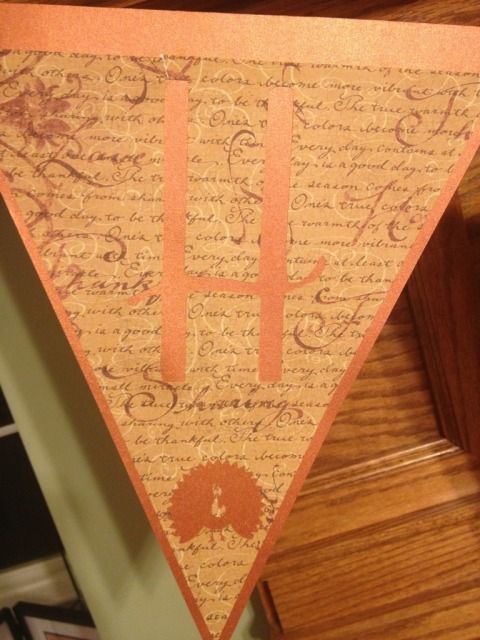
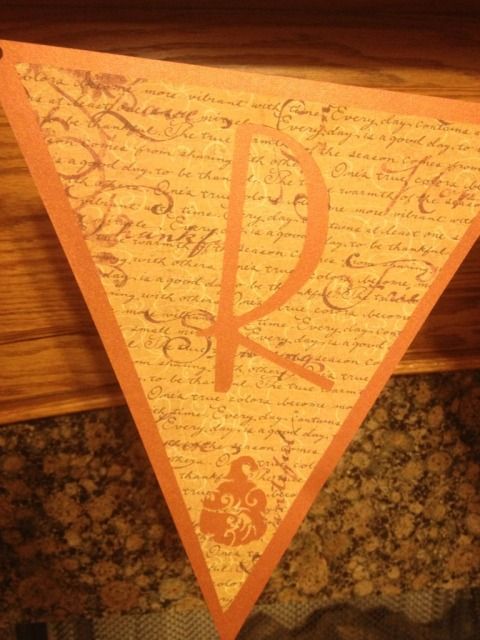
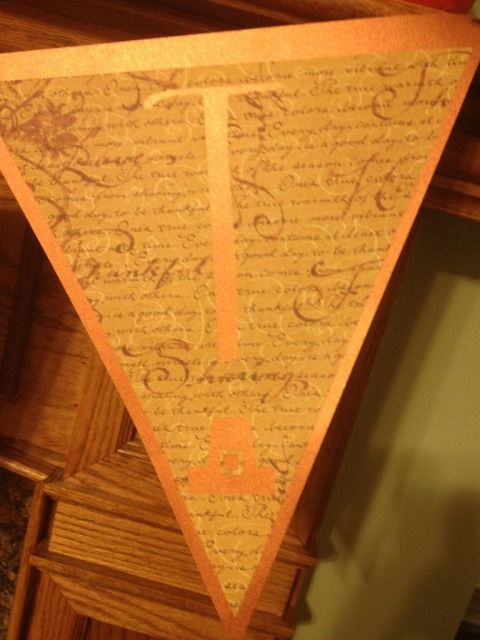
Take your inner (the Internal offset) piece, type your first letter, find your font, resize, and stick an image you like on the bottom (if you want).  I had a group of leaves, a pumpkin card, a gourd-type sketch, a turkey, and I took the hat from the Scarecrow shape which I stretched taller and added 2 squares for a buckle- instant pilgrim hat!


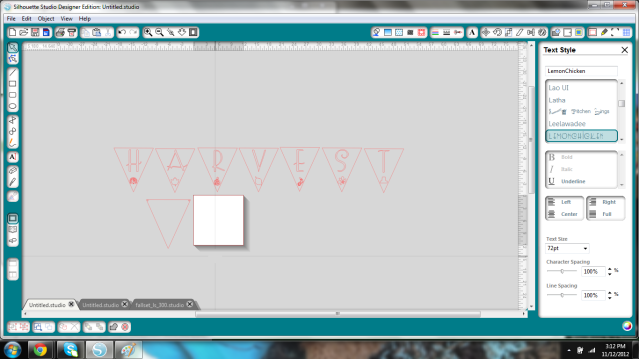
I just kept duplicating the Internal Offset triangle and resizing shapes that I thought would look good, and when done, I lined them all up and zoomed out so I could get a look at it.  I didn't duplicate the outer triangle 6x because I just used my imagination.


It's kind of hard to see from that pic but I was just getting a general idea of how it would look in case I needed to tweak it.

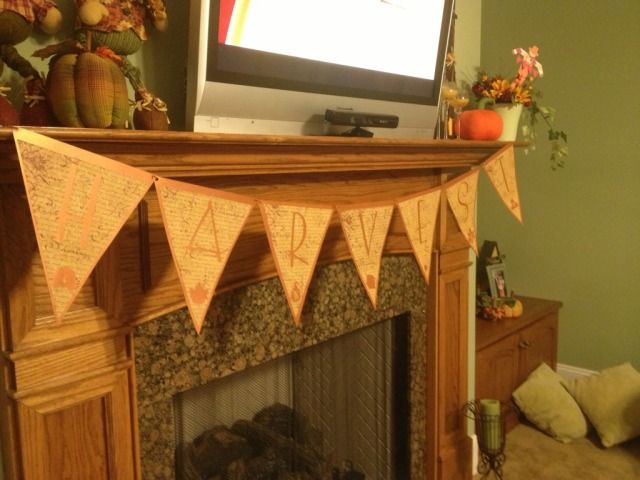
I then went to Michael's, since I have a library of vinyl but no cardstock, and just kind of visualized it with the current fall decor on the mantle.  This orange background flag is GORGEOUS.  I wish I could photograph it or describe it accurately.  It's a deep orange, but iridescent, almost like a good expensive fabric that shimmers and takes on a life of it's own when you move.  Anyway, total for 14 sheets of paper was $8.86.

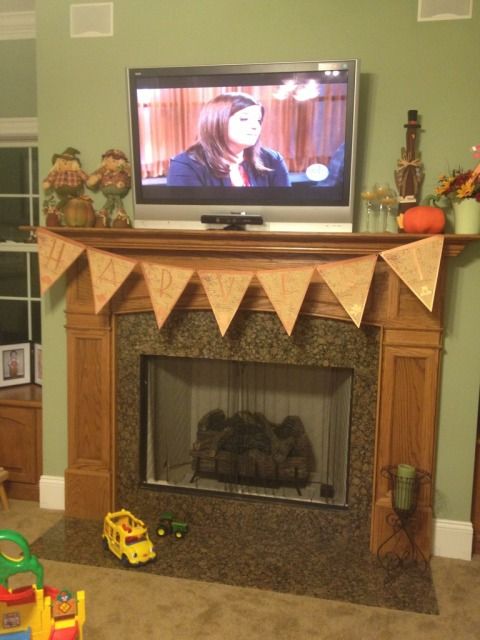
Cut, glue, string, & reveal!

My house has toys on the floor.  I have a toddler.  Also, I love the food network. 

I used brown string that I got at Michael's in a 3-pack of brown shades for about $2.  I strung it so that the string was behind the triangles from hole to hole rather than in front.  Oh, and the length?  I taped it to one end of the mantle, strung the flags on, and hoped like heck that the flags weren't going to be too long.  I then pulled it up, taped the other end, and slid the letters back and forth until I liked the spacing.

I have to say, I really like how it came out!


I used 3M Spray Adhesive.  I actually really dislike working with glue.  I find spray adhesive the easiest to use, although I have to keep washing my hands, but it does give it a nice and fast even coat.  It's not completely tacky for the first minute or so, making it re-position-able (at first).  Little pieces, like the turkey face, hat buckle, or inner letter pieces I used a glue stick.


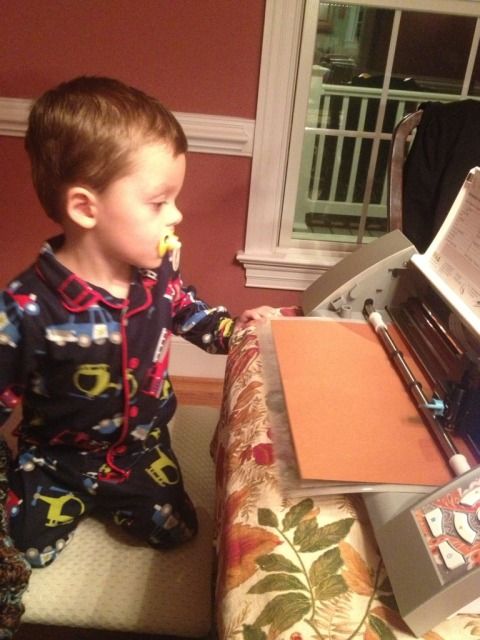
I had a "handy helper" (Oh, Mickey Mouse Clubhouse, how you've implanted into our brains after nearly 3 years) for most of this too!


Showing posts with label Banner. Show all posts

5.03.2013

Baby banner, and shape cropping with the Silhouette Cameo

I was reading the Silhouette blog for the first time in awhile and noticed that today's posting involved a shape challenge.  You can see it here, along with a link to the shape's download page.  Since I have been trying to make some baby shower decor (so far my tissue balls are more like tissue wheels...) I decided to use this as an opportunity to make a banner to string across the 8' long dessert table at the baby shower.

I think it's pretty obvious that my favorite feature of the Silhouette software is print & cut, since I don't need to have anything on hand but plain white card stock.  I bought the blue & brown pattern in the Silhouette store and filled up the shape's triangle banners.  I then created a circle inside the triangle, turned off the cut lines, and color matched it.  I then used print & cut to make 4 of those.  The letters BABY were cut out of white card stock and adhered with rolled glue dots to give them a little dimension.

Next came my ultrasound photos.  I used the other two shapes from the banner and shape cropped my ultrasound photos.  This is really easy to do.


First lay your photo and then choose the shape you want it.  Drag that shape over to the photo and align it where you want the crop.  It might be hard to see, but that banner shape is over the baby in the ultrasound in the screenshot below.


Next, drag your mouse and highlight/select both the photo and the shape at the same time.

Last, click Modify (top right, looks like a rectangle with a circled M in the upper right corner- see pic below) and then click crop.  Voila!  Easy peasy!  You may have to manually turn the cut lines on the shape when you crop it this way so just go to your cut line window (scissors with red, to the left of the font's A symbol) and click "Cut Edge."


I then created offsets for all 5 of my ultrasound photos and fill color matched them blue and brown to the triangle's pattern (you can see the blue offset for this particular ultrasound in the screenshots above).

Lots of printing & cutting comes next- I love print and cut, have I said that?  All I needed to have on hand for this was 12 sheets of plain white card stock and some string.

I used glue dots on the corners of the ultrasound photos and stuck them to the offsets.  I then used my bar, which is 8' 5" long, marked off 8' exactly, and measured out the string, taping the ends to the bar.  Starting with the center ultrasound photo and working out, I taped the string about 1/2 inch down the back of each banner piece.  For the party, this will be strung across the dessert table, with a white tablecloth behind it and white and blue tissue balls at each end (if I can get that particular craft mastered!).


So cute!  I love personalized decor and thought this was much more fun than a cluster of framed ultrasound photos. 

If you don't like to print, cut, and glue x1000, just make every single banner piece one layer- IE, shape crop your ultrasound, turn off the cut lines, offset it, color it, turn those cut lines on, and print & cut it.  That should print you a photo with a border, basically (the offset) and then cut it.  Ditto on the letters- just turn off the cut lines and group them in the circle of the pennant and print & cut it into one piece.

Thanks for looking!


11.14.2012

DIY Harvest Banner with the Silhouette Cameo (Pic heavy!!!)

I have seen lots of fall decor around lately.  I've even seen files to buy all or parts of a banner both in the Silhouette Online Store & for sale around the net by various file makers.

The thing is, I like being creative.  I wish I could freehand draw in Silhouette Studio; that would make it perfect.  I *almost* bought a set of files on the Sil Store for a banner, but each letter in "Harvest" was a different 99c download, and I couldn't find the file for the H!  So, DIY it was!  I managed to make this ALL with shapes I already owned.

I started with this shape.  I used it to make a tiny print & cut banner that I made to go with a scarecrow in a plant.


I deleted the rope shape and all of the triangles except for the middle one.

I wanted it to be a large banner so I stretched this as large as would fit on the 12x12" mat.


I then created an Internal Offset and increased the offset distance until I liked how it looked.


Next I added two small circles (I made one and duplicated it so they'd be the same, actually) to string my banner up.  Twine in mind at this point.


Now- remove your inner pieces, and group the holes & outer triangle.  Save it, as you'll need to cut it for each letter.  I'll need 7 for Harvest.  Set it aside; you don't need it any more.

Take your inner (the Internal offset) piece, type your first letter, find your font, resize, and stick an image you like on the bottom (if you want).  I had a group of leaves, a pumpkin card, a gourd-type sketch, a turkey, and I took the hat from the Scarecrow shape which I stretched taller and added 2 squares for a buckle- instant pilgrim hat!


I just kept duplicating the Internal Offset triangle and resizing shapes that I thought would look good, and when done, I lined them all up and zoomed out so I could get a look at it.  I didn't duplicate the outer triangle 6x because I just used my imagination.


It's kind of hard to see from that pic but I was just getting a general idea of how it would look in case I needed to tweak it.

I then went to Michael's, since I have a library of vinyl but no cardstock, and just kind of visualized it with the current fall decor on the mantle.  This orange background flag is GORGEOUS.  I wish I could photograph it or describe it accurately.  It's a deep orange, but iridescent, almost like a good expensive fabric that shimmers and takes on a life of it's own when you move.  Anyway, total for 14 sheets of paper was $8.86.

Cut, glue, string, & reveal!

My house has toys on the floor.  I have a toddler.  Also, I love the food network. 

I used brown string that I got at Michael's in a 3-pack of brown shades for about $2.  I strung it so that the string was behind the triangles from hole to hole rather than in front.  Oh, and the length?  I taped it to one end of the mantle, strung the flags on, and hoped like heck that the flags weren't going to be too long.  I then pulled it up, taped the other end, and slid the letters back and forth until I liked the spacing.

I have to say, I really like how it came out!


I used 3M Spray Adhesive.  I actually really dislike working with glue.  I find spray adhesive the easiest to use, although I have to keep washing my hands, but it does give it a nice and fast even coat.  It's not completely tacky for the first minute or so, making it re-position-able (at first).  Little pieces, like the turkey face, hat buckle, or inner letter pieces I used a glue stick.


I had a "handy helper" (Oh, Mickey Mouse Clubhouse, how you've implanted into our brains after nearly 3 years) for most of this too!