Showing posts with label review. Show all posts

10.18.2015

Curlformers

I have really long (at least mid back if not lower, though with some shorter layers around my face that are more like armpit length), really thick, really straight hair.  When a pro does my hair it will curl and hold it, but it'll also be hairspray stiff and I hate that.  I have tried to curl it myself so many times.  I have used hot rollers, rag curls, curling irons of varying sizes and price points, and even using my Chi to curl which I've seen give gorgeous curls to people!  Not me though.

Before I go further- I got no free products, none of these links are affiliate links, I'm making no money or any other sort of compensation for this review.  I just like to a) share products and stuff that I like, and b) share detailed reviews, especially if I've looked around online and couldn't find the info I needed, maybe someone else had the same thing to wonder about and I can help clear that up.

via www.curlformers.com


I rarely go to Sally's but recently when I did I noticed Curlformers.  I thought they looked weird and like they'd give the fakey ringlet cheerleader type curl, which isn't what I was going for.  I love big, bouncy, Victoria's Secret type curls.  While my store had a tiny selection, I did some research and noticed there are so many sizes.  There are 3 different curl types and 3 or 4 different lengths (the different colors are for clockwise and counterclockwise curls). I started googling reviews and it seemed like thick hair needed a ton of these things, so I finally broke down and ordered 40 of the Long Barrel Curls and it also came with hooks.  Now, if I wanted my hair curled near the root, I should have ordered the Extra Long Barrel Curls because with the Long ones, the shortest layer of my hair (right by my face, it's grown out long bangs) has about 1" or so hanging out if I have the Curlformer near the root.  I wanted the curls to start more mid-section though so it worked out OK for me.  Now, one thing that really does bug me is that I paid for 40 of them, but only needed 19 to cover my hair!  I have sooooo much hair that this really surprised me.

Putting them in was really simple but like I said I had done some googling and I watched some Youtube videos of girls with straight hair using them.  The hook is huge and all you have to do is slide the curlformer all the way onto the hook, then take a section of your hair, twist it in the direction of the curlformer (not all the way- just where you're going to hook it), hook that piece of hair, and then slide the curlformer towards your hooked hair, eventually pulling the hook all the way through and allowing the curlformer to spring into shape with your hair inside.  My hair takes forever to air dry but I had let it air dry for about 90 minutes, occasionally scrunching it inside a towel.  I didn't use any styling cream.  It probably only took me 20-30 minutes to do my whole head.  I was expecting longer for my first time.

Step 1.


after you have the curlformer on the hook a la photo #1, hook your hair and pull the hook back down through the curl former.  Easy peasy.
Am I really sharing this pic?


I wasn't sure how long I was going to leave them in.  Some people sleep in them but that seemed really painful.  I did try laying down and since I started them mid-hair I could kind of spread them out behind my head so it's possible you could get comfortable. They aren't hard and they are mesh but it's not exactly soft.  It was only about 4:30PM at this point so I figured even if I only left them in til bedtime that's at least 6 hours.  Well, the family had other plans, and rather than go out and get stared at, I started blow drying my hair at 6:40.  I did use high heat and I'm not sure that's recommended but I move the dryer around a lot so I wasn't worried.  I did this in between doing my makeup.  I blow dried for like 5 minutes (I really hate blow drying my hair..), did my base, 5 minutes, contour, 5 minutes, eyes.  When my hair was cooled I finally went ahead and pulled the curlers out.  I wasn't totally sure my hair was dry.  Air drying my hair straight would take forever to dry- I can sleep with it wet and wake up with it damn.  I'm guessing the combo of it being mesh, it separating my hair out, and 15 minutes of the hair dryer really helped, because it was dry!  And...curly!  And very soft!

I kind of smushed them a little bit with my fingers to get them to combine but very gently and sparingly.  I sprayed them with Elnett and that's pretty much it.  I used a fine comb from my part to the top of my ears or so to smooth out that hair.  I was so surprised by the results.

Time-
Shower- wet hair- about 90 minutes
Curlformer use- about 30 minutes
Drying time- about 2 hours later, 15 minutes of dryer
Total time from out of shower-removing curlers- about 4 hours 15 minutes

That sounds like a lot of time, and it probably is if you can use a curling iron to get beautiful barrel curls, but if you're like me and can't do so after literally a decade if not more of practice, and your hair never holds them anyway, it's awesome.  Obviously you can do other things during most of that 4.15 hour time span- putting in and drying would be the biggest time sinks.  Removing takes seconds.  Styling is up to you but as noted I barely styled them.

I took a lot of pics- this is around 2 hours after removing them, and much of that time was spent outside in the eastern NC humidity.

This is around 4 hours later, after I couldn't sleep and laid around in bed playing on my iPad


And this is next day curls with a little bit of styling help.  When I say little, I mean I twisted my hair back in the direction of the curl (away from my face on both sides) and sprayed lightly with Elnett again.  Again I fine tooth combed from my part to about the tops of my ears just to smooth that straighter hair.


Ok, so, I showered Tuesday afternoon, then did the styling thing.  Then woke up Wednesday and that would be the pics you just saw.  This is how I looked waking up on Thursday:


Even though I try to be really really gentle with my hair since I dye it red, I can't handle not showering more often than every other day.  My hair gets greasy fast.  I'm going to try some of the new Bumble & bumble Pret A Powder to see if I like it better than other dry shampoos, but I haven't grabbed it yet.  So, at this point in the hair curling experiment, I showered again.  Bye bye pretty curls!  They'll be back on Saturday when I have a dressy special event I'll need to style for.


*A few weeks later*

So I had been waiting on hitting Post on this because I decided I wanted longer curlformers.  I ordered a set of 29" and wanted to show the difference.  The one on the right, the 16" one, to get the end of my hair curled I had to set it where you see it.  The one on the left is 29" and not only is it at my roots, but it's not even full of hair.  If you look at the bottom curl of that curlformer, then go up to the 3rd from bottom, on the right side you can just see the end of my hair.  That's a LOT of growing room and I can still position them lower.  It doesn't make a difference to have empty curlformer at the end if you want to buy a longer length  and use on both long and short hair.


For reference, here's how long my hair is.  I possible could have been ok with the 22" length, but I'm still growing my hair.  I like it long.


Final thoughts, or tl;dr:  I have long, thick, straight hair that flat out won't hold a curl with a curling iron, flat iron, hot rollers, going to sleep with rag twists on wet hair, etc.  Using Curlformers (and occasionally I won't even use heat!  Sooo much better for my hair) I can get curls that look great and last at least 3 days if not longer (sorry, gotta wash my hair sometime!).  I don't even use styling products except for some light hair spray.  They are easy to use and while not 100% comfortable if you need to lay down, it's doable.  My hair dries faster than normal while in them, I guess because they're spread out more, and I really can't think of anything negative to say.  I love them.  I use them almost every time I wash my hair.

7.16.2014

Red Velvet hair for next to no cost at home

I have gotten pretty bad at keeping this up.  Honestly, I'm a little overwhelmed by the e-mails I get about a few reviews I've done, and more than once I've been contacted about free products to try but that really isn't my thing.  I started this blog because when Pinterest exploded I realized how few truly impartial reviews are out there.  I'm human and what may work for me may not work for you, and vice versa, but I'm happy to post honest, unbiased, unsponsored reviews of anything that catches my eye (when I actually do it anyway!).

So we left off here in my attempt to DIY red velvet hair.  I was testing the effectiveness of Manic Panic bleach, as all I was getting was a dark brown plum color and not bright red.  I had brought Pravana Vivids hair color and strand tested it several times but it just was not going to work without pre lightening.  Well, even on the spot on bleached in that last post, it didn't stick!  I can't tell you how sad I was.  Pravana has amazing reviews.

I kept googling around and kept coming across L'oreal Hicolor Hilights for Dark Hair  (not an affiliate link).  I had seen some bloggers who again just got a red tint, though better than any tint I managed in the past, and some who got gorgeous, nearly Ariel hair color.  I bought a tube of Magenta and a tube of Red at Sally's for around $5 each, plus a bottle of Orero Developer in 30 Volume for under $4.  Pay attention to the box- you want Hicolor Hilights, but it's wonderful for doing your whole head.  I already had a mixing bowl and gloves, and if you like to use a brush, you need one of those too.  I can say from several strand tests and several root retouch sessions that there is no color difference on my hair between Red and Magenta.

The box says 2.4 oz developer to 1 tube color, but I didn't feeling like dealing with that, so I just eyeballed 2.5 in my bowl (which is labeled 1, 2, 3, 4, 5, 6, no halves or quarters or .4s) and squeezed out the color tube.  I mix it up with a leftover chopstick until there are no red lumps, put on my gloves, and spread it all over my head.  Even when doing root growth I will still do all over color to brighten it up.  When my hair is saturated I will put it in a ponytail and hit it with the blow dryer for 5 minutes.  I then put a plastic bag over my hair and wrap the whole thing in a towel.  15 minutes later I will blow dry for 5 more minutes over the bag and then rewrap the towel for 15 more minutes, at which point I rinse.  I rinse in cold water and it's mostly clear after 5 minutes.  I then condition, usually with Aussie 3 Minute Miracle Moist, rinse that out, and go on my way.

To maintain, well, I really don't.  After the initial rinse I start taking hot showers again and I shower almost every day, 2 bad things for maintaining red, but this really doesn't fade.  I use Ulta's Red shampoo, conditioner, and every week or so the color depositing glaze from that line (not affiliate links), but it seems like a red-brown stain, and maybe that's why I lose vibrancy but not color?  Maybe I won't use the glaze for the next 6 weeks and compare.  I've also used a volumizing shampoo and a hotel shampoo without any issues, and if I really want my hair to look great or just every so often for hair health I will use Aussie 3 Minute Miracle Moist again.

It loses its shocking vibrancy over time, but not it's red color.  I hope the pics I will be showing you in a sec will help make that clear.  It does not fade to gingery-bleachy-auburny-browny-ick.  I do a root touchup and a head refresh every 6 weeks or so.  For that, I do the same thing as I've already described, but skip the heat since my roots take to color better than my length (has to do with the heat of your scalp and your type of virgin hair, because of hair type you may or may not have similar results with that method).

As for staining- I do not do a Vaseline barrier on my hairline/ears, but this has never stained my skin after I rinse everything off.  This does leave a red tint on my shower floor, but if I pour bleach over it and let it sit for 10 minutes and then rinse, that tint is gone.  It will stain towels/clothes when it's in it's dye form, but I've had no issues with wet hair post-dye transferring to bed sheets, clothing, etc.  My shower water never runs 100% clear but the pink tint that still rinses out is so faint that you probably won't notice if you aren't looking for it.

Ok on to photos.  Please note- how the red color is NOT ginger after 6 weeks, and how dark brown my roots are.  While this product is mixed with a developer, I didn't have to pre-lighten it or bleach it or anything harsh like that.  My hair is remarkable undamaged after all it's initial abuse and now regular use of this product.

Please also note...would you call this magenta?  I wouldn't.  That's why I noted I saw no color difference.  Red and Magenta look the same on me.  I haven't tried any other colors.  I would love a darker, more magenta color for real, but I'm happy with this!  Photos taken in same window-less bathroom about 1 hour apart.  I will update with weekly photos over the next 6 weeks to show on the vibrancy and color changes over that time, and I will not use the color depositing glaze I mentioned just in case that affected things.


5.22.2014

Manic Panic Flashlightning Bleach Before & After Review- on the journey to Red Velvet hair

Generally I post pics and reviews of things when I myself had looked for reviews and hadn't found any, or hadn't found the info I needed.  In this case, I wanted to bleach my dyed hair (as part of a whole hair change experiment of sorts, I guess) and couldn't find much before & after for the Manic Panic dye.  I've read that it's effective and gentle, and it's in a kit so it's nearly idiot-proof, but even in Youtube reviews I generally mostly saw only the after and the person just talked at the camera.  Or it would say it was a bleach review, but then you watch and they had actually used Color Zapp and then bleached 4x in one week (OMG, how does she still have hair???).  Anyway, I review things in hopes of helping, I don't get free products, paid to review, or even use affiliate links.  Click the links to buy the products or don't, I don't make money off it either way and I somewhat distrust reviews like that.

So, hair history.  My hair is light brown and I've been dying it dark for a long time.  I've also wanted Red Velvet hair for a long time.  First I tried L'oreal Power Reds in R48, over hair that had been dyed a few months prior with John Frieda 4N.  Power Reds are popular but also very hit or miss.  I was a miss.  I got nearly black hair with some red glint in the sun, like cherry coke I guess.  Pretty, but not what I wanted.

This is with a flash or else you wouldn't see anything but darkness.  It's pretty here, but it was nothing like this unless I was standing still in bright sunlight.


 After trying to fade it in the shower for about 2 weeks, I bought Manic Panic Amplified in Vampire Red.  Due to the before and after pics on their site, including the unbleached ones, I thought I'd be good.  Nope!  My hair turned faintly purple with a bit more red in the light.  It was actually gorgeous so I left it for awhile.  Keep in mind, my hair was DARKER than the pic above shows, before using the MP dye.


Ok, so still not red velvet.  After looking at these swatches and their claim to lift dark hair, no pre-bleaching needed, I chose L'oreal Hicolor in Dark Auburn Red with a 30 vol. developer.  I didn't really want to but I figured this is better than straight up bleaching.  Well, it didn't really work.  In fact, in normal light I just have dark brown hair again.  In sunlight there's SOME red.  I took this literally standing in bright sunlight.  I also used Ulta shampoo, conditioner, and glaze for red hair, but the reviews on that are so-so and I'm not sure they really help.


So now, I'm kind of at that point.  Screw it, I'm going to need to bleach.  But I've damaged my hair so much, haven't I?  Test strand time.

I grabbed some Manic Panic Flash Lightning in Vol. 30 and bleached a test strand of my hair from a few inches down to the ends.  I wrapped it in foil and left it on for 90 minutes before rinsing it out.  I wasn't sure what to think.  To me it actually looked like a nice red, but in photos and to my 4 year old, it was orange, so there went my dreams of bleaching once and being done.

I decided to bleach the bottom half of what I had already bleached a 2nd time, so I conditioned, left it on for a half hour, rinsed, dried, and re-bleached.  Don't do this to your whole head.  This is a small test strand and I was fully prepared for it to fall off at this point. 

I reapplied bleach to the bottom, wrapped in foil, and left it in for another 90 minutes.  Rinse, condition, rinse, dry, voila.  

See how most of my hair just looks dark brown?  Yeah.  Sigh.


I don't really know what to call the bottom color.  It's light orange.  That's the best I can think of.   However, it was bleached twice for a total of 180 minutes, or 3 hours, in the span of about 5 hours, and it's not fried, so that's a plus.

My downside to the MP?  This is all the bleach you get.  You get a decent amount of developer, but this packet mixed with developer isn't all that much more product in volume, so if you have long hair, I'd buy at least two, if not 3 of these kits if this is what you want to use.


My next step is attempting an ombre ponytail bleaching and then trying out my Pravana reds and magentas!  I hear they're the best unnatural color dyes on the market, so I'm really excited try this out.  I'll use my test strand first to see it on undyed, 1 bleach, and 2 bleach hair and see how much bleaching I really need to do.  I'm hoping none, 1 worst case scenario, but I'll update when I figure out what I'm doing :)

5.02.2014

Lashes

It's been awhile...anyone still out there?

I've been playing a lot with makeup lately, which isn't like me, but it's fun!  I always wished I had big, long lashes and I'm not interested in extensions any more.  I've tried two mascaras, Benefit They're Real and Smashbox Full Exposure, along with Younique 3D Fiber Lashes (I DO NOT sell them, fyi!) and Ardell false lashes in Wispies.  I also played with the old staple, Great Lash, that I've never actually liked but seems to always make "Best of" lists and NYX Doll Eyes which seems to have a cult following (it's in the drug store section at Ulta but I'm not sure it's a drug store brand.  It's cheap though).

Comparison pics, in order:

No mascara- nuff said

Younique 3D fiber mascara ($32ish shipping from younique's website)- I hate that you have to buy this stuff via a consultant (even on the company's website) but the effort required is minimal and it's comparable to the fake lashes.  One coat of gel, one coat of fiber lashes from 1/2 way up my lashes to ends, another coat of gel.  Bam.  Done.  If it appears to have a clump of fibers on my lashes I just hit it with a lash comb.  It lasts all day and seems waterproof (tear proof, rain proof, haven't gone swimming) as well.  I have Smashbox Full Exposure on my bottom lashes in this photo.

Ardell false lashes ($4.49/pair, $6.99 for Duo gel, $6.99 for a false lash applicator that is a toss up on helpfulness, everything from Sally's)- I'm using Duo gel and I trimmed about 1/4" off in the inside ends of these.  Putting them on was a PITA.  Duo gel smells, it's messy, it does take practice and you better have a good way to wipe the glue off your cheeks when you smear it trying to wash your eye area (tip, baby oil on a cotton ball works well in a pinch), you can kind of "feel" them, and also, I trimmed the length once they were on my eye as they were literally touching my eyelashes.  I like the look, I don't like the effort.  In the photo, I have just a touch of Benefit They're Real on my bottom lashes and have combed through to combine my real and false lashes.

Benefit They're Real! mascara ($23, Sephora)-  This is probably my favorite mascara brush ever, but the mascara itself seems average.  I put on a coat, then other eye, then back to first eye for coat 2, and repeat on eye 2.  Seems to have good staying power but is NOT waterproof.  This is on my bottom lashes as well.

Smashbox Full Exposure ($19.50, Sephora)- This is my favorite mascara, but given the choice I use the Fiber Lashes.  I keep this in my purse or travel kit as I don't like how Fiber Lashes is 2 tubes to pack instead of 1.  My lashes look really full and long but it does seem to flake.  I like to use Anastasia Lash Genius Waterproof Topcoat ($21, Sephora) over the top to help with that.  For comparison purposes I am NOT using Anastasia in this photo.  This is on my bottom lashes as well.

NYX Doll Eyes ($6.99, Ulta)- this is cheap, but I do feel like it elongated my lashes pretty well.  If I needed a mascara in a hurry, the drugstore is where I'd head, and I'd look for this over Great Lash any day.  This is on my bottom lashes as well.

Maybelline Great Lash ($2.99, CVS)- It's cheap and it does make a difference vs no mascara, but it's not even in the realm of favorites for me compared to above.  This is on my bottom lashes as well.


Summarize:  I like the look of the false lashes (especially the cost, in comparison!) but for ease and comfort I like the fiber lashes.  Full Exposure is my other favorite, which is even easier than fiber lashes and cheaper as well.  I like to use Anastasia Lash Genius on the top of Full Exposure, which negates the cost effectiveness, but makes it pretty much bullet proof.  I don't get the hype of Benefit "They're Real!" or Nyx/Maybelline value drugstore mascaras.


2.09.2013

Eggless Chocolate Chip Cookie Dough FroYo

Ice cream for breakfast!  Being pregnant I'm having a hard time with food right now.  I'm also diabetic so I can't give in to a lot of my cravings.  This one is OK for me- I'm not calling it a diabetic recipe though, check your own blood sugar for your body's verdict on that- and obviously healthier than just eating a bowl of cookie dough.


What you need:

1/4 cup sugar
1/2 cup packed brown sugar
1/2 cup butter, softened for easier mixing
1/4 tsp salt
2 tsp vanilla extract
1 cup flour
1/4 tsp baking soda
1 cup mini chocolate chips
1 cup vanilla yogurt

Beat sugars and butter together until mixed and creamy.  Add vanilla and mix again.  In a separate bowl stir together flour, baking soda, and salt.  Once mixed, stir in chocolate chips.  Mix the two bowls together by hand.  Stir in yogurt until fully combined.  Freeze overnight.

My quality control specialist.  Once he realized those were chocolate chips, he disappeared to eat a bowlful.

Before freezing, it really does look like cookie dough!


And after freezing, ice cream it is!


1.31.2013

Cloud Bread Recipe & Review

I've been seeing Cloud Bread a lot on Pinterest lately.


Doesn't it look just like fresh yummy bread?

I'm supposed to be eating low carb/high protein for awhile, but I'm Italian.  I'm pretty sure my blood is made of carbs.  I decided to  make this bread to see how it turned out.

I ended up using this recipe BUT I googled a few recipes first, and added 1 pinch of salt to this recipe.  Also 1 packet of sweetener didn't equal 1/8 teaspoon, it's nearly two packets.  So, modified recipe below:

You need:

3 eggs
2 packets or 1/8 teaspoon artificial sweetener
3 tablespoons of either fat free cream cheese OR cottage cheese
1/4 teaspoon Cream of Tartar
Pinch of Salt

Recipe:

Preheat oven to 300 degrees.

Take your 3 eggs and separate the yolks from the whites as carefully as possible.

Mix together the yolks, the cheese, the salt, and the sweetener until it's creamy and smooth.

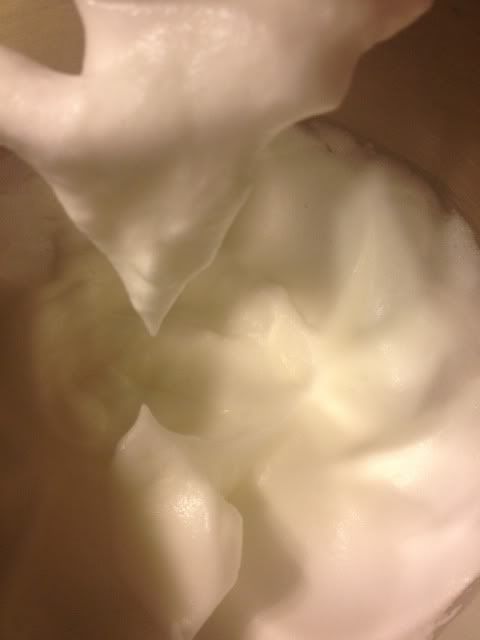
In a separate bowl, beat the whites and the cream of tartar until they form stiff peaks.  This can take 5+ minutes of beating.

This is how a stiff peak will look.  Not drippy- doesn't fall over:


Fold the two mixtures together carefully.  You don't want to press the air out of the whites mixture.

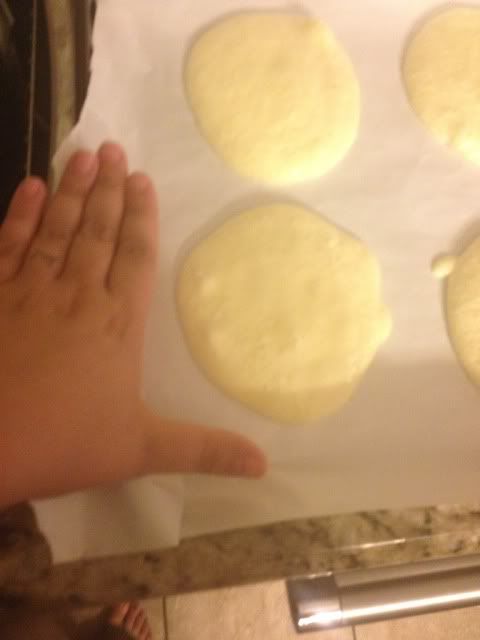
Scoop batter onto greased baking sheet.  

I made six that were this size (this is batter, not baked)


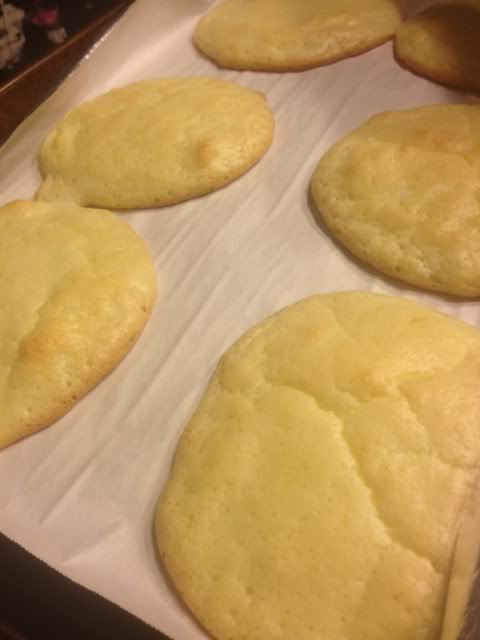
Bake for about 30 minutes- your oven may vary!

Now you should have this!


I read on one of the recipes that they are better textured after sitting (sealed) overnight so into tupperware they went.  I honestly didn't notice a huge difference in poking them though.

The smell a bit eggy.  Almost like this is what is used for the bun of an Egg McMuffin.  On the other hand, they taste very light and have almost no flavor.  I think it would be great for grilled cheese or maybe a cheese/meat sandwich, but for my beloved and missed peanut butter sandwich, I wasn't all that impressed.


11.13.2012

Silhouette Cameo Nail Stencil Review

I was bored and kind of crafty-burned-out today after working so hard to get ready for last weekend's craft fair.  Awhile back I had seen nail designs in the Silhouette Store but I hadn't looked at them very closely.  I decided to give those a try today.

I bought the "Side Dots" design from the Silhouette Store and looked at the blog of the creator  as the store instructs for a how-to.  When I saw these awhile back I thought these WERE the decorations but you actually cut the stencil.

Ok, down to business.


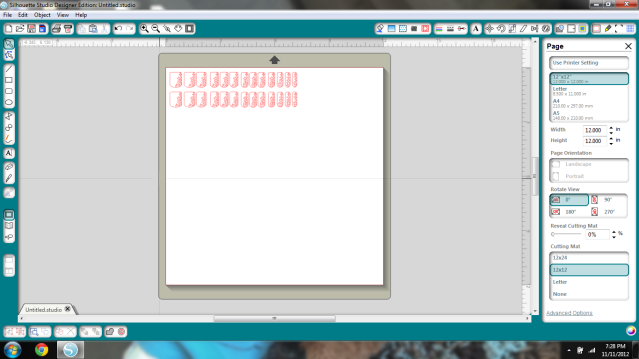
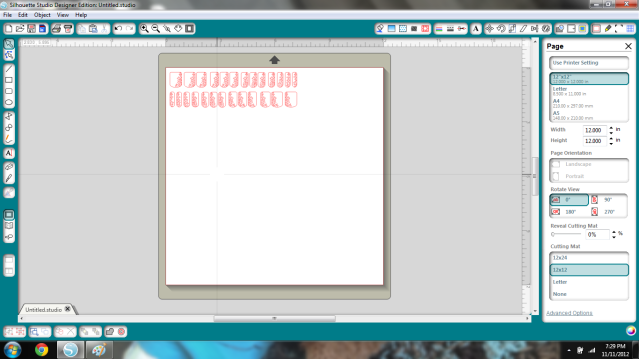
First I decided to flip half of the designs so that on my right and left hands the designs would be opposite; not all to the right.


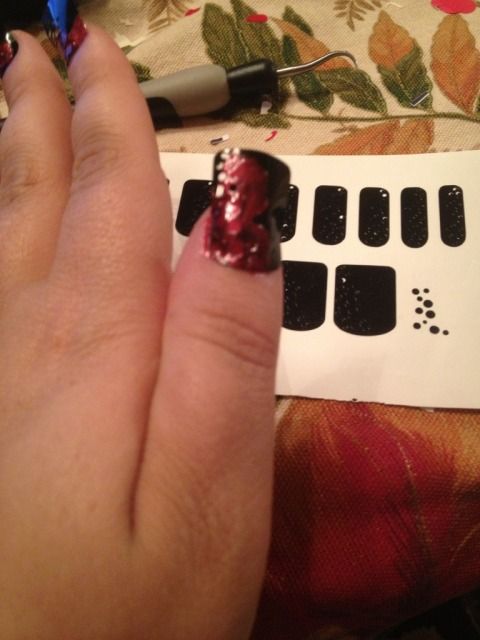
Then I hit Cut and waited approx. 11 minutes.  It felt like forever!  Lots of tiny pieces.

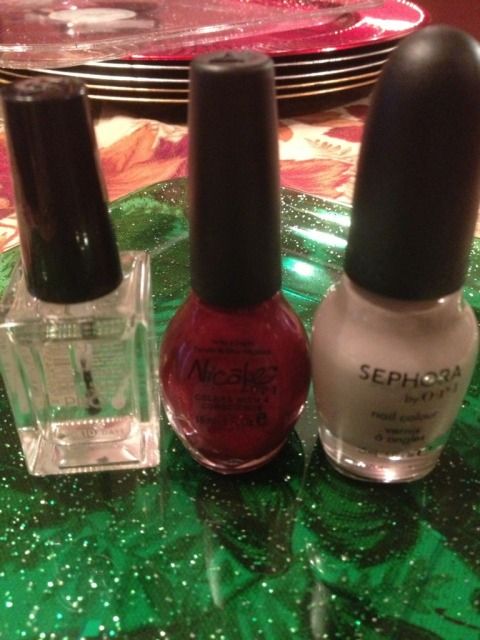
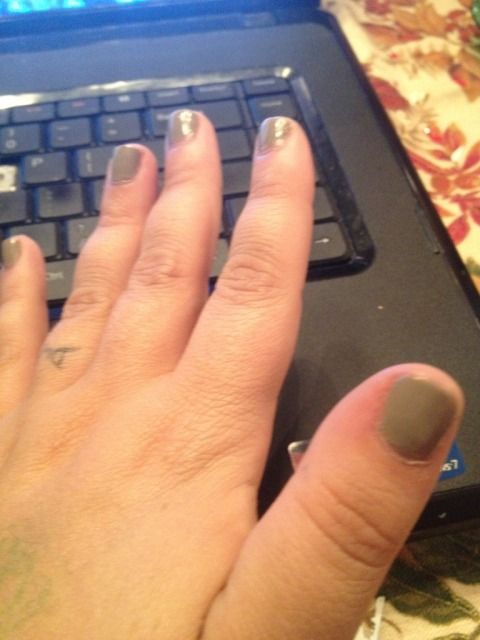
While I was waiting I took a pic of my polishes & a before pic of my base polish.


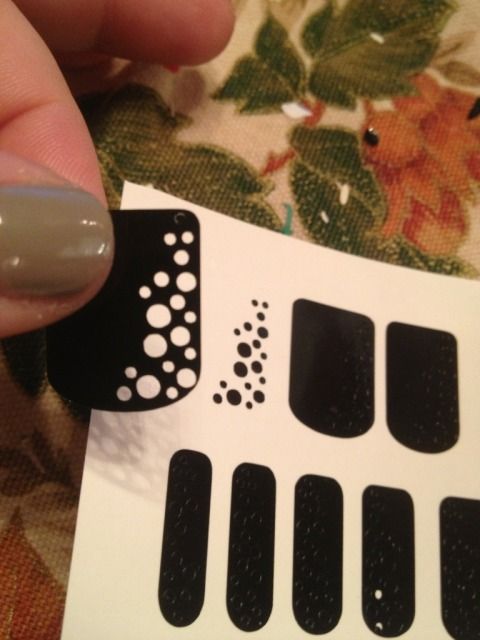
The design finally finished cutting and I was already dreading the weeding, but guess what?  If you start at the top and pull it nearly back on itself, most if not all of the dots weed themselves.


Next, you find the ones that match your nail size, press them on, and paint over with your desired color.  All designs probably have this issue so I'm going to point out you almost have to dab, not brush, or the bristles just skip over the holes.


I tried two things now.

1) The blog says to wait until your nails dry to peel this off
2) I've always heard that when stenciling, peel BEFORE it's 100% dry or you risk the design peeling with the stencil.

So I tried both.

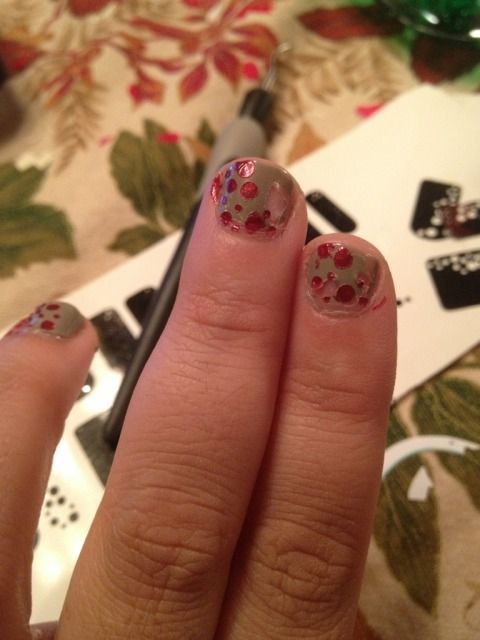
Left- 1, right- 2


Pretty awful.  The grey polish is from yesterday so I know it was 100% dry.  Damp or dry didn't make a difference for the stencil.  The vinyl left goo behind.  The blog has a comment about wiping that off with alcohol and a swab, but since that's also how you remove nail polish altogether, I didn't give it a try (though this is coming off anyway).

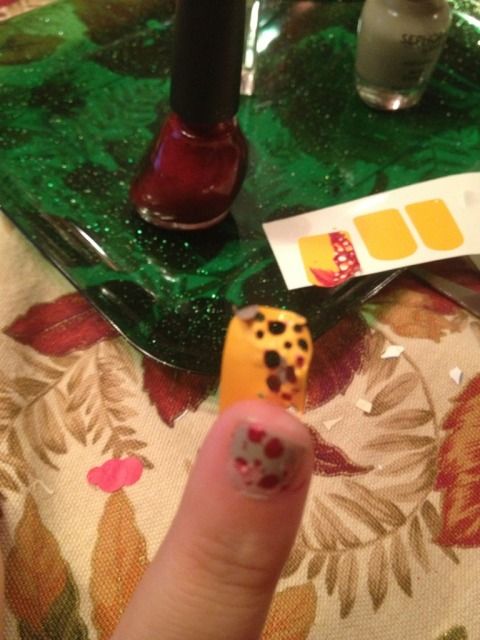
This black vinyl is Oracal 641.  I also have some Oracal 341 which is meant for short-term so I thought perhaps it would work better.

I recut the stencils for my right hand in 341 and repeated the process.  


Again, it peeled off pieces of the perfectly dry grey nail and left residue behind.

Sadface.