Showing posts with label recipe. Show all posts

11.05.2013

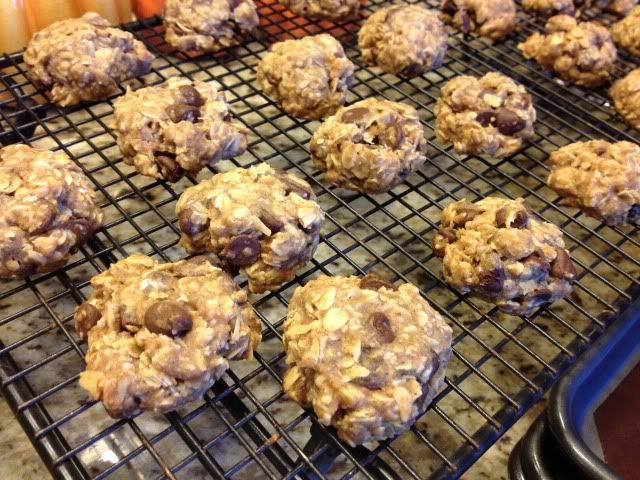
Healthier Lactation Cookies- Lactation Cookie Recipe #3

So the last two recipes I posted for lactation cookies are delicious, but the jury is out on effectiveness at the moment.  This recipe, I saw an increase right away in my breast milk BUT you are going to spend more $ on ingredients and the cookies are not as yummy.  Maybe that's good, I won't overeat them, that's for sure.  This also only makes around half the cookies compared to the other recipes.

Ingredients:

·         1 cup coconut flour
·         1/2 cup virgin coconut oil
·         1/2 cup brown sugar
·         2 tablespoons flax seed meal
·         2 tablespoons of water
·         2 eggs
·         1 tablespoon vanilla extract
·         1 teaspoon cinnamon
·         1/4 cup of Brewer's Yeast
·         1/2 teaspoon salt
·         1 & 1/2 cups steel cut oats (NOT instant oats)
·         1 cup chocolate chips

Preheat oven to 350 degrees.

Mix the flax seed and water together in a small bowl and set aside for now.

Cream together coconut oil and brown sugar.  Add the eggs and vanilla extract and mix well.

Add coconut flour, cinnamon, brewer's yeast, and salt.  Mix well.

Stir in oats and chocolate chips.

Roll into balls (again, I use the OK symbol with my thumb and pointer finger and make balls about the size of the empty circle) and place onto a silicon baking sheet.  Smash them flat a little- these will not spread out like other cookies.

Bake for 12-15 minutes depending on your oven.

Make about 36 cookies.


Results-  Well, the day I made these, I ate about 9 (they are very small) and it was my best producing day ever, up just under 2 oz from the day before and also the day before that.  The 2nd day, I only ate 6, and am back down to where I was in the days before eating these.  They are somewhat dry and crumbly, stay in their ball shape after baking, and very, very not-sweet.  You will taste the Brewer's Yeast, but, if you do the math, 1/4 cup of Brewer's Yeast in 36 cookies is less than 1/2 teaspoon per cookie, and it's one of the main things to help your milk supply.  I don't find the taste bad, though some of you certainly will, but I also won't snack on these like I do the other recipes.

Updated results:  While I was still working on this post, on day 3 after making these cookies, I woke up with a small lump that turned into a full fledged clog by noon.  After LOTS of time with a heat pack, my pump and Lecithin pills, I think it's out, but if you've ever had a clog you know that the pain lasts for a few days after it's gone.  At least it's not Mastitis, I suppose.  I NEVER get clogs since starting a Lecithin regime, so I'm wondering if it's these cookies causing a slight increase and me not getting all the milk out as a result.  I will be getting into my breastfeeding regime later.
11.04.2013

Chocolate Chip Lactation Cookies- Lactation Cookie Recipe #2

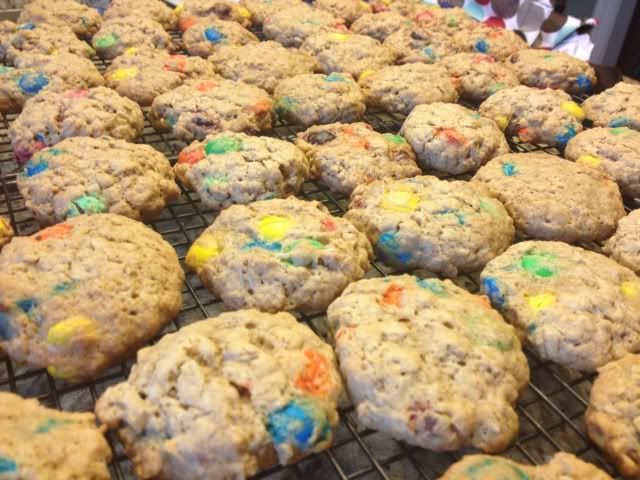
So yesterday I shared my first lactation cookie recipe, made with M&Ms.  This recipe is pretty much the same but made with chocolate chips instead.  The difference is in the sweetness.  I feel like the M&Ms really made the cookie overwhelming and since due to the brewer's yeast this is a less sweet cookie in general, that's alarming.

Take note, tomorrow I'll post a healthier version of a lactation cookie, at least, compared to this recipe and yesterday's recipe.

I'll go ahead with results before I get into the recipe & photo this time, since it's very similar.  I could easily eat 10 of these cookies per day.  They are delicious.  However, any slight increase in breast milk did not require me to continue taking them to maintain, so I'm not really sure if they *really* were doing anything.  On the other hand, I haven't gotten into my whole arsenal of breast feeding tricks yet, so what you don't know is that I pretty much have oversupply and did it to myself on purpose so I can pump lots and wean earlier, plus not stress about milk supply.  You may see a noticeable increase if your supply is low.  I mean, there must be a reason the recipes are so enduring.

Ingredients:
2 tablespoons flax seed meal (found at GNC.  Alternative- buy flax seed and stick it in your food processor)
1/4 cup water
1 cup butter1 cup white sugar
1/2 cup brown sugar
3 eggs
2 teaspoons vanilla extract
2 cups flour
1/4 cup brewer's yeast (found at GNC.  NO OTHER TYPE OF YEAST!)
1 teaspoon baking soda
1/2 teaspoon salt
3 cups oats
2 cups chocolate chips

Preheat oven to 350 degrees.


Mix water and flax seed meal into a small bowl and set aside for the moment.


Cream together butter, white sugar, and brown sugar.


Add eggs and vanilla extract and mix well.


Add flax seed meal mixture and mix well.


Add flour, brewer's yeast, baking soda, and salt.  Some like to mix dry ingredients in a separate bowl.  I like to do less dishes so I just throw it all into the mixer bowl with the wet ingredients.  Mix well.


Stir in oats and chocolate chips.


Form and set on baking sheets.  I don't really have a set size, in general the little dough balls are around the size of the hole when I put my pointer finger to my thumb and make a circle, like making the "OK" sign.  


I bake on silicone sheets for about 15 minutes in an electric oven.  From owning a gas oven previously I know to remind you that your oven may be different and keep an eye on your cookies the first time you make them.

Recipe makes about 50 cookies.


11.03.2013

M&M Lactation Cookies- Lactation Cookie Recipe #1

I have a whole thing planned around breastfeeding and pumping, but as I'm only 8 weeks post partum, I'm still trying out a lot of stuff.

One thing I love to do to help is make lactation cookies.  I don't know if my supply is increasing because that's just what happens when you consistently empty your breasts, because of my supplementation, or both.

Regardless, I like lactation cookies.  They are yummy, they have some things in them that are good for you, and they certainly don't hurt supply.  The cons, well, they are cookies.  I will be posting some other recipes and tweaks to make them healthier in the coming days but in the meantime, enjoy a cookie, moms!  You deserve it.

Ingredients:
2 tablespoons flax seed meal (found at GNC.  Alternative- buy flax seed and stick it in your food processor)
1/4 cup water
1 cup butter
1 cup white sugar
1/2 cup brown sugar
3 eggs
2 teaspoons vanilla extract
2 cups flour
1/4 cup brewer's yeast (found at GNC.  NO OTHER TYPE OF YEAST!)
1 teaspoon baking soda
1/2 teaspoon salt
3 cups oats
2 cups M&Ms

Preheat oven to 350 degrees.

Mix water and flax seed meal into a small bowl and set aside for the moment.

Cream together butter, white sugar, and brown sugar.

Add eggs and vanilla extract and mix well.

Add flax seed meal mixture and mix well.

Add flour, brewer's yeast, baking soda, and salt.  Some like to mix dry ingredients in a separate bowl.  I like to do less dishes so I just throw it all into the mixer bowl with the wet ingredients.  Mix well.

Stir in oats and M&Ms.

Form and set on baking sheets.  I don't really have a set size, in general the little dough balls are around the size of the hole when I put my pointer finger to my thumb and make a circle, like making the "OK" sign.  I bake on silicone sheets for about 15 minutes in an electric oven.  From owning a gas oven previously I know to remind you that your oven may be different and keep an eye on your cookies the first time you make them.

Recipe makes about 50 cookies.


Results:

Well, they are delicious, but almost too sweet with the M&Ms, which is why the next recipe I'll share will have something else.  My supply steadily increase small amounts daily while eating (6-8 per day.../hides) but continued to increase after as well, so I don't know if I can give cookies all the credit.

8.17.2013

Faux Bojangles Biscuits

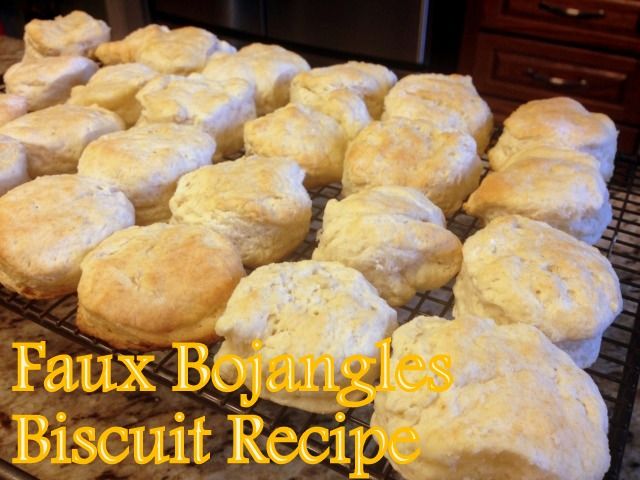
Wow, I never shared this recipe???  I loooove biscuits and used to make this every week, keeping them in tupperware and re-heating in the toaster oven as needed.  They are great for breakfast sandwiches, dinner rolls, snacks...did I mention I love biscuits?

Biscuits are probably the only thing at Bojangle's that I actually eat and they do a really yummy biscuit, so I convinced a friend of mine who managed one to snag me the recipe and adapted it a little to what I usually have on hand.


Ingredients:

3 cups self-rising flour OR 3 cups all-purpose flour with 3 & 3/4 tsp baking power and 3/4 tsp salt mixed in
2 tsp powdered sugar
3 tsp baking powder
1/2 cup salted butter (or unsalted, if you converted all-purpose flour to substitute for self-rising; I've found otherwise it's too salty)
1 & 1/2 cup buttermilk OR 1 & 1/2 cup milk (I use skim) and 2 tsp cream of tartar- mix and let stand for 5 min

Directions:

Pre-heat oven to 450 degrees.  Mix dry ingredients, then add butter (softened is best, and I use my Kitchenaid with paddle attachment to mix it all in).  Add buttermilk and mix well.

Spread flour on your counter and dump out dough.  Knead until non-sticky, then roll it out to about 1/2" thickness.  Use a cup or a biscuit cutter (I use a child size drinking glass) to cut out circles and place them on baking tray (I prefer stoneware- up to you!  You may have to spray your tray if it's not non-stick).  Keep rolling and cutting to use up all the dough.  Place biscuits touching each other on tray.

Bake for 15 minutes.  If you want (I do!) at about 13 minutes, carefully spread some butter over the top of the biscuits and finish baking to get that greasy golden Bojangles biscuit sheen.

When I want to re-heat them I pop them in my toaster oven for 3 minutes, but I'm sure you could easily warm them in a regular oven as well.


7.09.2013

Cake Batter Protein Shake Recipe

I used to be a manager at Gold's Gym and while I worked there I got addicted to their protein shakes.  They have a huge smoothie bar with tons of flavors- how could I not?  There's a little secret though.  Most of their recipes aren't that great for you.  The Carb Cutter which only comes in Vanilla or Chocolate is the best option, since it's just the protein mix BUT sugar free chocolate or vanilla syrup is always added & blended.  If you've ever had just a straight protein powder & water mix you probably know why.  The rest of the flavorings are full of sugar and even worse for you (lots of berry, tropical fruit, etc flavor offerings) but all of those generally start with a vanilla protein powder base.

Bearing that in mind, and wanting to add more protein to my pregnancy diet, I pulled out my container of vanilla Muscle Milk.  I had tried mixing it with greek yogurt and chocolate PB2 in the past and was not impressed, so here goes round two.

I wanted something sweet and thanks to a milkshake I saw (but didn't drink! le sigh) I decided to try out a cake batter flavor.  Now, when I make chocolate chip cookies, I follow the Nestle Toll House recipe BUT I add a box of Jell-O Instant Vanilla Pudding Mix and the cookies come out chewy and mouth watering.  I thought maybe this pudding mix could help me here.  My mom is a professional cake maker and her frosting (which everyone RAVES about- my 3 year old refuses to eat a cake with store bought!) has butter extract, so I also grabbed that.

If you want more protein or a thicker smoothie/milkshake texture I would try adding greek yogurt.  I hate greek yogurt and couldn't even drink a smoothing with it hiding under Chocolate PB2, so I didn't try.  If you like it I bet it would be great though!  I like thinner smoothies.  My husband adds normal yogurt to fruit smoothies and it feels like drinking snot to me.  To each their own!


Ingredients
1 scoop of vanilla protein powder- I use vanilla Muscle Milk
1/2 teaspoon imitation butter extract
1 tablespoon sugar free Jell-O Vanilla Instant Pudding
1 cup water
2 cups ice cubes
Sprinkles to garnish

Method
This is kind of important unless you've splurged on a Vitamix blender or something.  Add water first.  If you add the protein powder first it tends to clump up cheaper blender blades.  Even at Gold's with our giant commercial blender, we do it this way.  After water I added powder, ice, butter extract, pudding mix, and then blended it all up for about 30 seconds.  Pour into glass and sprinkle some sprinkles on top if you want!

Results
I.love.it.  I'm drinking one now.  I am diabetic and pregnant and struggle to get enough protein, especially since meat kind of turns my stomach right now.

Nutrition
I am not a nutritionist.  I have two college degrees and neither are in nutrition.  This may not be exact, but my best guess will have to suffice.

1 scoop of muscle milk, if mixed with water, is 100 calories, 6g carbs, 12g protein.  1 serving of Jell-O Sugar Free Instant Vanilla Pudding Mix is 80 calories- I MAYBE used 1/8 of that.  The bag I bought says it has 4 servings, I used 1 tablespoon of that and it still looks mostly full.  At worst I'd say you're looking at 110 calories unless you overload on the sprinkles.  Double your Muscle Milk to 2 scoops and you get 210 calories, 25g protein and 13g carbs.

Chocolate version coming up soon! :)


2.09.2013

Eggless Chocolate Chip Cookie Dough FroYo

Ice cream for breakfast!  Being pregnant I'm having a hard time with food right now.  I'm also diabetic so I can't give in to a lot of my cravings.  This one is OK for me- I'm not calling it a diabetic recipe though, check your own blood sugar for your body's verdict on that- and obviously healthier than just eating a bowl of cookie dough.


What you need:

1/4 cup sugar
1/2 cup packed brown sugar
1/2 cup butter, softened for easier mixing
1/4 tsp salt
2 tsp vanilla extract
1 cup flour
1/4 tsp baking soda
1 cup mini chocolate chips
1 cup vanilla yogurt

Beat sugars and butter together until mixed and creamy.  Add vanilla and mix again.  In a separate bowl stir together flour, baking soda, and salt.  Once mixed, stir in chocolate chips.  Mix the two bowls together by hand.  Stir in yogurt until fully combined.  Freeze overnight.

My quality control specialist.  Once he realized those were chocolate chips, he disappeared to eat a bowlful.

Before freezing, it really does look like cookie dough!


And after freezing, ice cream it is!


1.31.2013

Cloud Bread Recipe & Review

I've been seeing Cloud Bread a lot on Pinterest lately.


Doesn't it look just like fresh yummy bread?

I'm supposed to be eating low carb/high protein for awhile, but I'm Italian.  I'm pretty sure my blood is made of carbs.  I decided to  make this bread to see how it turned out.

I ended up using this recipe BUT I googled a few recipes first, and added 1 pinch of salt to this recipe.  Also 1 packet of sweetener didn't equal 1/8 teaspoon, it's nearly two packets.  So, modified recipe below:

You need:

3 eggs
2 packets or 1/8 teaspoon artificial sweetener
3 tablespoons of either fat free cream cheese OR cottage cheese
1/4 teaspoon Cream of Tartar
Pinch of Salt

Recipe:

Preheat oven to 300 degrees.

Take your 3 eggs and separate the yolks from the whites as carefully as possible.

Mix together the yolks, the cheese, the salt, and the sweetener until it's creamy and smooth.

In a separate bowl, beat the whites and the cream of tartar until they form stiff peaks.  This can take 5+ minutes of beating.

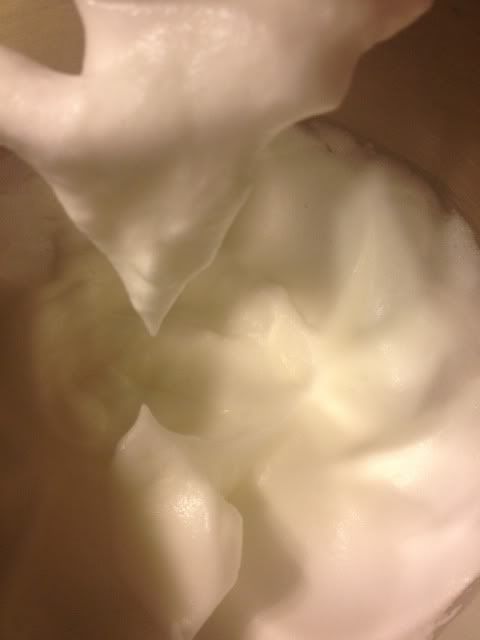
This is how a stiff peak will look.  Not drippy- doesn't fall over:


Fold the two mixtures together carefully.  You don't want to press the air out of the whites mixture.

Scoop batter onto greased baking sheet.  

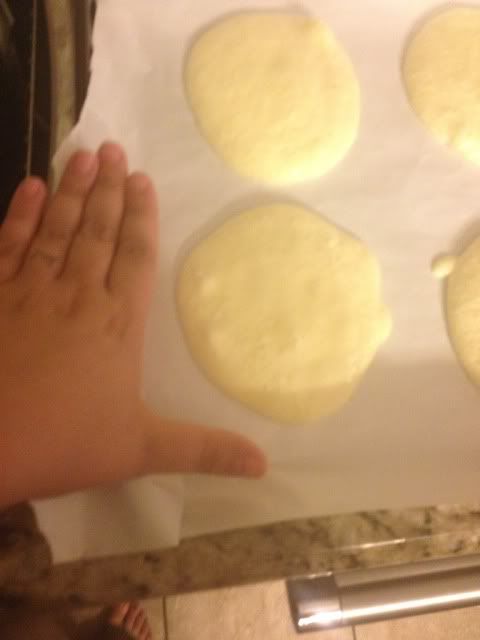
I made six that were this size (this is batter, not baked)


Bake for about 30 minutes- your oven may vary!

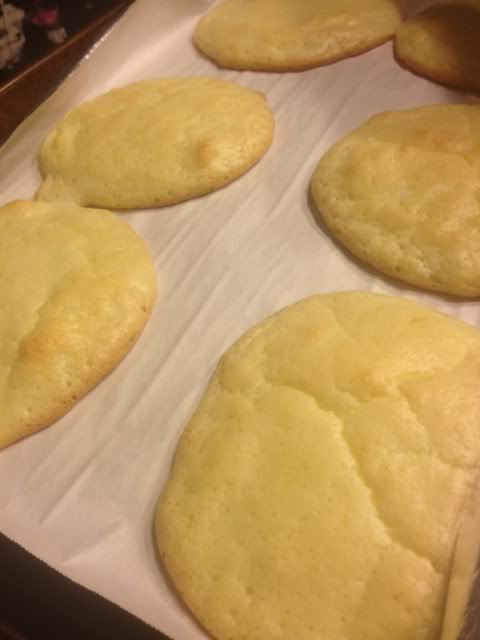
Now you should have this!


I read on one of the recipes that they are better textured after sitting (sealed) overnight so into tupperware they went.  I honestly didn't notice a huge difference in poking them though.

The smell a bit eggy.  Almost like this is what is used for the bun of an Egg McMuffin.  On the other hand, they taste very light and have almost no flavor.  I think it would be great for grilled cheese or maybe a cheese/meat sandwich, but for my beloved and missed peanut butter sandwich, I wasn't all that impressed.


8.02.2012

Sneaky Toddler Muffins

My toddler is a decent eater, but he could always use more fruits and veggies.  Everyone could, really!  These muffins have carrots, banana, and squash in them and with the pumpkin pie spice, they smell (and taste) delicious!


recipe is slightly adapted from All Recipes.

Ingredients:

1/2 cup unsalted butter
1/2 cup brown sugar
2 large mashed bananas
1 container of baby food squash
1 cup of grated carrots
2 eggs
1 cup whole wheat flour
1/2 cup traditional oats
1 teaspoon baking soda
1 teaspoon pumpkin pie spice
1/2 teaspoon salt

Preheat oven to 375.  Fill muffin tins with paper liners.

Cream butter and brown sugar.  Add in bananas, squash, carrots, and eggs.  Stir in flour, oats, baking soda, pumpkin pie spice, and salt.

Using a soup ladle unless you have another way you like minimizing batter-mess, fill muffin papers about 1/2-3/4 full.

Bake for 15 to 20 minutes.  Let cool before giving to children!

7.03.2012

Pretzel Recipe

I love big soft pretzel with warm cheese and some pizza sauce for dipping.  It's one of my favorite treats to get at the mall.  I saw a recipe a few months ago and I have made them myself several times since then.  The only deviation from the recipe comes from when we occasionally put some garlic on top before baking, or make them shaped like sticks or even real pretzels.  Bites are so easy to make though!


The original recipe can be found by clicking here.

Ingredients:
Part One:  Dough
1.5 cups warm water- not too hot, don't kill your yeast!
2 tablespoons light brown sugar
1 package or 2.25 teaspoons active dry yeast
6 tablespoons of melted butter
2.5 teaspoons kosher salt
4.5 cups all-purpose flour
Vegetable oil

Part Two:  Baking
12 cups water
3/4 cup baking soda
2 eggs beaten with 2 tablespoons of cold water
Kosher salt to sprinkle


Add the water, brown sugar, yeast, and melted butter to the bowl of your stand mixer.  I let the melted butter sit for a few minutes, as I'm always scared it's going to be too hot and kill the yeast.  Mix these together with your dough hook.  Add the flour and kosher salt and mix well with your dough hook.  The dough will ride around on the hook when it's well mixed.  Knead the dough a few times with your hands into a nice ball shape.  Place in a bowl greased with vegetable oil and cover with a towel.  Let it sit for an hour so that it rises.  I put my bowl in the oven and just turn on the oven light.  It was doubled in less than an hour this way!


Now, you want to boil 12 cups of water and when it's boiling add 3/4 cup of baking soda.  Shape your dough however you like- I generally use a knife to cut the blob into about 8 strips, cut those strips in half, roll them out a bit, and cut those into bites.  Do whatever you like!  Whatever your shape is, boil it for about 30 seconds.  Remove with a big slotted spoon- I have a GIANT one from Pampered Chef that I adore for this sort of thing.  I place the bites on a dinner plate and brush them with the egg & water mixture.  Not TOO much- dripping down the sides = sticks to your pan!  I then transfer them to the baking sheet and sprinkle them with kosher salt.


Bake at 425 degrees.  It takes my gas oven about 12-15 minutes to get these looking done.  You know your oven, just watch them the first time you make them and figure out how much time you need.


These are FAB fresh out of the oven, but I've also frozen them (tip- bake them for 1/2 the needed time and then freeze.  To reheat, spray with melted butter, add a sprinkle more salt if needed, and pop in an oven or toaster oven on 350 for 10 minutes or so.  I use my toaster oven) and they keep well in a covered bin in the fridge (reheat the same as frozen but only for about 5 minutes).


This recipe made THREE dinner plates like this!  Four baking sheets worth of bites!


And this is my favorite way to enjoy them :)


6.28.2012

Homemade Oreo Cookies

Today, I saw a recipe on Yahoo! for homemade Oreo cookies!  I'm never going to lose the baby weight, I can tell!

I think the slew of recipes going around lately was inspired by this image:


That just makes me smile every time I see it for so many reasons.


So, on to the recipe!

I'm going to paste from the link above, since for once in my life I followed it exactly.  I will however post my photos at the end.  I baked 1 pan on a stoneware sheet and 1 on a metal sheet with wax paper.  The stoneware pan was by far superior- I was peeling bits of wax paper off of the other cookies.

This made me 100 cookies, so 50 Oreos.

I would suggest you add at least 1 extra cup of powdered sugar to the cream filling recipe for a better texture.

Just to repeat, Recipe Link!
Chocolate Wafers
Ingredients:
2 cups all purpose flour
¾ cup white sugar
3 tablespoons cocoa powder
½ teaspoon table salt
1 cup bittersweet chocolate chips
4 tablespoons unsalted butter
2 eggs
In a small bowl, whisk together the flour, sugar, cocoa powder, and salt.
In a microwave safe bowl, melt chocolate chips and butter for 30 seconds. Stir them together and microwave an additional 30 seconds. Repeat this process until chocolate and butter have both melted.
Using either a hand-held mixer with the beaters or a stand mixer with the paddle, combine melted chocolate and butter, and mix on low speed for 20 seconds.
Add eggs one at a time and mix on low speed until fully combined. Scrape down the bowl with a rubber spatula.
Add dry ingredients and mix on low speed for 10 seconds. Finish mixing with ingredients with a rubber spatula by hand.
Using two sheets of parchment paper roll out dough to 1/8-inch thickness.
Refrigerate dough for one hour or until firm.

Preheat oven to 350 degrees
Using a small round cookie cutter cut out as many rounds as possible and place one inch apart on a parchment paper lined cookie sheet. You can reroll the scraps once.
Bake for five minutes, then rotate the pan in the oven and bake an additional five minutes.
When the cookies are cool enough to handle, fill with cream filling (see directions below). Set aside for 20 minutes while the filling firms up.
Cream filling
2 sticks unsalted butter (room temperature)
1 pinch table salt
2 cups confectioner's sugar
1 teaspoon vanilla extract
Using either a hand-held mixer with the beaters or a stand mixer with the paddle, cream butter and salt at medium speed until light and fluffy
Add half the confectioner's sugar and mix on low for 30 seconds. Scrape down the bowl.
Add vanilla and mix on low for 30 seconds. Scrape down the bowl.
Gradually mix in remaining confectioners' sugar, holding some back until you reach the desired consistency. It should be smooth and spreadable, but not so runny that it will drip off the cookie.
Fill chocolate wafers with pastry bag fitted with small tip. You can also spread carefully with a knife or small spatula. A modest amount (about a teaspoon per cookie) is better so it doesn't squeeze out from between the wafers.
Cookies can be stored for up to one week in an airtight container.


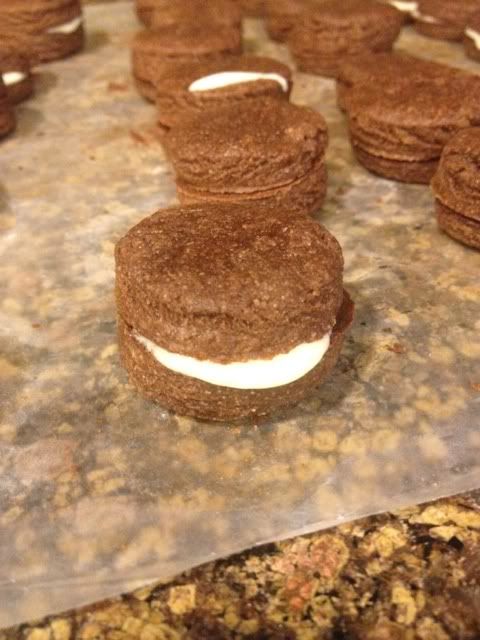
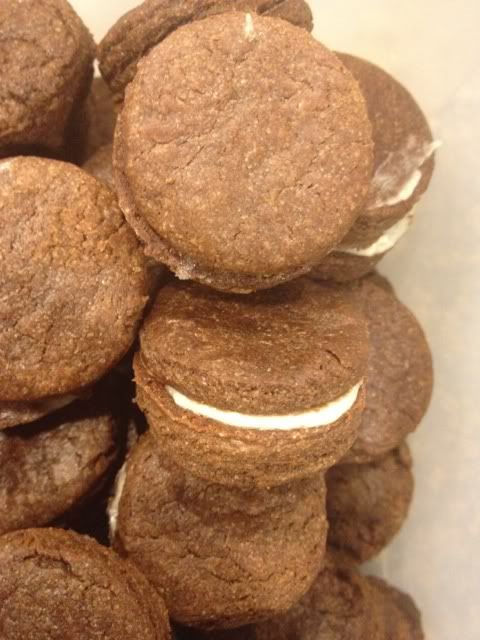
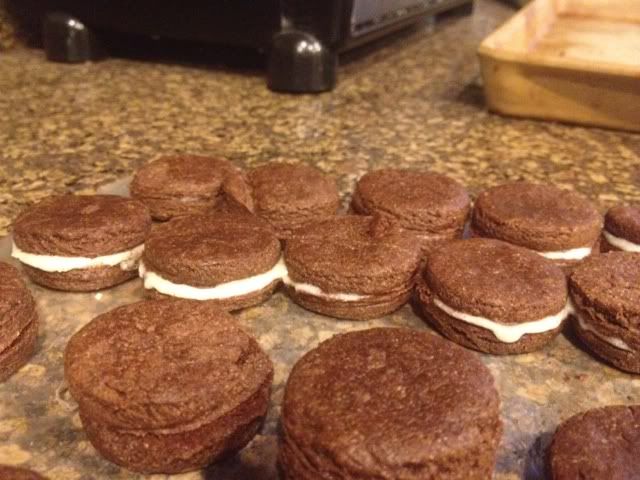
Here's how I did!  Delish, but I do wish I had put extra powdered sugar in the filling.  It's more frosting-y, or icing-y, creamy anyway.


Let me know if you try it, especially if you found a way to improve the filling as I suggested!

6.27.2012

Quick & Easy Chocolate Cobbler

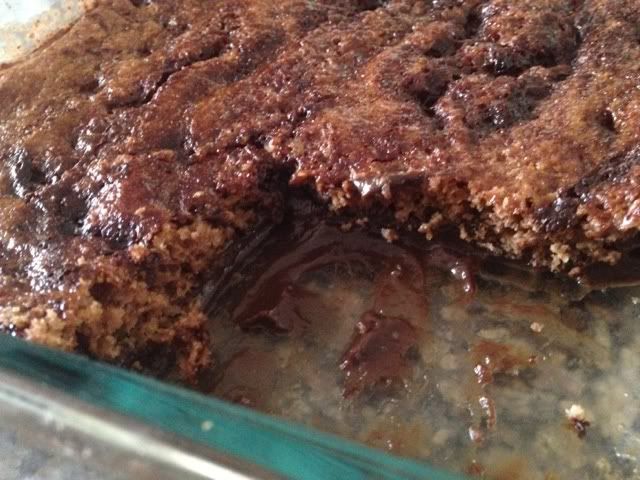
This chocolate cobbler recipe is so easy and the ingredients are so common!  You probably have everything you need already.  Cobbler is a wonderful treat.  It's a cross between a cake and a brownie and pudding, all in one!


The cobbler has two layers, but like I said, it's quick and easy, don't worry!

Bottom layer:

3/4 cup white sugar
1 cup all-purpose flour
2 tablespoons cocoa powder
1.5 teaspoons baking powder.
0.5 teaspoon salt
1/2 cup fat-free milk
3 tablespons melted butter

Mix all of this up well in a blender so that it's very, very, very creamy.

Spread evenly into a 9 x 13 baking dish.  I used a glass Pyrex one, ungreased.

Top layer:

In a clean bowl, stir together the following:

1/4 cup white sugar
1/4 cup cocoa powder
1/2 cup brown sugar

Sprinkle this mixture evenly over the top of your wet mixture.  Don't mix the two together!

Finally, add 1.5 cups of water, pouring GENTLY over the top of your cobbler.  Do not mix, do not stir, and have faith that this will work magic!  Make sure the entire top of your cobbler is covered with water.

Bake at 350 degrees for 40 minutes.

This cobbler is fantastic both hot and cold and even more fantastic with ice cream!

6.25.2012

DIY Pita Bread

Making your own pita bread is really easy and needs so few ingredients, I bet you can make them with what you have on hand!

1 tablespoon of yeast
1 teaspoon of sugar
1 teaspoon of salt
1.5 cups warm water
3 cups all purpose flour

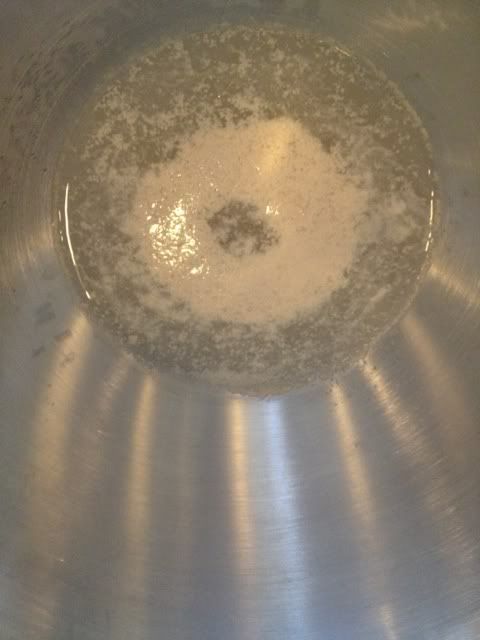
Add the yeast, sugar, and water to your stand mixer bowl and let it sit for 10-15 minutes.  You want the yeast to be frothy and bubbly.  If your yeast doesn't "come alive" so to speak, your water may have been too hot (which kills it), not warm enough (doesn't wake it up), or you need to go buy a new can of yeast.  Don't omit the sugar- yeast eats it so it's like a little snack to get the yeast going.

Not quite done, but getting there!


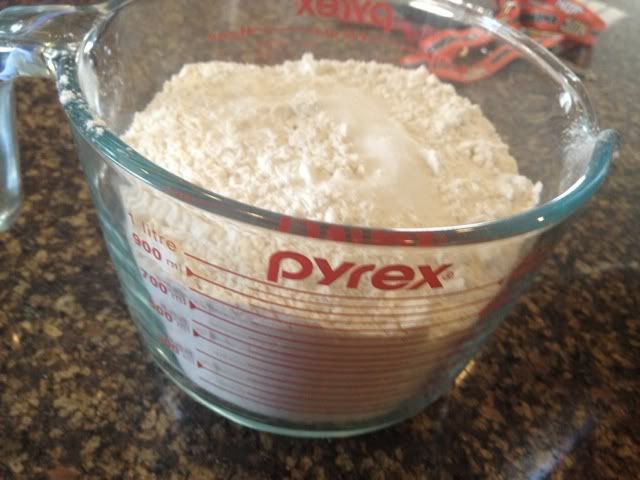
In a separate bowl, mix the flour and salt.  When possible I like to use my 4 cup Pyrex glass measuring cup rather than dirty bowl a bowl and a measuring cup.


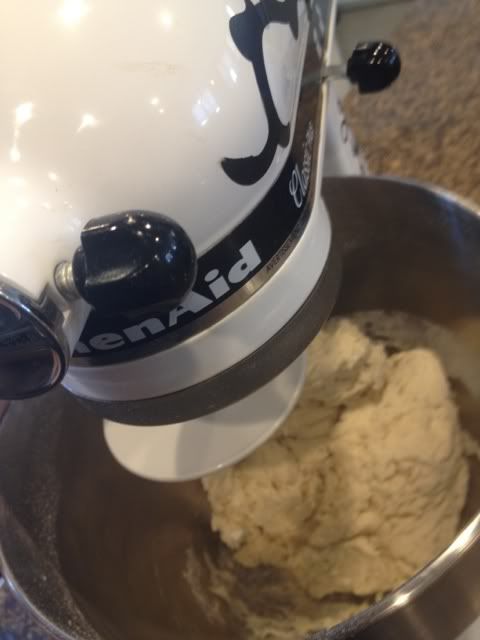
Attach your dough hook and slowly mix in the flour/salt mixture.  Keep mixing until the dough is really smooth and rides the hook.


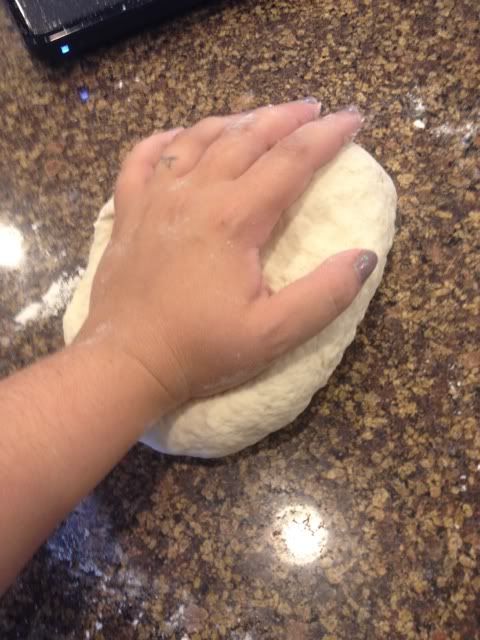
Now take your dough out onto a floured surface and knead it well, really putting some elbow grease into it.  Knead it a LOT.  Try to make at least 5 minutes before your hands get tired!  You want the dough to be really stretchy, but not sticky.  If it's sticky add a tiny bit more flour until it stops.


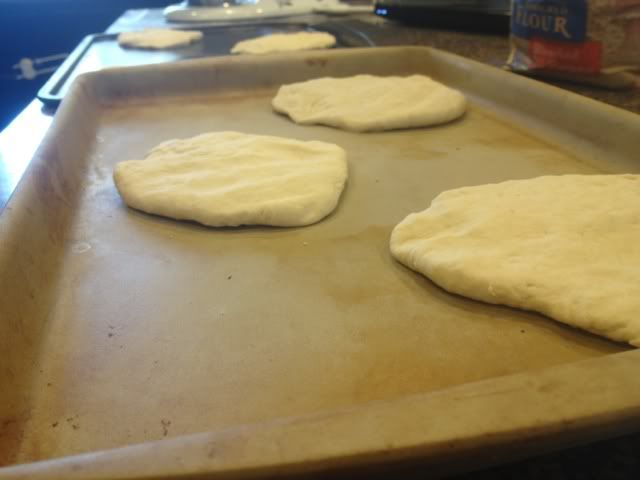
Break the dough into balls.  I found that 6 balls was a good size for pitas but that's up to you.  Just remember to adjust for baking time if you go much smaller or bigger.

after you have the balls rolled out nicely, play them on a tray and flatten them with a rolling pin.  


Let these rise slightly.  It should only take about 30 minutes, although if you have your a/c going like me, you might need to play.  I throw some barely damp towels in the dryer on hot for 10 minutes, then stop the dryer and pop my trays in there and shut the door.  Otherwise my house just seems too cold for anything to rise in the summer with our a/c on.

When you think it's about time, preheat your oven to 500 degrees.  When the oven is preheated and the pitas are risen a bit, take a spatula and flip the pitas over.  Put them in the oven right after doing that.    You will bake them for about 15 minutes depending on your oven.

*Note- I used a stoneware pan for 3 pitas, which is non stick and fab.  I only have one so the other 3 pitas went on a metal pan.  I did not grease it and did not need to.

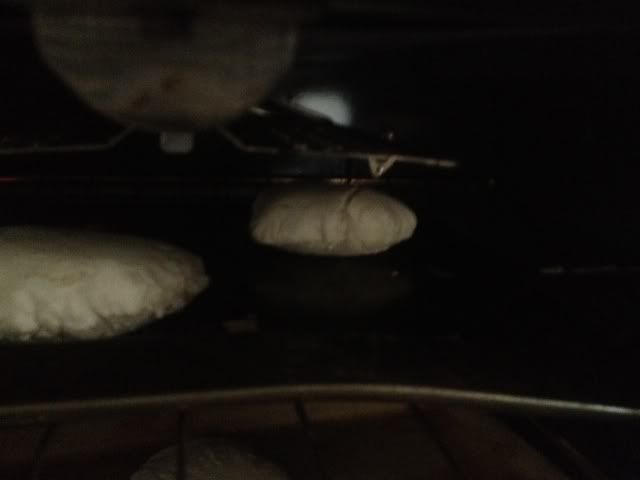
After the first 8 minutes or so you should see your pitas looking puffy!


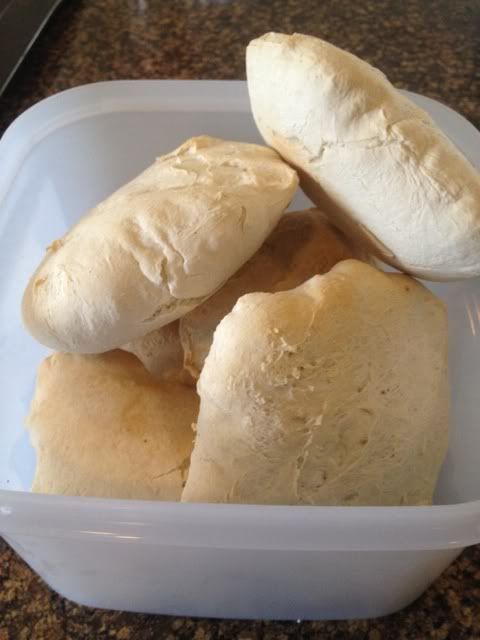
Once they are starting to turn golden (around 15 minutes) they are done!  Let them cool, then you can slice into the pocket and stuff them (and stuff yourself!)

pre-slicing


6.19.2012

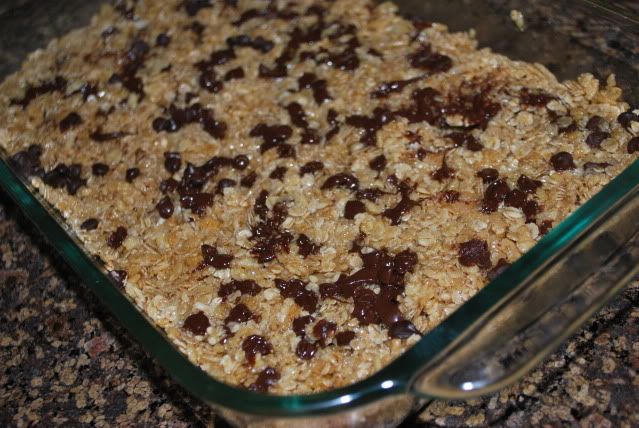
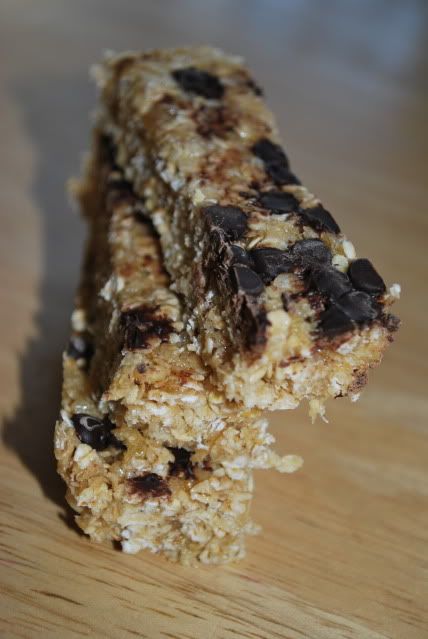
Homemade Granola Bars

We love granola bars around here!  A box of 42 can disappear in a week.  I thought making a batch as needed would be easier and maybe cheaper- we'll see!


Granola Bar Recipe:

1 cup of rice krispy cereal
2 cups of quick oats (traditional oats will NOT work.  Also,  you could sub this for 2 cups of loose granola but I haven't tried that)

Mix those together and set aside.

In a pot, combine:

1/2 cup brown sugar
1/4 cup honey
1/4 cup butter
1.5 cups marshmellows

Heat on medium until everything is smooth and combined.  Leave it on the heat until you see bubbles, almost like it's boiling.  This is necessary to get the oats to cook and stick together.

Pour the wet mixture over the dry mixture and stir stir stir!

In an ungreased pan (mine was a Pyrex pan about 10x8.5 or so) pour your mixture.  Spray a spatula with Pam and use it to press, press, press, and press again.  You need to pack this TIGHTLY.

Sprinkle a handful of mini chocolate chips over the top and gently press down with your spatula so they stick..

Let cool for about 2 hours.  I usually refrigerate it after the first hour.

Slice into bars and enjoy!  These ARE shelf stable, but I find they stay together as bars better in the fridge and they still taste great!

*Have fun mixing and matching ingredients!  I've heard great things about adding peanut butter to the pot, raisins to the dry mixture, peanut butter or butterscotch chips, etc.


6.18.2012

Nutella Cookies

My husband loves Nutella but I rarely buy it.  I was in such a baking mood over the weekend that I asked him to pick up a jar while he was out, and when he went out again later, I made Nutella cookies to surprise him!

In a mixer, combine:

1 cup Nutella
1 cup Sugar
1 egg
1/2 tsp milk

The dough is pretty crumbly.  If your dough is super dry you can add another 1/2 tsp milk.  However, try hand kneading for a minute first.  I pulled out a handful at a time to knead and form into dough balls on the tray.


I have always heard it's best to make these small-ish cookies because they are chewy.  I had dough balls around 1 tbsp in size.  Normally I can fit 12 on my tray but I fit another row of 3 with this recipe & size.

Bake at 350 degrees for around 16 minutes.  I use a energy star gas oven and always seem to need to bake things for a longer amount of time than anyone else.  You know your oven best, just keep an eye on it!


These are a delicious, chewy, brownie-like cookie with a wonderful flavor.  They lasted less than a day here!


6.16.2012

Skinny Peanut Butter Cookies

I love peanut butter.  I'm not exaggerating when I say that I could live on peanut butter sandwiches.  When I found a recipe for 35 Calorie Peanut Butter Cookies, I jumped on it!

There are only four ingredients:

1 cup of fat free peanut butter
1 cup of sugar
1 egg
1 tsp baking soda

Mix the peanut butter and sugar until blended, then add the egg and baking soda and mix again.  The dough is not sticky.  Form into balls on a baking tray.  For the peanut butter cookie look, press a fork across the top in a cross hatch pattern.  Bake at 350 for 12-20 minutes.  Yes, that is a big range.  The recipe called for 8, my gas oven took about 18.  You know your oven better than me!

Let cool and enjoy!


6.14.2012

My Double-DIY Trail Mix

So the other day, I made homemade fruit snacks and reviewed the recipe on here.  They were a hit, and on Tuesday I only had a small handful left over.

Also on Tuesday, the girls did not finish the apple slices they had with lunch.

Lovely, no?


I diced those apple slices and threw them in the dehydrator for 2 hours.


When they're done, you have a second type of DIY fruit snack!  Dried apples!  You can do this with any fruit.


I added the leftover fruit snacks and the dried apple snacks to some baggies with raisins. Voila, a car-ready snack that makes thrifty use of leftovers and keeps them full for cheerleading practice!


6.12.2012

Recipe Review: Crackle Cookies

Today the girls and I decided to make cookies while my son was napping.  We settled on Crackle Cookies (click for link to recipe) and got to work!


They look pretty good in the oven, right?


WRONG!


This recipe is like everything wrong with a cookie rolled into one.  They stuck to the pan (both a stoneware pan that NOTHING sticks to, and a greased metal pan).  They were bitter.  They were rock hard.  They fell apart (or had to be scraped off in the case of pan 2- those cookies went right into the disposal, as I needed tons of water just to scrape them off).

So, how do you fix this?  You have three kids staring at you with sad eyes, just wanting some fresh warm cookies.

Well, that didn't happen, but we did the next best thing.


Blend up the cookie pieces with some vanilla ice cream!


6.07.2012

DIY Fruit Snacks

Between my son and my husband we go through a LOT of fruit snacks.  I'm lucky if a 42-pouch box lasts us a week!  If any other kids are here, forget it, I'm lucky if I get 4 days.

I've always wondered if I could make them- thanks to Pinterest I've made a LOT of stuff I used to buy from food to cleaning products and more (check my archives), so today I gave it a shot.

I modified a recipe I found online, so here's what I did-

1/2 cup water
3 .25oz packs of unflavored gelatin
1 pack of jell-o mix (raspberry, in this case)


Add all 3 to a pot or sauce pan and set heat to medium.  Stir until all of the gelatin and jello mix are fully mixed.


Pour into your mold and let it set.  This made EXACTLY enough to fill this mold of mine.  I did 20 minutes on the counter, and when it was still too sticky and un-solid, I put it in the fridge for another 10.  Bingo.


I needed a small paring knife to get the snacks out.  I just ran it along the 4 edges of each square (really, it didn't take that long) and then popped the square out.


One thing I noticed is they still felt kind of sticky, so I sprinkled a very, very, very light dusting of powdered sugar over them and shook them up.  Now they felt perfect!


They passed the taste test here!  I happened to have saved a bunch of Gerber plastic baby food containers which are great little portion sized storage containers for these.  They do not need to be refrigerated.


Happy eating!  Now, I'm off for a manicure, sorely needed if you can't tell...


Showing posts with label recipe. Show all posts

11.05.2013

Healthier Lactation Cookies- Lactation Cookie Recipe #3

So the last two recipes I posted for lactation cookies are delicious, but the jury is out on effectiveness at the moment.  This recipe, I saw an increase right away in my breast milk BUT you are going to spend more $ on ingredients and the cookies are not as yummy.  Maybe that's good, I won't overeat them, that's for sure.  This also only makes around half the cookies compared to the other recipes.

Ingredients:

·         1 cup coconut flour
·         1/2 cup virgin coconut oil
·         1/2 cup brown sugar
·         2 tablespoons flax seed meal
·         2 tablespoons of water
·         2 eggs
·         1 tablespoon vanilla extract
·         1 teaspoon cinnamon
·         1/4 cup of Brewer's Yeast
·         1/2 teaspoon salt
·         1 & 1/2 cups steel cut oats (NOT instant oats)
·         1 cup chocolate chips

Preheat oven to 350 degrees.

Mix the flax seed and water together in a small bowl and set aside for now.

Cream together coconut oil and brown sugar.  Add the eggs and vanilla extract and mix well.

Add coconut flour, cinnamon, brewer's yeast, and salt.  Mix well.

Stir in oats and chocolate chips.

Roll into balls (again, I use the OK symbol with my thumb and pointer finger and make balls about the size of the empty circle) and place onto a silicon baking sheet.  Smash them flat a little- these will not spread out like other cookies.

Bake for 12-15 minutes depending on your oven.

Make about 36 cookies.


Results-  Well, the day I made these, I ate about 9 (they are very small) and it was my best producing day ever, up just under 2 oz from the day before and also the day before that.  The 2nd day, I only ate 6, and am back down to where I was in the days before eating these.  They are somewhat dry and crumbly, stay in their ball shape after baking, and very, very not-sweet.  You will taste the Brewer's Yeast, but, if you do the math, 1/4 cup of Brewer's Yeast in 36 cookies is less than 1/2 teaspoon per cookie, and it's one of the main things to help your milk supply.  I don't find the taste bad, though some of you certainly will, but I also won't snack on these like I do the other recipes.

Updated results:  While I was still working on this post, on day 3 after making these cookies, I woke up with a small lump that turned into a full fledged clog by noon.  After LOTS of time with a heat pack, my pump and Lecithin pills, I think it's out, but if you've ever had a clog you know that the pain lasts for a few days after it's gone.  At least it's not Mastitis, I suppose.  I NEVER get clogs since starting a Lecithin regime, so I'm wondering if it's these cookies causing a slight increase and me not getting all the milk out as a result.  I will be getting into my breastfeeding regime later.

11.04.2013

Chocolate Chip Lactation Cookies- Lactation Cookie Recipe #2

So yesterday I shared my first lactation cookie recipe, made with M&Ms.  This recipe is pretty much the same but made with chocolate chips instead.  The difference is in the sweetness.  I feel like the M&Ms really made the cookie overwhelming and since due to the brewer's yeast this is a less sweet cookie in general, that's alarming.

Take note, tomorrow I'll post a healthier version of a lactation cookie, at least, compared to this recipe and yesterday's recipe.

I'll go ahead with results before I get into the recipe & photo this time, since it's very similar.  I could easily eat 10 of these cookies per day.  They are delicious.  However, any slight increase in breast milk did not require me to continue taking them to maintain, so I'm not really sure if they *really* were doing anything.  On the other hand, I haven't gotten into my whole arsenal of breast feeding tricks yet, so what you don't know is that I pretty much have oversupply and did it to myself on purpose so I can pump lots and wean earlier, plus not stress about milk supply.  You may see a noticeable increase if your supply is low.  I mean, there must be a reason the recipes are so enduring.

Ingredients:
2 tablespoons flax seed meal (found at GNC.  Alternative- buy flax seed and stick it in your food processor)
1/4 cup water
1 cup butter1 cup white sugar
1/2 cup brown sugar
3 eggs
2 teaspoons vanilla extract
2 cups flour
1/4 cup brewer's yeast (found at GNC.  NO OTHER TYPE OF YEAST!)
1 teaspoon baking soda
1/2 teaspoon salt
3 cups oats
2 cups chocolate chips

Preheat oven to 350 degrees.


Mix water and flax seed meal into a small bowl and set aside for the moment.


Cream together butter, white sugar, and brown sugar.


Add eggs and vanilla extract and mix well.


Add flax seed meal mixture and mix well.


Add flour, brewer's yeast, baking soda, and salt.  Some like to mix dry ingredients in a separate bowl.  I like to do less dishes so I just throw it all into the mixer bowl with the wet ingredients.  Mix well.


Stir in oats and chocolate chips.


Form and set on baking sheets.  I don't really have a set size, in general the little dough balls are around the size of the hole when I put my pointer finger to my thumb and make a circle, like making the "OK" sign.  


I bake on silicone sheets for about 15 minutes in an electric oven.  From owning a gas oven previously I know to remind you that your oven may be different and keep an eye on your cookies the first time you make them.

Recipe makes about 50 cookies.


11.03.2013

M&M Lactation Cookies- Lactation Cookie Recipe #1

I have a whole thing planned around breastfeeding and pumping, but as I'm only 8 weeks post partum, I'm still trying out a lot of stuff.

One thing I love to do to help is make lactation cookies.  I don't know if my supply is increasing because that's just what happens when you consistently empty your breasts, because of my supplementation, or both.

Regardless, I like lactation cookies.  They are yummy, they have some things in them that are good for you, and they certainly don't hurt supply.  The cons, well, they are cookies.  I will be posting some other recipes and tweaks to make them healthier in the coming days but in the meantime, enjoy a cookie, moms!  You deserve it.

Ingredients:
2 tablespoons flax seed meal (found at GNC.  Alternative- buy flax seed and stick it in your food processor)
1/4 cup water
1 cup butter
1 cup white sugar
1/2 cup brown sugar
3 eggs
2 teaspoons vanilla extract
2 cups flour
1/4 cup brewer's yeast (found at GNC.  NO OTHER TYPE OF YEAST!)
1 teaspoon baking soda
1/2 teaspoon salt
3 cups oats
2 cups M&Ms

Preheat oven to 350 degrees.

Mix water and flax seed meal into a small bowl and set aside for the moment.

Cream together butter, white sugar, and brown sugar.

Add eggs and vanilla extract and mix well.

Add flax seed meal mixture and mix well.

Add flour, brewer's yeast, baking soda, and salt.  Some like to mix dry ingredients in a separate bowl.  I like to do less dishes so I just throw it all into the mixer bowl with the wet ingredients.  Mix well.

Stir in oats and M&Ms.

Form and set on baking sheets.  I don't really have a set size, in general the little dough balls are around the size of the hole when I put my pointer finger to my thumb and make a circle, like making the "OK" sign.  I bake on silicone sheets for about 15 minutes in an electric oven.  From owning a gas oven previously I know to remind you that your oven may be different and keep an eye on your cookies the first time you make them.

Recipe makes about 50 cookies.


Results:

Well, they are delicious, but almost too sweet with the M&Ms, which is why the next recipe I'll share will have something else.  My supply steadily increase small amounts daily while eating (6-8 per day.../hides) but continued to increase after as well, so I don't know if I can give cookies all the credit.

8.17.2013

Faux Bojangles Biscuits

Wow, I never shared this recipe???  I loooove biscuits and used to make this every week, keeping them in tupperware and re-heating in the toaster oven as needed.  They are great for breakfast sandwiches, dinner rolls, snacks...did I mention I love biscuits?

Biscuits are probably the only thing at Bojangle's that I actually eat and they do a really yummy biscuit, so I convinced a friend of mine who managed one to snag me the recipe and adapted it a little to what I usually have on hand.


Ingredients:

3 cups self-rising flour OR 3 cups all-purpose flour with 3 & 3/4 tsp baking power and 3/4 tsp salt mixed in
2 tsp powdered sugar
3 tsp baking powder
1/2 cup salted butter (or unsalted, if you converted all-purpose flour to substitute for self-rising; I've found otherwise it's too salty)
1 & 1/2 cup buttermilk OR 1 & 1/2 cup milk (I use skim) and 2 tsp cream of tartar- mix and let stand for 5 min

Directions:

Pre-heat oven to 450 degrees.  Mix dry ingredients, then add butter (softened is best, and I use my Kitchenaid with paddle attachment to mix it all in).  Add buttermilk and mix well.

Spread flour on your counter and dump out dough.  Knead until non-sticky, then roll it out to about 1/2" thickness.  Use a cup or a biscuit cutter (I use a child size drinking glass) to cut out circles and place them on baking tray (I prefer stoneware- up to you!  You may have to spray your tray if it's not non-stick).  Keep rolling and cutting to use up all the dough.  Place biscuits touching each other on tray.

Bake for 15 minutes.  If you want (I do!) at about 13 minutes, carefully spread some butter over the top of the biscuits and finish baking to get that greasy golden Bojangles biscuit sheen.

When I want to re-heat them I pop them in my toaster oven for 3 minutes, but I'm sure you could easily warm them in a regular oven as well.


7.09.2013

Cake Batter Protein Shake Recipe

I used to be a manager at Gold's Gym and while I worked there I got addicted to their protein shakes.  They have a huge smoothie bar with tons of flavors- how could I not?  There's a little secret though.  Most of their recipes aren't that great for you.  The Carb Cutter which only comes in Vanilla or Chocolate is the best option, since it's just the protein mix BUT sugar free chocolate or vanilla syrup is always added & blended.  If you've ever had just a straight protein powder & water mix you probably know why.  The rest of the flavorings are full of sugar and even worse for you (lots of berry, tropical fruit, etc flavor offerings) but all of those generally start with a vanilla protein powder base.

Bearing that in mind, and wanting to add more protein to my pregnancy diet, I pulled out my container of vanilla Muscle Milk.  I had tried mixing it with greek yogurt and chocolate PB2 in the past and was not impressed, so here goes round two.

I wanted something sweet and thanks to a milkshake I saw (but didn't drink! le sigh) I decided to try out a cake batter flavor.  Now, when I make chocolate chip cookies, I follow the Nestle Toll House recipe BUT I add a box of Jell-O Instant Vanilla Pudding Mix and the cookies come out chewy and mouth watering.  I thought maybe this pudding mix could help me here.  My mom is a professional cake maker and her frosting (which everyone RAVES about- my 3 year old refuses to eat a cake with store bought!) has butter extract, so I also grabbed that.

If you want more protein or a thicker smoothie/milkshake texture I would try adding greek yogurt.  I hate greek yogurt and couldn't even drink a smoothing with it hiding under Chocolate PB2, so I didn't try.  If you like it I bet it would be great though!  I like thinner smoothies.  My husband adds normal yogurt to fruit smoothies and it feels like drinking snot to me.  To each their own!


Ingredients
1 scoop of vanilla protein powder- I use vanilla Muscle Milk
1/2 teaspoon imitation butter extract
1 tablespoon sugar free Jell-O Vanilla Instant Pudding
1 cup water
2 cups ice cubes
Sprinkles to garnish

Method
This is kind of important unless you've splurged on a Vitamix blender or something.  Add water first.  If you add the protein powder first it tends to clump up cheaper blender blades.  Even at Gold's with our giant commercial blender, we do it this way.  After water I added powder, ice, butter extract, pudding mix, and then blended it all up for about 30 seconds.  Pour into glass and sprinkle some sprinkles on top if you want!

Results
I.love.it.  I'm drinking one now.  I am diabetic and pregnant and struggle to get enough protein, especially since meat kind of turns my stomach right now.

Nutrition
I am not a nutritionist.  I have two college degrees and neither are in nutrition.  This may not be exact, but my best guess will have to suffice.

1 scoop of muscle milk, if mixed with water, is 100 calories, 6g carbs, 12g protein.  1 serving of Jell-O Sugar Free Instant Vanilla Pudding Mix is 80 calories- I MAYBE used 1/8 of that.  The bag I bought says it has 4 servings, I used 1 tablespoon of that and it still looks mostly full.  At worst I'd say you're looking at 110 calories unless you overload on the sprinkles.  Double your Muscle Milk to 2 scoops and you get 210 calories, 25g protein and 13g carbs.

Chocolate version coming up soon! :)


2.09.2013

Eggless Chocolate Chip Cookie Dough FroYo

Ice cream for breakfast!  Being pregnant I'm having a hard time with food right now.  I'm also diabetic so I can't give in to a lot of my cravings.  This one is OK for me- I'm not calling it a diabetic recipe though, check your own blood sugar for your body's verdict on that- and obviously healthier than just eating a bowl of cookie dough.


What you need:

1/4 cup sugar
1/2 cup packed brown sugar
1/2 cup butter, softened for easier mixing
1/4 tsp salt
2 tsp vanilla extract
1 cup flour
1/4 tsp baking soda
1 cup mini chocolate chips
1 cup vanilla yogurt

Beat sugars and butter together until mixed and creamy.  Add vanilla and mix again.  In a separate bowl stir together flour, baking soda, and salt.  Once mixed, stir in chocolate chips.  Mix the two bowls together by hand.  Stir in yogurt until fully combined.  Freeze overnight.

My quality control specialist.  Once he realized those were chocolate chips, he disappeared to eat a bowlful.

Before freezing, it really does look like cookie dough!


And after freezing, ice cream it is!


1.31.2013

Cloud Bread Recipe & Review

I've been seeing Cloud Bread a lot on Pinterest lately.


Doesn't it look just like fresh yummy bread?

I'm supposed to be eating low carb/high protein for awhile, but I'm Italian.  I'm pretty sure my blood is made of carbs.  I decided to  make this bread to see how it turned out.

I ended up using this recipe BUT I googled a few recipes first, and added 1 pinch of salt to this recipe.  Also 1 packet of sweetener didn't equal 1/8 teaspoon, it's nearly two packets.  So, modified recipe below:

You need:

3 eggs
2 packets or 1/8 teaspoon artificial sweetener
3 tablespoons of either fat free cream cheese OR cottage cheese
1/4 teaspoon Cream of Tartar
Pinch of Salt

Recipe:

Preheat oven to 300 degrees.

Take your 3 eggs and separate the yolks from the whites as carefully as possible.

Mix together the yolks, the cheese, the salt, and the sweetener until it's creamy and smooth.

In a separate bowl, beat the whites and the cream of tartar until they form stiff peaks.  This can take 5+ minutes of beating.

This is how a stiff peak will look.  Not drippy- doesn't fall over:


Fold the two mixtures together carefully.  You don't want to press the air out of the whites mixture.

Scoop batter onto greased baking sheet.  

I made six that were this size (this is batter, not baked)


Bake for about 30 minutes- your oven may vary!

Now you should have this!


I read on one of the recipes that they are better textured after sitting (sealed) overnight so into tupperware they went.  I honestly didn't notice a huge difference in poking them though.

The smell a bit eggy.  Almost like this is what is used for the bun of an Egg McMuffin.  On the other hand, they taste very light and have almost no flavor.  I think it would be great for grilled cheese or maybe a cheese/meat sandwich, but for my beloved and missed peanut butter sandwich, I wasn't all that impressed.


8.02.2012

Sneaky Toddler Muffins

My toddler is a decent eater, but he could always use more fruits and veggies.  Everyone could, really!  These muffins have carrots, banana, and squash in them and with the pumpkin pie spice, they smell (and taste) delicious!


recipe is slightly adapted from All Recipes.

Ingredients:

1/2 cup unsalted butter
1/2 cup brown sugar
2 large mashed bananas
1 container of baby food squash
1 cup of grated carrots
2 eggs
1 cup whole wheat flour
1/2 cup traditional oats
1 teaspoon baking soda
1 teaspoon pumpkin pie spice
1/2 teaspoon salt

Preheat oven to 375.  Fill muffin tins with paper liners.

Cream butter and brown sugar.  Add in bananas, squash, carrots, and eggs.  Stir in flour, oats, baking soda, pumpkin pie spice, and salt.

Using a soup ladle unless you have another way you like minimizing batter-mess, fill muffin papers about 1/2-3/4 full.

Bake for 15 to 20 minutes.  Let cool before giving to children!

7.03.2012

Pretzel Recipe

I love big soft pretzel with warm cheese and some pizza sauce for dipping.  It's one of my favorite treats to get at the mall.  I saw a recipe a few months ago and I have made them myself several times since then.  The only deviation from the recipe comes from when we occasionally put some garlic on top before baking, or make them shaped like sticks or even real pretzels.  Bites are so easy to make though!


The original recipe can be found by clicking here.

Ingredients:
Part One:  Dough
1.5 cups warm water- not too hot, don't kill your yeast!
2 tablespoons light brown sugar
1 package or 2.25 teaspoons active dry yeast
6 tablespoons of melted butter
2.5 teaspoons kosher salt
4.5 cups all-purpose flour
Vegetable oil

Part Two:  Baking
12 cups water
3/4 cup baking soda
2 eggs beaten with 2 tablespoons of cold water
Kosher salt to sprinkle


Add the water, brown sugar, yeast, and melted butter to the bowl of your stand mixer.  I let the melted butter sit for a few minutes, as I'm always scared it's going to be too hot and kill the yeast.  Mix these together with your dough hook.  Add the flour and kosher salt and mix well with your dough hook.  The dough will ride around on the hook when it's well mixed.  Knead the dough a few times with your hands into a nice ball shape.  Place in a bowl greased with vegetable oil and cover with a towel.  Let it sit for an hour so that it rises.  I put my bowl in the oven and just turn on the oven light.  It was doubled in less than an hour this way!


Now, you want to boil 12 cups of water and when it's boiling add 3/4 cup of baking soda.  Shape your dough however you like- I generally use a knife to cut the blob into about 8 strips, cut those strips in half, roll them out a bit, and cut those into bites.  Do whatever you like!  Whatever your shape is, boil it for about 30 seconds.  Remove with a big slotted spoon- I have a GIANT one from Pampered Chef that I adore for this sort of thing.  I place the bites on a dinner plate and brush them with the egg & water mixture.  Not TOO much- dripping down the sides = sticks to your pan!  I then transfer them to the baking sheet and sprinkle them with kosher salt.


Bake at 425 degrees.  It takes my gas oven about 12-15 minutes to get these looking done.  You know your oven, just watch them the first time you make them and figure out how much time you need.


These are FAB fresh out of the oven, but I've also frozen them (tip- bake them for 1/2 the needed time and then freeze.  To reheat, spray with melted butter, add a sprinkle more salt if needed, and pop in an oven or toaster oven on 350 for 10 minutes or so.  I use my toaster oven) and they keep well in a covered bin in the fridge (reheat the same as frozen but only for about 5 minutes).


This recipe made THREE dinner plates like this!  Four baking sheets worth of bites!


And this is my favorite way to enjoy them :)


6.28.2012

Homemade Oreo Cookies

Today, I saw a recipe on Yahoo! for homemade Oreo cookies!  I'm never going to lose the baby weight, I can tell!

I think the slew of recipes going around lately was inspired by this image:


That just makes me smile every time I see it for so many reasons.


So, on to the recipe!

I'm going to paste from the link above, since for once in my life I followed it exactly.  I will however post my photos at the end.  I baked 1 pan on a stoneware sheet and 1 on a metal sheet with wax paper.  The stoneware pan was by far superior- I was peeling bits of wax paper off of the other cookies.

This made me 100 cookies, so 50 Oreos.

I would suggest you add at least 1 extra cup of powdered sugar to the cream filling recipe for a better texture.

Just to repeat, Recipe Link!
Chocolate Wafers
Ingredients:
2 cups all purpose flour
¾ cup white sugar
3 tablespoons cocoa powder
½ teaspoon table salt
1 cup bittersweet chocolate chips
4 tablespoons unsalted butter
2 eggs
In a small bowl, whisk together the flour, sugar, cocoa powder, and salt.
In a microwave safe bowl, melt chocolate chips and butter for 30 seconds. Stir them together and microwave an additional 30 seconds. Repeat this process until chocolate and butter have both melted.
Using either a hand-held mixer with the beaters or a stand mixer with the paddle, combine melted chocolate and butter, and mix on low speed for 20 seconds.
Add eggs one at a time and mix on low speed until fully combined. Scrape down the bowl with a rubber spatula.
Add dry ingredients and mix on low speed for 10 seconds. Finish mixing with ingredients with a rubber spatula by hand.
Using two sheets of parchment paper roll out dough to 1/8-inch thickness.
Refrigerate dough for one hour or until firm.

Preheat oven to 350 degrees
Using a small round cookie cutter cut out as many rounds as possible and place one inch apart on a parchment paper lined cookie sheet. You can reroll the scraps once.
Bake for five minutes, then rotate the pan in the oven and bake an additional five minutes.
When the cookies are cool enough to handle, fill with cream filling (see directions below). Set aside for 20 minutes while the filling firms up.
Cream filling
2 sticks unsalted butter (room temperature)
1 pinch table salt
2 cups confectioner's sugar
1 teaspoon vanilla extract
Using either a hand-held mixer with the beaters or a stand mixer with the paddle, cream butter and salt at medium speed until light and fluffy
Add half the confectioner's sugar and mix on low for 30 seconds. Scrape down the bowl.
Add vanilla and mix on low for 30 seconds. Scrape down the bowl.
Gradually mix in remaining confectioners' sugar, holding some back until you reach the desired consistency. It should be smooth and spreadable, but not so runny that it will drip off the cookie.
Fill chocolate wafers with pastry bag fitted with small tip. You can also spread carefully with a knife or small spatula. A modest amount (about a teaspoon per cookie) is better so it doesn't squeeze out from between the wafers.
Cookies can be stored for up to one week in an airtight container.


Here's how I did!  Delish, but I do wish I had put extra powdered sugar in the filling.  It's more frosting-y, or icing-y, creamy anyway.


Let me know if you try it, especially if you found a way to improve the filling as I suggested!

6.27.2012

Quick & Easy Chocolate Cobbler

This chocolate cobbler recipe is so easy and the ingredients are so common!  You probably have everything you need already.  Cobbler is a wonderful treat.  It's a cross between a cake and a brownie and pudding, all in one!


The cobbler has two layers, but like I said, it's quick and easy, don't worry!

Bottom layer:

3/4 cup white sugar
1 cup all-purpose flour
2 tablespoons cocoa powder
1.5 teaspoons baking powder.
0.5 teaspoon salt
1/2 cup fat-free milk
3 tablespons melted butter

Mix all of this up well in a blender so that it's very, very, very creamy.

Spread evenly into a 9 x 13 baking dish.  I used a glass Pyrex one, ungreased.

Top layer:

In a clean bowl, stir together the following:

1/4 cup white sugar
1/4 cup cocoa powder
1/2 cup brown sugar

Sprinkle this mixture evenly over the top of your wet mixture.  Don't mix the two together!

Finally, add 1.5 cups of water, pouring GENTLY over the top of your cobbler.  Do not mix, do not stir, and have faith that this will work magic!  Make sure the entire top of your cobbler is covered with water.

Bake at 350 degrees for 40 minutes.

This cobbler is fantastic both hot and cold and even more fantastic with ice cream!

6.25.2012

DIY Pita Bread

Making your own pita bread is really easy and needs so few ingredients, I bet you can make them with what you have on hand!

1 tablespoon of yeast
1 teaspoon of sugar
1 teaspoon of salt
1.5 cups warm water
3 cups all purpose flour

Add the yeast, sugar, and water to your stand mixer bowl and let it sit for 10-15 minutes.  You want the yeast to be frothy and bubbly.  If your yeast doesn't "come alive" so to speak, your water may have been too hot (which kills it), not warm enough (doesn't wake it up), or you need to go buy a new can of yeast.  Don't omit the sugar- yeast eats it so it's like a little snack to get the yeast going.

Not quite done, but getting there!


In a separate bowl, mix the flour and salt.  When possible I like to use my 4 cup Pyrex glass measuring cup rather than dirty bowl a bowl and a measuring cup.


Attach your dough hook and slowly mix in the flour/salt mixture.  Keep mixing until the dough is really smooth and rides the hook.


Now take your dough out onto a floured surface and knead it well, really putting some elbow grease into it.  Knead it a LOT.  Try to make at least 5 minutes before your hands get tired!  You want the dough to be really stretchy, but not sticky.  If it's sticky add a tiny bit more flour until it stops.


Break the dough into balls.  I found that 6 balls was a good size for pitas but that's up to you.  Just remember to adjust for baking time if you go much smaller or bigger.

after you have the balls rolled out nicely, play them on a tray and flatten them with a rolling pin.  


Let these rise slightly.  It should only take about 30 minutes, although if you have your a/c going like me, you might need to play.  I throw some barely damp towels in the dryer on hot for 10 minutes, then stop the dryer and pop my trays in there and shut the door.  Otherwise my house just seems too cold for anything to rise in the summer with our a/c on.

When you think it's about time, preheat your oven to 500 degrees.  When the oven is preheated and the pitas are risen a bit, take a spatula and flip the pitas over.  Put them in the oven right after doing that.    You will bake them for about 15 minutes depending on your oven.

*Note- I used a stoneware pan for 3 pitas, which is non stick and fab.  I only have one so the other 3 pitas went on a metal pan.  I did not grease it and did not need to.

After the first 8 minutes or so you should see your pitas looking puffy!


Once they are starting to turn golden (around 15 minutes) they are done!  Let them cool, then you can slice into the pocket and stuff them (and stuff yourself!)

pre-slicing


6.19.2012

Homemade Granola Bars

We love granola bars around here!  A box of 42 can disappear in a week.  I thought making a batch as needed would be easier and maybe cheaper- we'll see!


Granola Bar Recipe:

1 cup of rice krispy cereal
2 cups of quick oats (traditional oats will NOT work.  Also,  you could sub this for 2 cups of loose granola but I haven't tried that)

Mix those together and set aside.

In a pot, combine:

1/2 cup brown sugar
1/4 cup honey
1/4 cup butter
1.5 cups marshmellows

Heat on medium until everything is smooth and combined.  Leave it on the heat until you see bubbles, almost like it's boiling.  This is necessary to get the oats to cook and stick together.

Pour the wet mixture over the dry mixture and stir stir stir!

In an ungreased pan (mine was a Pyrex pan about 10x8.5 or so) pour your mixture.  Spray a spatula with Pam and use it to press, press, press, and press again.  You need to pack this TIGHTLY.

Sprinkle a handful of mini chocolate chips over the top and gently press down with your spatula so they stick..

Let cool for about 2 hours.  I usually refrigerate it after the first hour.

Slice into bars and enjoy!  These ARE shelf stable, but I find they stay together as bars better in the fridge and they still taste great!

*Have fun mixing and matching ingredients!  I've heard great things about adding peanut butter to the pot, raisins to the dry mixture, peanut butter or butterscotch chips, etc.


6.18.2012

Nutella Cookies

My husband loves Nutella but I rarely buy it.  I was in such a baking mood over the weekend that I asked him to pick up a jar while he was out, and when he went out again later, I made Nutella cookies to surprise him!

In a mixer, combine:

1 cup Nutella
1 cup Sugar
1 egg
1/2 tsp milk

The dough is pretty crumbly.  If your dough is super dry you can add another 1/2 tsp milk.  However, try hand kneading for a minute first.  I pulled out a handful at a time to knead and form into dough balls on the tray.


I have always heard it's best to make these small-ish cookies because they are chewy.  I had dough balls around 1 tbsp in size.  Normally I can fit 12 on my tray but I fit another row of 3 with this recipe & size.

Bake at 350 degrees for around 16 minutes.  I use a energy star gas oven and always seem to need to bake things for a longer amount of time than anyone else.  You know your oven best, just keep an eye on it!


These are a delicious, chewy, brownie-like cookie with a wonderful flavor.  They lasted less than a day here!


6.16.2012

Skinny Peanut Butter Cookies

I love peanut butter.  I'm not exaggerating when I say that I could live on peanut butter sandwiches.  When I found a recipe for 35 Calorie Peanut Butter Cookies, I jumped on it!

There are only four ingredients:

1 cup of fat free peanut butter
1 cup of sugar
1 egg
1 tsp baking soda

Mix the peanut butter and sugar until blended, then add the egg and baking soda and mix again.  The dough is not sticky.  Form into balls on a baking tray.  For the peanut butter cookie look, press a fork across the top in a cross hatch pattern.  Bake at 350 for 12-20 minutes.  Yes, that is a big range.  The recipe called for 8, my gas oven took about 18.  You know your oven better than me!

Let cool and enjoy!


6.14.2012

My Double-DIY Trail Mix

So the other day, I made homemade fruit snacks and reviewed the recipe on here.  They were a hit, and on Tuesday I only had a small handful left over.

Also on Tuesday, the girls did not finish the apple slices they had with lunch.

Lovely, no?


I diced those apple slices and threw them in the dehydrator for 2 hours.


When they're done, you have a second type of DIY fruit snack!  Dried apples!  You can do this with any fruit.


I added the leftover fruit snacks and the dried apple snacks to some baggies with raisins. Voila, a car-ready snack that makes thrifty use of leftovers and keeps them full for cheerleading practice!


6.12.2012

Recipe Review: Crackle Cookies

Today the girls and I decided to make cookies while my son was napping.  We settled on Crackle Cookies (click for link to recipe) and got to work!


They look pretty good in the oven, right?


WRONG!


This recipe is like everything wrong with a cookie rolled into one.  They stuck to the pan (both a stoneware pan that NOTHING sticks to, and a greased metal pan).  They were bitter.  They were rock hard.  They fell apart (or had to be scraped off in the case of pan 2- those cookies went right into the disposal, as I needed tons of water just to scrape them off).

So, how do you fix this?  You have three kids staring at you with sad eyes, just wanting some fresh warm cookies.

Well, that didn't happen, but we did the next best thing.


Blend up the cookie pieces with some vanilla ice cream!


6.07.2012

DIY Fruit Snacks

Between my son and my husband we go through a LOT of fruit snacks.  I'm lucky if a 42-pouch box lasts us a week!  If any other kids are here, forget it, I'm lucky if I get 4 days.

I've always wondered if I could make them- thanks to Pinterest I've made a LOT of stuff I used to buy from food to cleaning products and more (check my archives), so today I gave it a shot.

I modified a recipe I found online, so here's what I did-

1/2 cup water
3 .25oz packs of unflavored gelatin
1 pack of jell-o mix (raspberry, in this case)


Add all 3 to a pot or sauce pan and set heat to medium.  Stir until all of the gelatin and jello mix are fully mixed.


Pour into your mold and let it set.  This made EXACTLY enough to fill this mold of mine.  I did 20 minutes on the counter, and when it was still too sticky and un-solid, I put it in the fridge for another 10.  Bingo.


I needed a small paring knife to get the snacks out.  I just ran it along the 4 edges of each square (really, it didn't take that long) and then popped the square out.


One thing I noticed is they still felt kind of sticky, so I sprinkled a very, very, very light dusting of powdered sugar over them and shook them up.  Now they felt perfect!


They passed the taste test here!  I happened to have saved a bunch of Gerber plastic baby food containers which are great little portion sized storage containers for these.  They do not need to be refrigerated.


Happy eating!  Now, I'm off for a manicure, sorely needed if you can't tell...