Showing posts with label home. Show all posts

6.10.2012

$45 to an in-home bar DIY

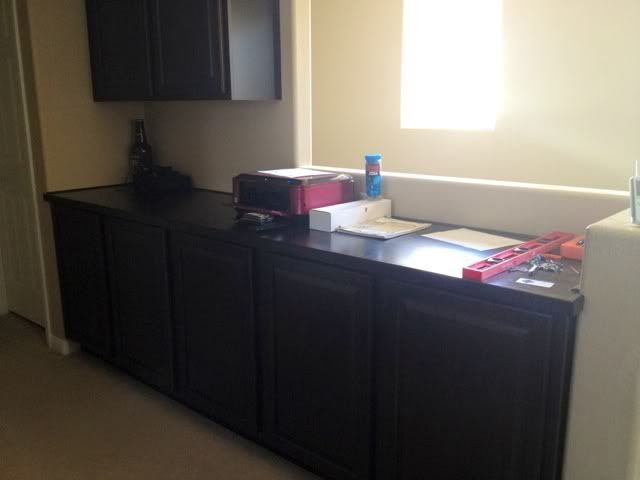
In our office, there is a wall of cabinets.  We knew they were there when we built the house, and we knew they'd match the kitchen (and bathroom) cabinets, as our builder didn't let us change cabinets for some reason. What we didn't know is that in the office the counter top would be just wood.  It gets scratched easily and looks cheap.  We also didn't really use this space for much more than collecting junk.

See?


I thought about removing a middle section and making a desk, but then I'd have a chair blocking the hallway.  I tried to keep it as clear and clutter free as possible, and it felt like a waste of space.  Then I thought about making it a bar, since all our liquor was in a cabinet with my kiddie craft stuff, but you can't put cold beverages down on this wood or you'd get a ring.  

I couldn't get the bar idea out of my head, and one Friday, we made it happen for $45!

First, I got some peel and stick tile at Lowe's.  $15 after military discount.  We had one tile left over.


First we laid it all out.


We saw we'd have to trim the far end and along the front.  We also made sure all the arrows on the back were facing the same way for grain matching.
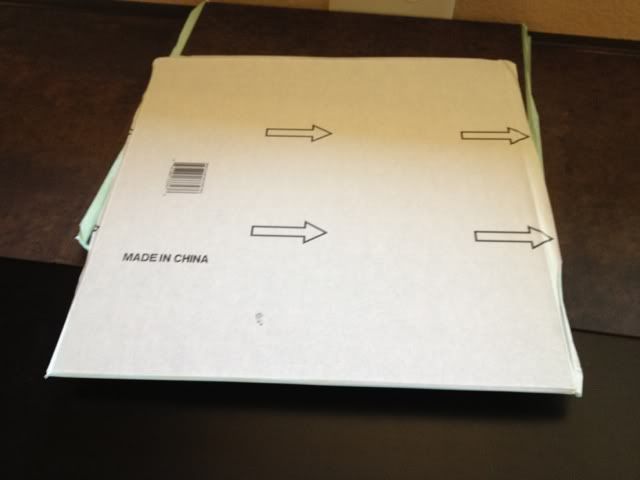


We laid out the back row first (but not the very last tile that we'd have to cut in half).  We then laid out the front row, trimming every tile as we laid it.  We used a box cutter and a lot of luck.

We trimmed it to that line, so there's about an inch of wood trim in front.

We then cut the final two tiles to fit (about 2/3'ds size) and ran over the whole thing with a rolling pin to help it stick.

Next, we took two stemware racks from Bed Bath and Beyond ($12 with coupon) and installed them under the upper cabinet for our wine and champagne glasses.  We brought our liquor up and added a set of cocktail accessories (shaker, etc.  $18).  


What do you think?  I feel like it's a much better use of that space, and much nicer looking!


We're going to mount a paper towel holder, add a black blender, and a small (3-6 bottle) wine rack and then call this puppy done!

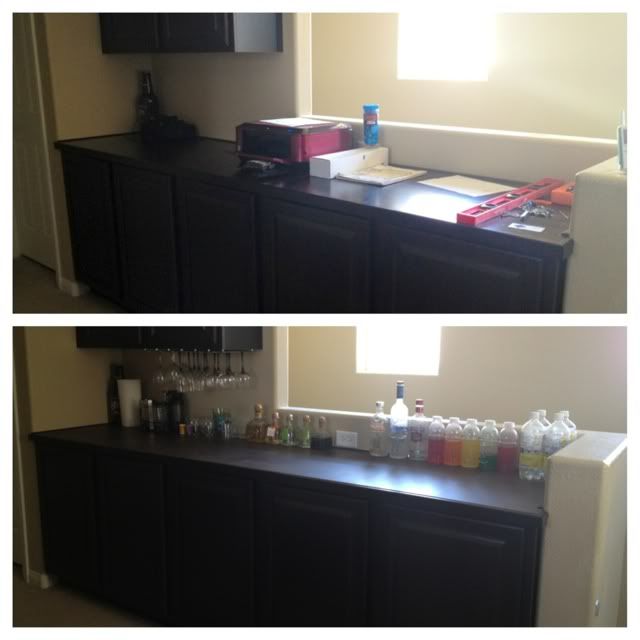
Before & after


6.05.2012

The Wax Paper Trick

This is a totally unbiased review of a household trick I read online, inspired by my new purchase.

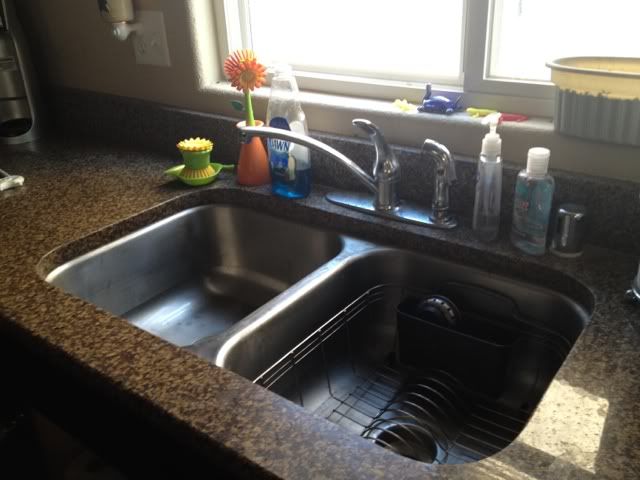
My purchase was a beautiful new faucet!  I've been wanting one since we built the house and discovered this was the stock faucet:


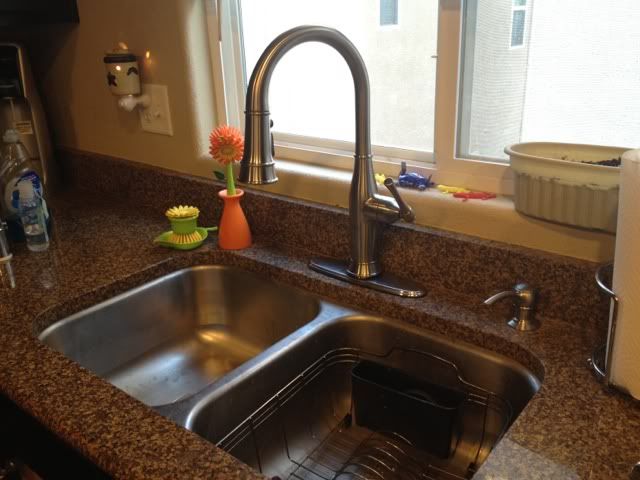
So the other day, we got this beauty!


Doesn't it look so much nicer???  And I wanted to KEEP it looking nice!  So, on to the trick!


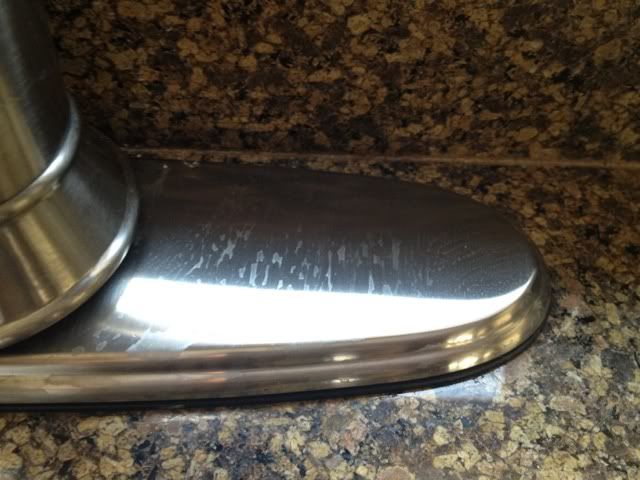
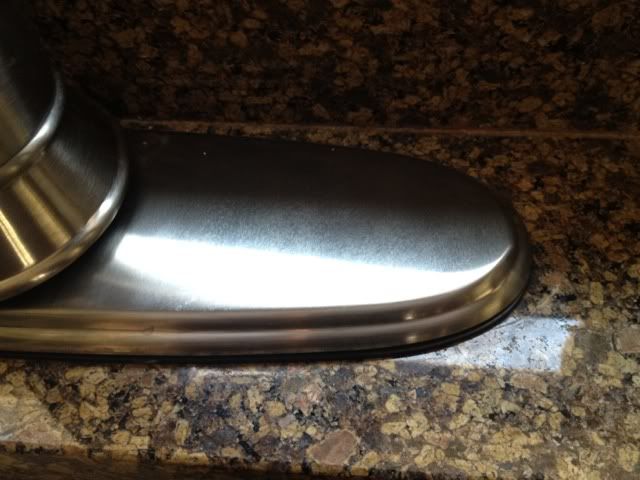
See those water spots?  Bleh.

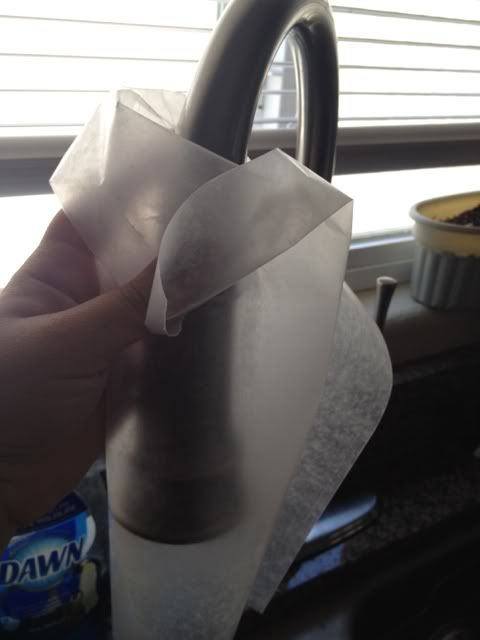
To prevent them, rub your faucet with some wax paper.  Because I only recently bought my first box of wax paper ever and I'm 26 years old, I rubbed the whole faucet with both sides, in case one side was waxy and one wasn't, or something.


It's said that the wax will repel water spots, so to test, I left some water drops in that same spot and let them air dry as usually happens when there's some splashing of the sprayer.


Look, no spots!  This trick really works!


4.09.2012

Bathroom accents DIY

In December we redid our master bathroom from the orange & hot pinks of my college dorm towels to a very sleek & luxe silver with crystal accents from Bed Bath & Beyond.  However, I had taken down all the wall decor and it was looking kind of bare.

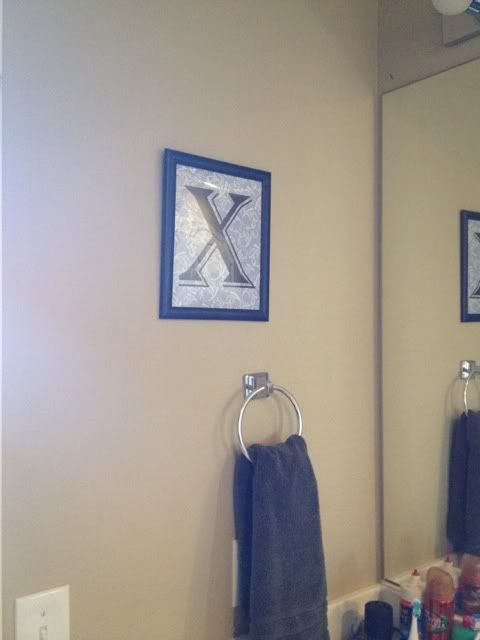
5 minutes with the Cricut & Sure Cuts a Lot and a frame from the dollar store.  I even printed out the pretty paper- just typed 'Grey Print' into Google & printed out one I liked.  Easy!

excuse the hubby's messy side of the sink!

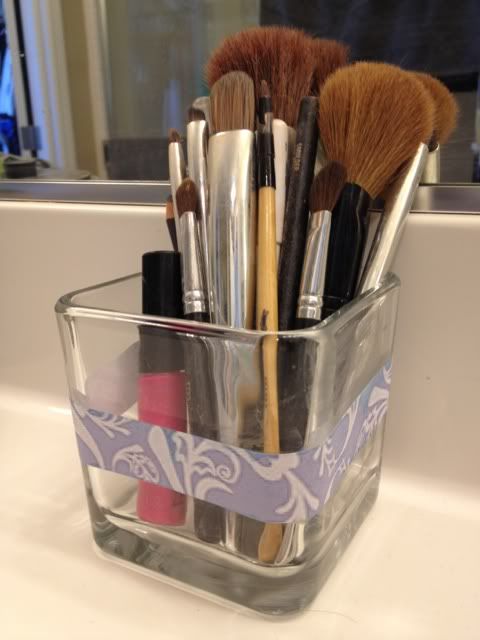
I even had a little bit of paper left over after trimming to fit the frame.  Coincidentally, I wanted to stop using my rinse cup as a makeup brush holder, so I had picked up a clear glass container at the dollar store as well.  I decided to Mod Podge the extra strip of paper on there to help it coordinate with the silver & grey bathroom.


One of these days I will make sure the bathroom is spotless and take a pic of how much it has changed in the last few months!


Showing posts with label home. Show all posts

6.10.2012

$45 to an in-home bar DIY

In our office, there is a wall of cabinets.  We knew they were there when we built the house, and we knew they'd match the kitchen (and bathroom) cabinets, as our builder didn't let us change cabinets for some reason. What we didn't know is that in the office the counter top would be just wood.  It gets scratched easily and looks cheap.  We also didn't really use this space for much more than collecting junk.

See?


I thought about removing a middle section and making a desk, but then I'd have a chair blocking the hallway.  I tried to keep it as clear and clutter free as possible, and it felt like a waste of space.  Then I thought about making it a bar, since all our liquor was in a cabinet with my kiddie craft stuff, but you can't put cold beverages down on this wood or you'd get a ring.  

I couldn't get the bar idea out of my head, and one Friday, we made it happen for $45!

First, I got some peel and stick tile at Lowe's.  $15 after military discount.  We had one tile left over.


First we laid it all out.


We saw we'd have to trim the far end and along the front.  We also made sure all the arrows on the back were facing the same way for grain matching.
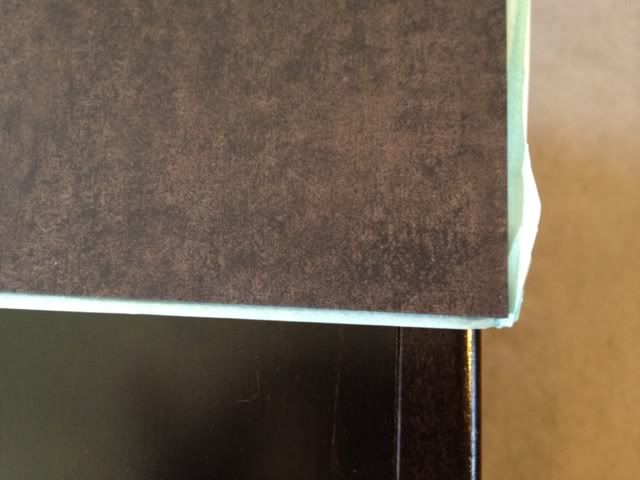


We laid out the back row first (but not the very last tile that we'd have to cut in half).  We then laid out the front row, trimming every tile as we laid it.  We used a box cutter and a lot of luck.

We trimmed it to that line, so there's about an inch of wood trim in front.

We then cut the final two tiles to fit (about 2/3'ds size) and ran over the whole thing with a rolling pin to help it stick.

Next, we took two stemware racks from Bed Bath and Beyond ($12 with coupon) and installed them under the upper cabinet for our wine and champagne glasses.  We brought our liquor up and added a set of cocktail accessories (shaker, etc.  $18).  
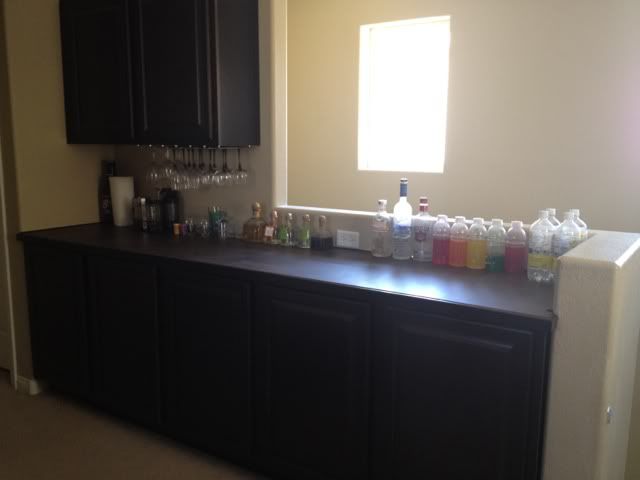


What do you think?  I feel like it's a much better use of that space, and much nicer looking!
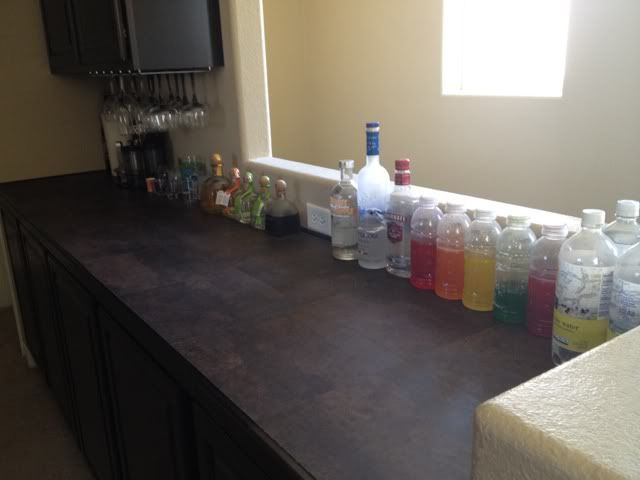

We're going to mount a paper towel holder, add a black blender, and a small (3-6 bottle) wine rack and then call this puppy done!

Before & after


6.05.2012

The Wax Paper Trick

This is a totally unbiased review of a household trick I read online, inspired by my new purchase.

My purchase was a beautiful new faucet!  I've been wanting one since we built the house and discovered this was the stock faucet:


So the other day, we got this beauty!


Doesn't it look so much nicer???  And I wanted to KEEP it looking nice!  So, on to the trick!


See those water spots?  Bleh.

To prevent them, rub your faucet with some wax paper.  Because I only recently bought my first box of wax paper ever and I'm 26 years old, I rubbed the whole faucet with both sides, in case one side was waxy and one wasn't, or something.


It's said that the wax will repel water spots, so to test, I left some water drops in that same spot and let them air dry as usually happens when there's some splashing of the sprayer.


Look, no spots!  This trick really works!


4.09.2012

Bathroom accents DIY

In December we redid our master bathroom from the orange & hot pinks of my college dorm towels to a very sleek & luxe silver with crystal accents from Bed Bath & Beyond.  However, I had taken down all the wall decor and it was looking kind of bare.

5 minutes with the Cricut & Sure Cuts a Lot and a frame from the dollar store.  I even printed out the pretty paper- just typed 'Grey Print' into Google & printed out one I liked.  Easy!

excuse the hubby's messy side of the sink!

I even had a little bit of paper left over after trimming to fit the frame.  Coincidentally, I wanted to stop using my rinse cup as a makeup brush holder, so I had picked up a clear glass container at the dollar store as well.  I decided to Mod Podge the extra strip of paper on there to help it coordinate with the silver & grey bathroom.


One of these days I will make sure the bathroom is spotless and take a pic of how much it has changed in the last few months!