Showing posts with label book. Show all posts

5.19.2018

How I made a DIY decorative box to hide my router for $11


I've moved into a new house and have a lot of things planned and decorating to do!  One of the first things I've wanted to get to is the mantle.  Above it is a recessed box with the cable, power, and other outlets.  I guess in newer builds the cable outlets aren't necessarily finished so this is the only place to plug in the modem and therefore the router.  The modem is small and just hidden behind stuff on the other end of the mantle but the router was more of a challenge.

This is what I started with:


The art canvas was sort of hollow due to the frame, so it works great to just hang over the box with all the outlets.  We had a lot of clutter on the mantle to try and hide the wires but hopefully this DIY makes it look more polished for now.  I saw similar hide-away boxes on Amazon and Etsy in the $50+ range, and at least on Amazon, you didn't have total control over the way the finished product looked.

So, first I went to Tuesday Morning and found a whole shelving unit of fake books.  I bought two, which cost me $11.  I had this project in mind for awhile so I had the measurements of the router in my phone and picked a book slightly wider and taller.  Depth wasn't as much of a concern since I'd be cutting the back off and because the antennas will still stick out of the back.  Then I went home and grabbed a hand saw from the garage and cut off the "back" part of the book that would go over the router:


In my case I just had to cut the two corners and then by bending that piece down I was able to just tear it off.  So now once you swing the lid closed again, you've got a box with an open back slot to slip a router inside...


As you can see, the box is still going to be away from the wall a bit due to the antenna.  This also is a plus if you're worried about the router getting hot.  When I tried this with real books it absolutely got hotter, but as this is more of a box around the router and lighter than a normal book it doesn't seem to get hot so far.  If you're really concerned you could also cut out the sides of your fake book for more air flow.  The smaller book is also a fake hollow book to keep things light.  I stuck a cute flower pot I got at Hobby Lobby ages ago on top but the antennas were still bothering me.


Well, luckily the antennas are flexible, so I just aimed them all more towards the center to hide them.  So far I haven't noticed any signal loss, but if I did I'd first re-position the antennas and if I had to I'd remove this box except when company comes over.

I hope this helps someone out!  My favorite part of DIY stuff is being able to recreate something I want, have it be exactly to my tastes (and/or size if that's a concern), and do it cheaper.


5.14.2013

Smashbooking my pregnancy- the first half

Today I got two new toys.  One of them is a Smash Book.  I have never used one, or really been into traditional scrapbooking.  My mom makes awesome Shutterfly books and for preservation and size I think they are amazing.  She has put all of my childhood photos into books for me and now makes yearly books for my family.  However, the Smash Book is supposed to be fairly effortless and my Michael's store is discontinuing the items, so I got them on mega mega clearances.  Between Michael's and Target (also on sale) I got over $130 worth of Smash stuff for under $40.  Score!

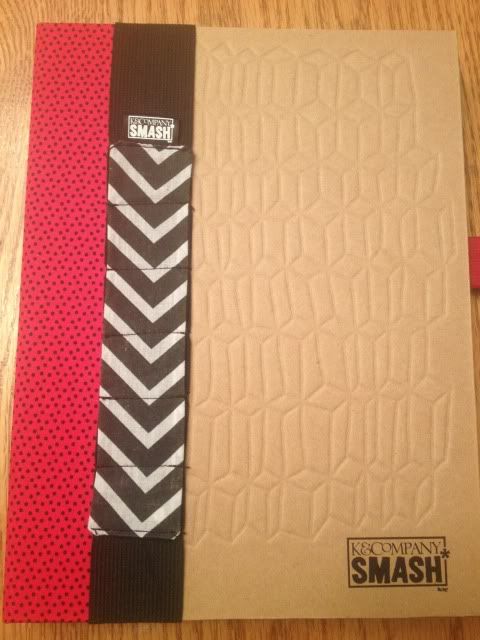
cover will be embellished at some point

I actually didn't have a plan in mind but decided to document my pregnancy.  I do feel bad for this baby.  With my first son I was constantly taking photos with my DSLR, editing them in Photoshop, documenting every step of the nursery decorating, etc.  With my second, I'm lucky to take a selfie in the mirror to show my growing bump.

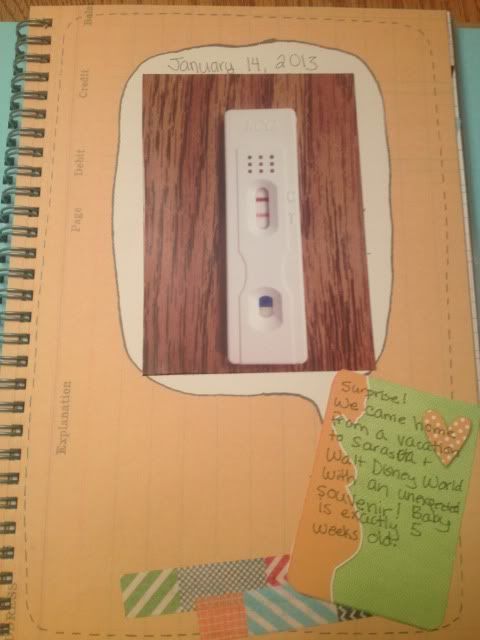
Page One had an ugly little cartoon talking about how pages can be intimidating and yada yada.  That's where the thought bubble the photo is in comes from.  I covered up as much as I could.  Unlike some amazing Smashbooks I've seen online, I'm sticking with the normal papers in the book as much as I can and keeping embellishments, especially 3D ones, to a minimum.  I just don't want to go overboard and I do want the book to stay mostly flat when closed.


The washi tape type stuff is Smashbook brand, and the little card is from U Printables By Rebecca who makes free printables in all sorts of categories and they are super cute.

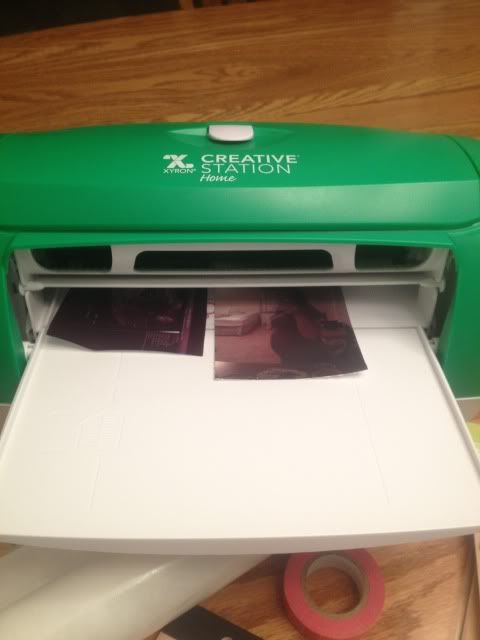
That brings me to toy #2.  Today I also got a Xyron, the 900 (9" work surface) to be exact, on clearance for $49.99 from $129.99.  Michael's rocks!  Joann's also has this same machine on clearance, but for $90, not $50.  

If you've never seen one, it's a cool machine that can turn anything that goes through it into a sticker, a magnet, or laminate it (without heat.  Without electricity or batteries, in fact).  You just install the proper cartridge, put your whatever you want in face up, turn the handle, and when it comes through the other side, use the attached slicing tool to slice it off the roll.  Peel off the backing and voila, you've made a sticker, with no changes to the front of whatever you slid through!  Ultrasounds stay safe, pictures stay shiny, card stock journaling cards stay cardstock, etc.  Much, much nicer than wet glue and less mess than glue dots (my mom HATES glue dots.  I get the little clear covers static-stuck to EVERYTHING when I use them).


After I ran those through I just stuck them in the book, easy peasy.


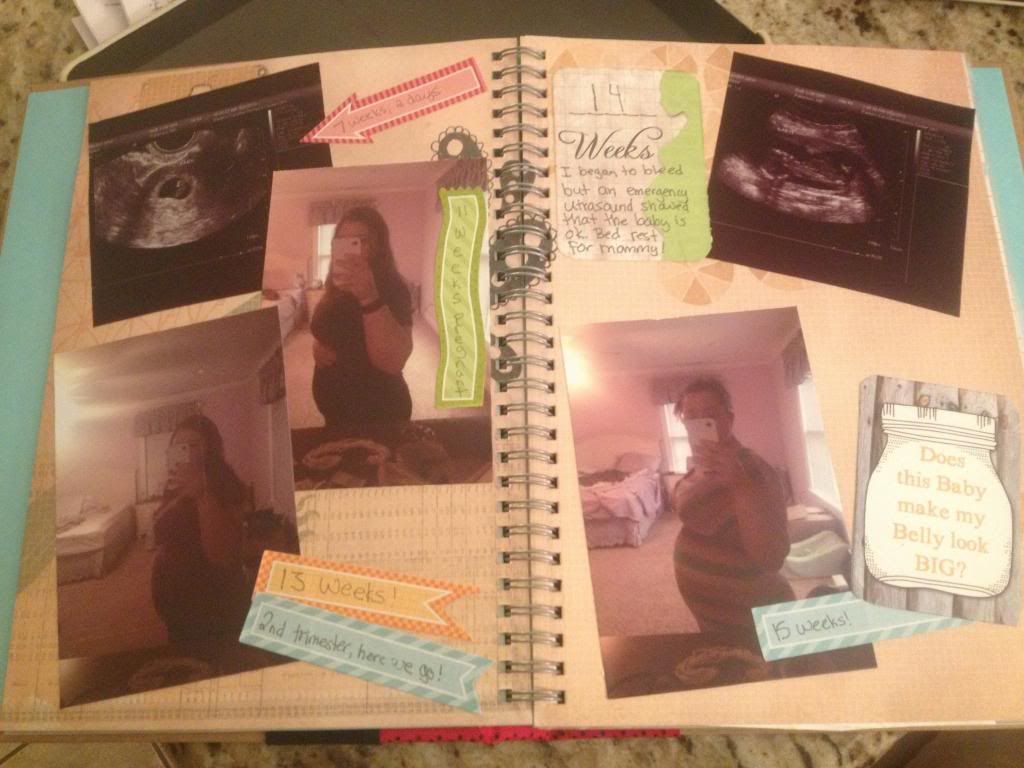
Again, the journal card and the mason jar card are from the printables link above.  The little banner arrow tag thingies are Smashbook.

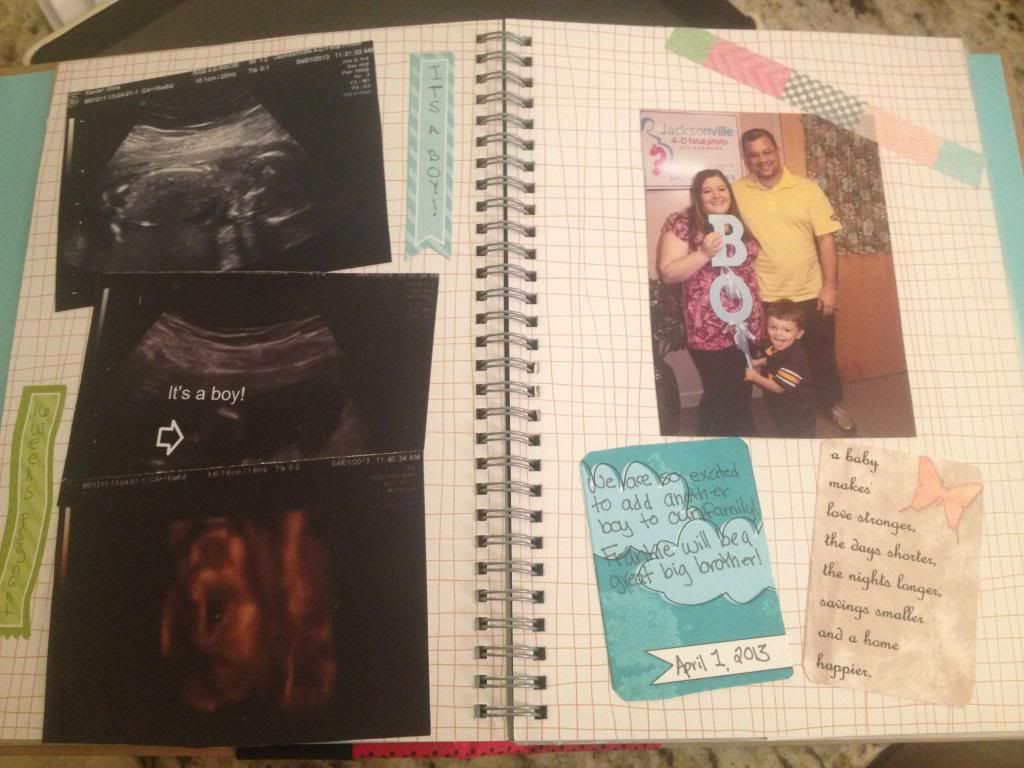
I had a lot of fun with the "It's a Boy!" page.  It gave me a natural chance to include a family picture, since it was taken right after we found out.  I actually left 2 blank pages in the beginning of the book for something family-oriented- maybe the vacation where baby was conceived?  Is that creepy?


Cars from the printables link above, arrows and washi tape from Smashbook.  It actually is not stick so I ran it through the Xyron.  Presto.

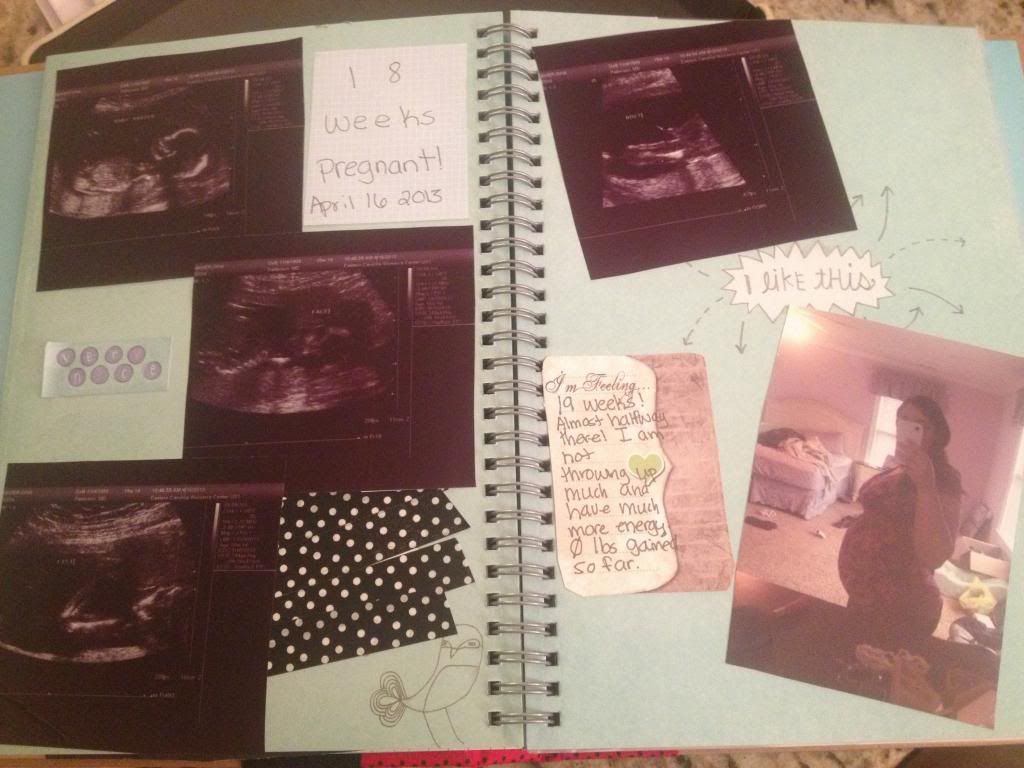
This next page isn't my super favorite one.  There was another stupid cartoon saying in the bottom corner so I tried to be cutesy and cover it with black and white washi tape.  I didn't mind the bird.  These ultrasound photos were shaped a little different and didn't line up as well as I'd hoped.  The notes on the left side are from Smashbook (one is trimmed from their little notepad sets, the other is a little taggie sticker), on the right, free printables from the link mentioned above.  The "I like this" is part of the page and I didn't mind it so didn't try to hide it.


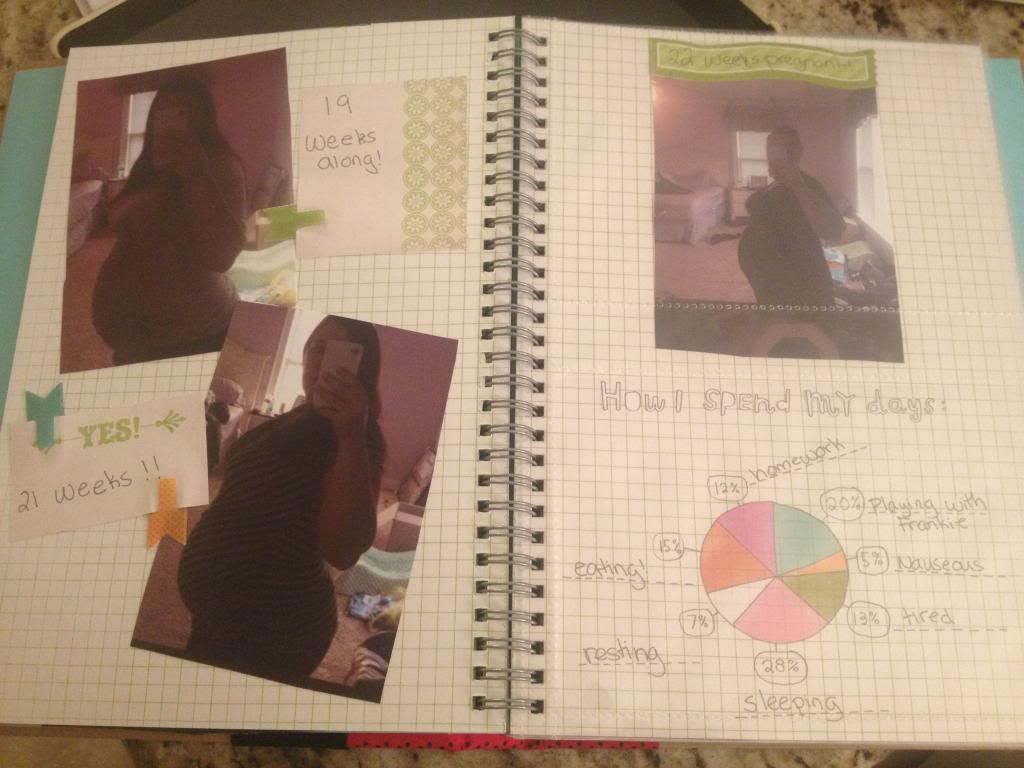
This brings me to the last page so far, 22 weeks along in my pregnancy.  On the right hand side, if it looks odd, that's because in between these two pages is a clear photo insert page.  I may rip that out.

The clips are Smashbook.  Both papers are trimmed from the little Smashbook notepads.  The pie chart graphic was part of that page, and since I didn't think I could hide it, I made the best of it.


I will obviously document belly pics and ultrasounds for the rest of my pregnancy, plus little journal card thoughts, my baby shower, hospital stay, birth, and coming home from the hospital (hopefully no NICU stay this time around).  The little folder in the back of the book's cover is perfect to hold the ultrasound DVDs that I have.  

I really have to say, the Xyron made this soooo easy.  I didn't even buy more glue dots today, and I'm out of them.  The Xyron is not the most economical choice (refills run $30+ though Michael's lets you use a 40 or 50% off one item coupon on them; mine does anyway) and I believe you get around 40' long x 9" wide but I can see how that would get used up quickly.  However, making a sticker just has no comparison to trying to glue something.  It's an entirely new level of crafting.

It was also nice to make something without my Cameo for once!  I am so dependent on that thing sometimes.


Showing posts with label book. Show all posts

5.19.2018

How I made a DIY decorative box to hide my router for $11


I've moved into a new house and have a lot of things planned and decorating to do!  One of the first things I've wanted to get to is the mantle.  Above it is a recessed box with the cable, power, and other outlets.  I guess in newer builds the cable outlets aren't necessarily finished so this is the only place to plug in the modem and therefore the router.  The modem is small and just hidden behind stuff on the other end of the mantle but the router was more of a challenge.

This is what I started with:


The art canvas was sort of hollow due to the frame, so it works great to just hang over the box with all the outlets.  We had a lot of clutter on the mantle to try and hide the wires but hopefully this DIY makes it look more polished for now.  I saw similar hide-away boxes on Amazon and Etsy in the $50+ range, and at least on Amazon, you didn't have total control over the way the finished product looked.

So, first I went to Tuesday Morning and found a whole shelving unit of fake books.  I bought two, which cost me $11.  I had this project in mind for awhile so I had the measurements of the router in my phone and picked a book slightly wider and taller.  Depth wasn't as much of a concern since I'd be cutting the back off and because the antennas will still stick out of the back.  Then I went home and grabbed a hand saw from the garage and cut off the "back" part of the book that would go over the router:


In my case I just had to cut the two corners and then by bending that piece down I was able to just tear it off.  So now once you swing the lid closed again, you've got a box with an open back slot to slip a router inside...


As you can see, the box is still going to be away from the wall a bit due to the antenna.  This also is a plus if you're worried about the router getting hot.  When I tried this with real books it absolutely got hotter, but as this is more of a box around the router and lighter than a normal book it doesn't seem to get hot so far.  If you're really concerned you could also cut out the sides of your fake book for more air flow.  The smaller book is also a fake hollow book to keep things light.  I stuck a cute flower pot I got at Hobby Lobby ages ago on top but the antennas were still bothering me.


Well, luckily the antennas are flexible, so I just aimed them all more towards the center to hide them.  So far I haven't noticed any signal loss, but if I did I'd first re-position the antennas and if I had to I'd remove this box except when company comes over.

I hope this helps someone out!  My favorite part of DIY stuff is being able to recreate something I want, have it be exactly to my tastes (and/or size if that's a concern), and do it cheaper.

5.14.2013

Smashbooking my pregnancy- the first half

Today I got two new toys.  One of them is a Smash Book.  I have never used one, or really been into traditional scrapbooking.  My mom makes awesome Shutterfly books and for preservation and size I think they are amazing.  She has put all of my childhood photos into books for me and now makes yearly books for my family.  However, the Smash Book is supposed to be fairly effortless and my Michael's store is discontinuing the items, so I got them on mega mega clearances.  Between Michael's and Target (also on sale) I got over $130 worth of Smash stuff for under $40.  Score!

cover will be embellished at some point

I actually didn't have a plan in mind but decided to document my pregnancy.  I do feel bad for this baby.  With my first son I was constantly taking photos with my DSLR, editing them in Photoshop, documenting every step of the nursery decorating, etc.  With my second, I'm lucky to take a selfie in the mirror to show my growing bump.

Page One had an ugly little cartoon talking about how pages can be intimidating and yada yada.  That's where the thought bubble the photo is in comes from.  I covered up as much as I could.  Unlike some amazing Smashbooks I've seen online, I'm sticking with the normal papers in the book as much as I can and keeping embellishments, especially 3D ones, to a minimum.  I just don't want to go overboard and I do want the book to stay mostly flat when closed.


The washi tape type stuff is Smashbook brand, and the little card is from U Printables By Rebecca who makes free printables in all sorts of categories and they are super cute.

That brings me to toy #2.  Today I also got a Xyron, the 900 (9" work surface) to be exact, on clearance for $49.99 from $129.99.  Michael's rocks!  Joann's also has this same machine on clearance, but for $90, not $50.  

If you've never seen one, it's a cool machine that can turn anything that goes through it into a sticker, a magnet, or laminate it (without heat.  Without electricity or batteries, in fact).  You just install the proper cartridge, put your whatever you want in face up, turn the handle, and when it comes through the other side, use the attached slicing tool to slice it off the roll.  Peel off the backing and voila, you've made a sticker, with no changes to the front of whatever you slid through!  Ultrasounds stay safe, pictures stay shiny, card stock journaling cards stay cardstock, etc.  Much, much nicer than wet glue and less mess than glue dots (my mom HATES glue dots.  I get the little clear covers static-stuck to EVERYTHING when I use them).


After I ran those through I just stuck them in the book, easy peasy.


Again, the journal card and the mason jar card are from the printables link above.  The little banner arrow tag thingies are Smashbook.

I had a lot of fun with the "It's a Boy!" page.  It gave me a natural chance to include a family picture, since it was taken right after we found out.  I actually left 2 blank pages in the beginning of the book for something family-oriented- maybe the vacation where baby was conceived?  Is that creepy?


Cars from the printables link above, arrows and washi tape from Smashbook.  It actually is not stick so I ran it through the Xyron.  Presto.

This next page isn't my super favorite one.  There was another stupid cartoon saying in the bottom corner so I tried to be cutesy and cover it with black and white washi tape.  I didn't mind the bird.  These ultrasound photos were shaped a little different and didn't line up as well as I'd hoped.  The notes on the left side are from Smashbook (one is trimmed from their little notepad sets, the other is a little taggie sticker), on the right, free printables from the link mentioned above.  The "I like this" is part of the page and I didn't mind it so didn't try to hide it.


This brings me to the last page so far, 22 weeks along in my pregnancy.  On the right hand side, if it looks odd, that's because in between these two pages is a clear photo insert page.  I may rip that out.

The clips are Smashbook.  Both papers are trimmed from the little Smashbook notepads.  The pie chart graphic was part of that page, and since I didn't think I could hide it, I made the best of it.


I will obviously document belly pics and ultrasounds for the rest of my pregnancy, plus little journal card thoughts, my baby shower, hospital stay, birth, and coming home from the hospital (hopefully no NICU stay this time around).  The little folder in the back of the book's cover is perfect to hold the ultrasound DVDs that I have.  

I really have to say, the Xyron made this soooo easy.  I didn't even buy more glue dots today, and I'm out of them.  The Xyron is not the most economical choice (refills run $30+ though Michael's lets you use a 40 or 50% off one item coupon on them; mine does anyway) and I believe you get around 40' long x 9" wide but I can see how that would get used up quickly.  However, making a sticker just has no comparison to trying to glue something.  It's an entirely new level of crafting.

It was also nice to make something without my Cameo for once!  I am so dependent on that thing sometimes.