Showing posts with label art. Show all posts

8.09.2013

Our worst kept secret ever

Pregnancy related things are really hard for the hubby and I to keep secret.  Despite 5 miscarriages and a year of fertility treatments to conceive our first child, we still told everyone the second our home test showed up positive, even though almost everyone thought we were crazy not to wait a little bit (that almost kind of hurts- "hey, remember you might fail at this?").  We never regretted it though!

This time around, family & friends knew right away (in fact, I walked straight out of the bathroom, where I called my just-deployed husband, and over to my dad, and started spreading the news!) but we didn't post on Facebook until the ultrasound showed heartbeat.  Why?  I don't know.  Last time my sister actually spilled the Facebook-beans so maybe I would have waited last time too.  Facebook is weird like that.

One thing we tried really, really hard to keep secret is the new baby's name.  With our first, we knew from before we got pregnant what he would be if he was a boy or girl.  With this one, we still had the girl name, but no boy name.  Agreeing on one took months, but we did!  Then hubby decided we should keep it secret.

Secrets can be fun, although my mother in law now knows, since he can never resist her asking :) I thought of a really cool idea though.  What if the "baby announcement" hospital photo of screaming 10 minute old baby was also a name announcement for everyone else?  At least for the Facebook crew, who don't get up to the minute, super close family secret updates.

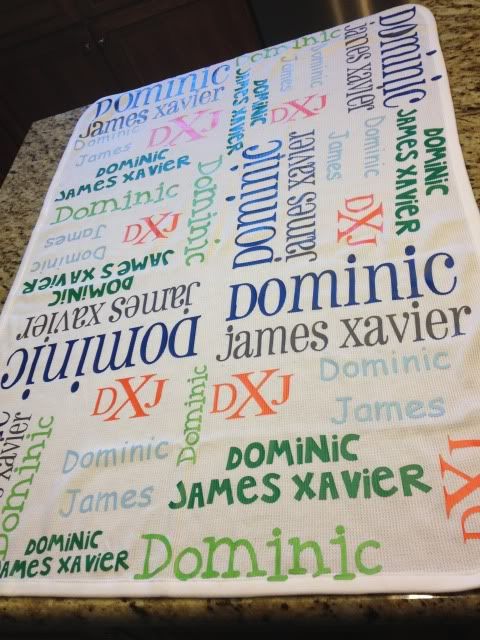
I set out to re-created a prop for a photo I saw.  And I am IN. LOVE.

I used my Silhouette Cameo to design the whole thing.  Simply resize the mat to whatever your blanket size is (this is 30 x 40 ") and design away.  I then copied the whole thing into a new file, split it up by color, and lined each color up on the mat one by one.  I cut them out of Siser Easyweed HTV (my favorite brand!), weeded & cut the words apart, and then re-created the whole thing on the blanket.  I pressed with my iron and parchment paper (no fancy heat press or teflon sheet here- I think I'm proof that you don't need tons of $$$ equipment to make something awesome!) and total pressing time was about 20 minutes.  I spent extra time going back and forth since the blanket is a waffle weave and I wanted to make sure the HTV really got in there.

So, blog-land friends, please be honored that you now know the name of our soon-to-be-born son!  I can't wait to swaddle him in this blanket and post a photo.

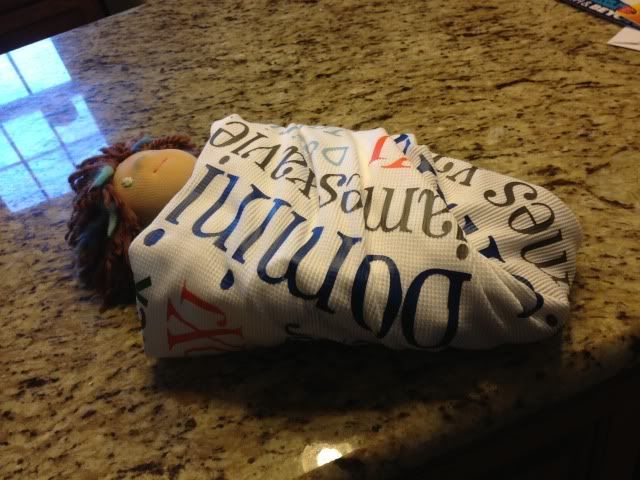
I did try to take a photo of how this would look as a swaddle, but a 14" doll (even my preemie first-born was 17.5"....) whos arms naturally stick out to the sides did not make the best model.  I don't have anything else to use though!  Oh well :)  It'll be on my son one month from today!

I got some questions about the design process so let me show you some screenshots.

Here we have the design mat resized to the blanket size, which is 30" wide and 40" long.  Ignore the red box- that is showing you where the 12x24 cutting mat is.  These are all free fonts from around the web.  


Once that was done (using lots of duplication, resizing, and moving things around) I copied it into a new file and started to split it up by color.  My HTV sheets are 12" x 15" so I resized my mat for those.  You can see here that some colors took 2 sheets- some took 1/4 of one.  It varies.  Anyway, I didn't show it with this screenshot, but don't forgot- MIRROR BEFORE YOU CUT HTV!  Mirror your image!  Select it and hit "flip horizontally."  Also, remember HTV goes on your cutting mat shiny side DOWN!  :)

When I make something with HTV I get asked a LOT about the pressing process.  I don't own a heat press or a teflon sheet.  My iron is from walmart.  It goes from 1-6, temperature-wise, so I set it on 6.  

I press in two stages.  First, I use parchment paper over the HTV with it's little carrier sheet (the shiny sheet) attached.


Next, I remove the carrier sheet, put the parchment paper back down (VERY IMPORTANT!  DO NOT IRON OVER HTV DIRECTLY!) and press it again.  I do about 15-45 seconds of pressing over each area each time.

Here's me removing the carrier sheet after the first press.  The HTV is adhered, but I think the 2nd parchment-paper-only step really helps it adhere well (especially on textured fabrics like this.


I hope that helps some of you who like me don't want to drop $200+ on a heat press, or even $10 on a telfon sheet- I've never felt the need! :)

7.06.2013

Nail Art with Vinyl Stencils

Hi again!  Guess what's back- the nausea!  Fun fun.  In the interest of going back to bed I'm just quickly sharing some photos from almost a month ago.  I wanted to do some fun nail art for our vacation and decided to give my Cameo a 2nd try.  My disastrous first attempt with nail art stencils from the Silhouette store can be found here.

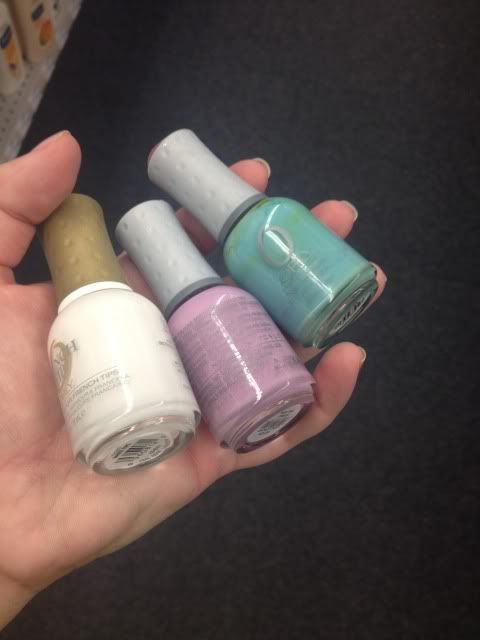
CVS was having a massive sale on Orly when I went in to pick up a prescription so I grabbed these three colors.


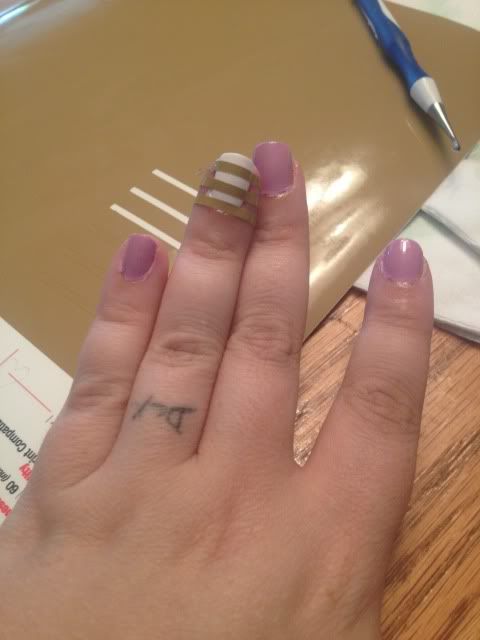
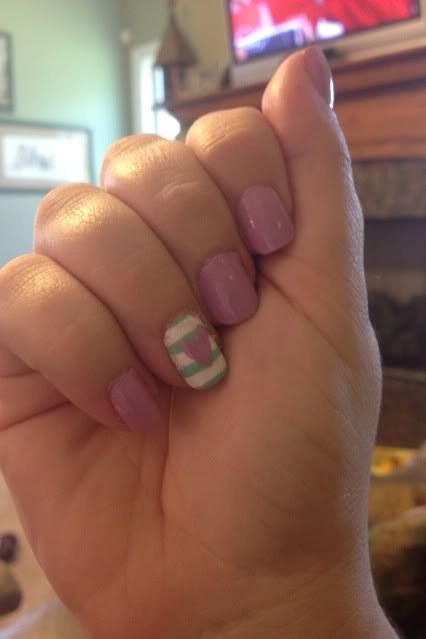
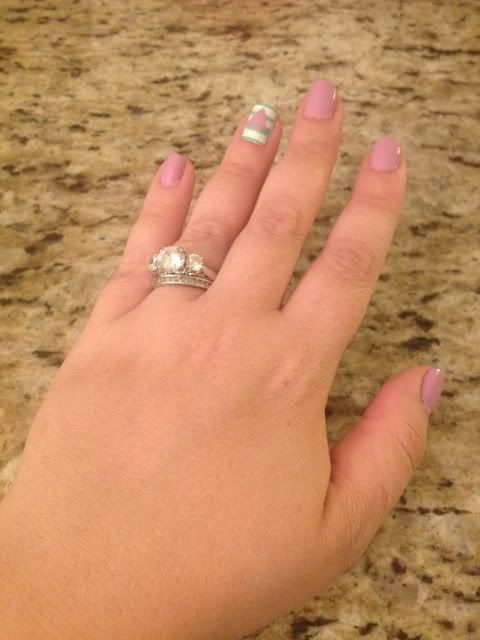
I painted 4 of my nails in the pinky purple and my ring finger in the white on both hands.  I then took some scrap Oracal 631 and cut it into strips.  I tried using scissors and ended up using my cameo to keep the lines straight.  After the white nail was dry (this is great polish for that by the way- I barely needed two coats) I pressed it onto the white nails, keeping it really smooth.


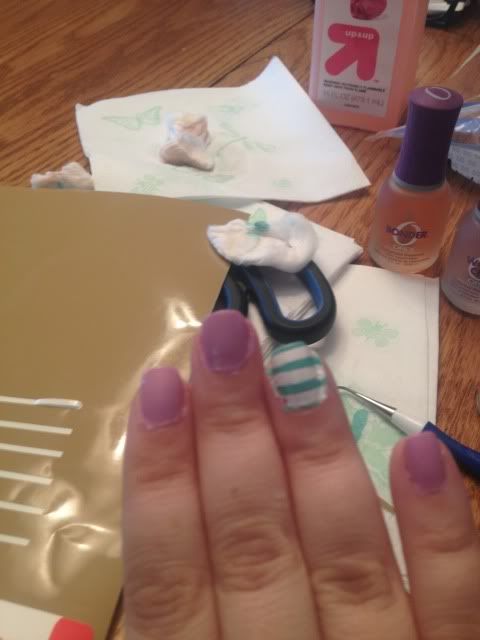
I took the turquoise and brushed it over the vinyl.  I did two light coats quickly, waited about a minute, and peeled off the vinyl.  I think that waiting for the polish to dry will just cause the whole thing to tear off.  I've always heard you should wet peel.  I then put top coat over it (Orly Won't Chip) to smooth it out.


I then took a heart shape I had in my library, shrunk it wayyy down, and cut two out of the same vinyl with my Cameo.  I actually cut this heart in about 4 different tiny sizes since I wasn't really sure what size would fit.  It's kind of hard to measure your own nail!

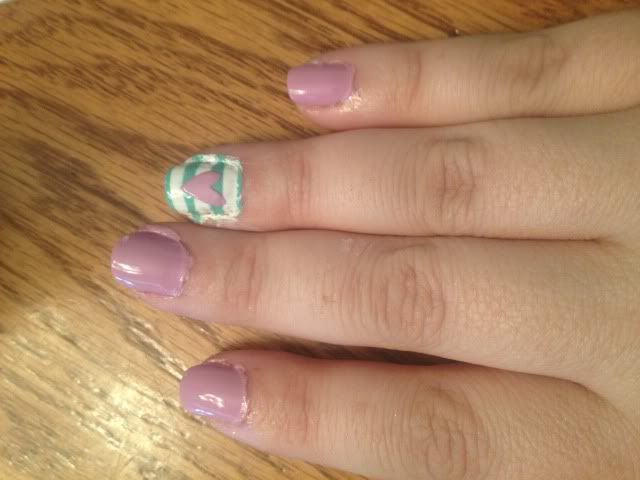
I did the same as before- apply the vinyl to a completely dry nail, adhere smoothly, 2 quick coats of purple pink polish, wait a minute, and wet peel gently.  Again, top coat goes on top to help smooth it out.


That's pretty much it!  All that's left is clean up.  I do go around the edges with a toothpick or q-tip and polish remover, but most of the mess comes off my skin in the shower so I usually don't sweat it too much.


This polish design lasted soooo long!  All through vacation!  About a week after I first did this I did have to go over all the purple pinky nails with another coat & topcoat but the ring finger nail art stayed for nearly two weeks until I finally removed it all!  It lasted through a Disney vacation which was a plus!

5.24.2013

Monogram nail art with the Silhouette Cameo

I saw this in a few places online recently, and yesterday I hit a pretty big wall of procrastination.  I'm taking 4 classes to be done with my degree in June, in the middle of buying a house, a PCS move to another state, and of course pregnant and taking care of my 3 year old.  Rather than do ANYTHING on my massive to-do list, I took some vinyl and monogrammed my pedicured toes.

The font is the Circle Monogram from Font Bros. and I used white Oracal 341 for the vinyl.  I wish I could get an accurate idea of the size.  The thing is, when I select an image in Silhouette Studio, the box it puts around it and measure with tends to be a little bigger than the actual design especially when using font.  I believe the total window was 1.42" wide, but the actual design is maybe .80" wide.  It'll depend on your own toes, of course!


While we're on a girly topic, my workstation has gotten pretty girly lately, huh?


I bought two large sheets of self-adhesive rhinestones from Allstarco.com, cut them to size, and adhered to the Cameo.  Took maybe 10 minutes and I didn't use all of the first sheet so I have lots left over to play with :) As for the computer...pink was on sale.  Nobody wanted it.  I got a great deal.  It's growing on me.

Showing posts with label art. Show all posts

8.09.2013

Our worst kept secret ever

Pregnancy related things are really hard for the hubby and I to keep secret.  Despite 5 miscarriages and a year of fertility treatments to conceive our first child, we still told everyone the second our home test showed up positive, even though almost everyone thought we were crazy not to wait a little bit (that almost kind of hurts- "hey, remember you might fail at this?").  We never regretted it though!

This time around, family & friends knew right away (in fact, I walked straight out of the bathroom, where I called my just-deployed husband, and over to my dad, and started spreading the news!) but we didn't post on Facebook until the ultrasound showed heartbeat.  Why?  I don't know.  Last time my sister actually spilled the Facebook-beans so maybe I would have waited last time too.  Facebook is weird like that.

One thing we tried really, really hard to keep secret is the new baby's name.  With our first, we knew from before we got pregnant what he would be if he was a boy or girl.  With this one, we still had the girl name, but no boy name.  Agreeing on one took months, but we did!  Then hubby decided we should keep it secret.

Secrets can be fun, although my mother in law now knows, since he can never resist her asking :) I thought of a really cool idea though.  What if the "baby announcement" hospital photo of screaming 10 minute old baby was also a name announcement for everyone else?  At least for the Facebook crew, who don't get up to the minute, super close family secret updates.

I set out to re-created a prop for a photo I saw.  And I am IN. LOVE.

I used my Silhouette Cameo to design the whole thing.  Simply resize the mat to whatever your blanket size is (this is 30 x 40 ") and design away.  I then copied the whole thing into a new file, split it up by color, and lined each color up on the mat one by one.  I cut them out of Siser Easyweed HTV (my favorite brand!), weeded & cut the words apart, and then re-created the whole thing on the blanket.  I pressed with my iron and parchment paper (no fancy heat press or teflon sheet here- I think I'm proof that you don't need tons of $$$ equipment to make something awesome!) and total pressing time was about 20 minutes.  I spent extra time going back and forth since the blanket is a waffle weave and I wanted to make sure the HTV really got in there.

So, blog-land friends, please be honored that you now know the name of our soon-to-be-born son!  I can't wait to swaddle him in this blanket and post a photo.


I did try to take a photo of how this would look as a swaddle, but a 14" doll (even my preemie first-born was 17.5"....) whos arms naturally stick out to the sides did not make the best model.  I don't have anything else to use though!  Oh well :)  It'll be on my son one month from today!


I got some questions about the design process so let me show you some screenshots.

Here we have the design mat resized to the blanket size, which is 30" wide and 40" long.  Ignore the red box- that is showing you where the 12x24 cutting mat is.  These are all free fonts from around the web.  


Once that was done (using lots of duplication, resizing, and moving things around) I copied it into a new file and started to split it up by color.  My HTV sheets are 12" x 15" so I resized my mat for those.  You can see here that some colors took 2 sheets- some took 1/4 of one.  It varies.  Anyway, I didn't show it with this screenshot, but don't forgot- MIRROR BEFORE YOU CUT HTV!  Mirror your image!  Select it and hit "flip horizontally."  Also, remember HTV goes on your cutting mat shiny side DOWN!  :)

When I make something with HTV I get asked a LOT about the pressing process.  I don't own a heat press or a teflon sheet.  My iron is from walmart.  It goes from 1-6, temperature-wise, so I set it on 6.  

I press in two stages.  First, I use parchment paper over the HTV with it's little carrier sheet (the shiny sheet) attached.
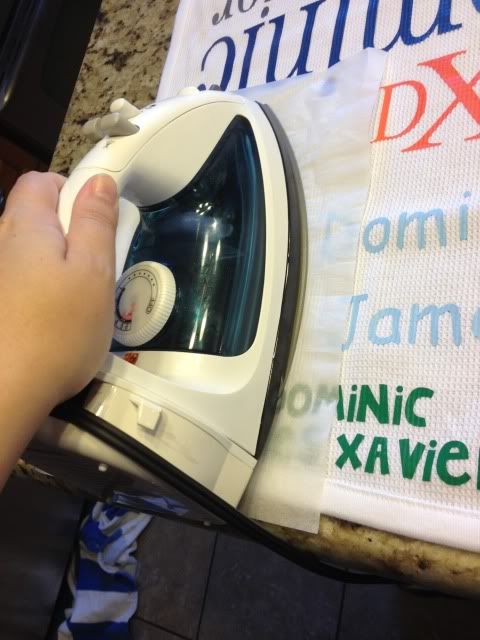

Next, I remove the carrier sheet, put the parchment paper back down (VERY IMPORTANT!  DO NOT IRON OVER HTV DIRECTLY!) and press it again.  I do about 15-45 seconds of pressing over each area each time.

Here's me removing the carrier sheet after the first press.  The HTV is adhered, but I think the 2nd parchment-paper-only step really helps it adhere well (especially on textured fabrics like this.
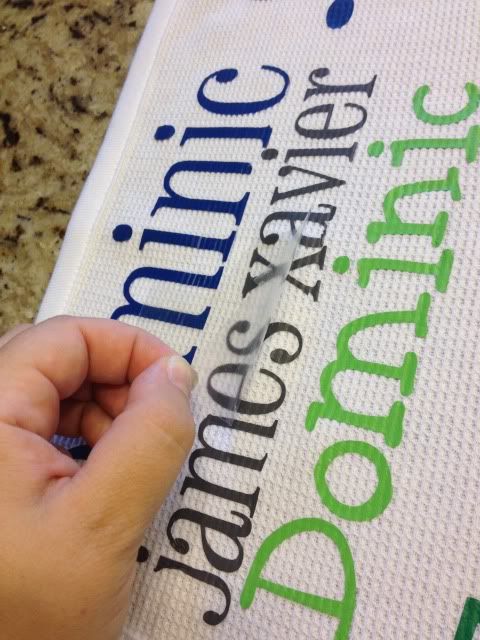


I hope that helps some of you who like me don't want to drop $200+ on a heat press, or even $10 on a telfon sheet- I've never felt the need! :)

7.06.2013

Nail Art with Vinyl Stencils

Hi again!  Guess what's back- the nausea!  Fun fun.  In the interest of going back to bed I'm just quickly sharing some photos from almost a month ago.  I wanted to do some fun nail art for our vacation and decided to give my Cameo a 2nd try.  My disastrous first attempt with nail art stencils from the Silhouette store can be found here.

CVS was having a massive sale on Orly when I went in to pick up a prescription so I grabbed these three colors.


I painted 4 of my nails in the pinky purple and my ring finger in the white on both hands.  I then took some scrap Oracal 631 and cut it into strips.  I tried using scissors and ended up using my cameo to keep the lines straight.  After the white nail was dry (this is great polish for that by the way- I barely needed two coats) I pressed it onto the white nails, keeping it really smooth.


I took the turquoise and brushed it over the vinyl.  I did two light coats quickly, waited about a minute, and peeled off the vinyl.  I think that waiting for the polish to dry will just cause the whole thing to tear off.  I've always heard you should wet peel.  I then put top coat over it (Orly Won't Chip) to smooth it out.


I then took a heart shape I had in my library, shrunk it wayyy down, and cut two out of the same vinyl with my Cameo.  I actually cut this heart in about 4 different tiny sizes since I wasn't really sure what size would fit.  It's kind of hard to measure your own nail!

I did the same as before- apply the vinyl to a completely dry nail, adhere smoothly, 2 quick coats of purple pink polish, wait a minute, and wet peel gently.  Again, top coat goes on top to help smooth it out.


That's pretty much it!  All that's left is clean up.  I do go around the edges with a toothpick or q-tip and polish remover, but most of the mess comes off my skin in the shower so I usually don't sweat it too much.


This polish design lasted soooo long!  All through vacation!  About a week after I first did this I did have to go over all the purple pinky nails with another coat & topcoat but the ring finger nail art stayed for nearly two weeks until I finally removed it all!  It lasted through a Disney vacation which was a plus!

5.24.2013

Monogram nail art with the Silhouette Cameo

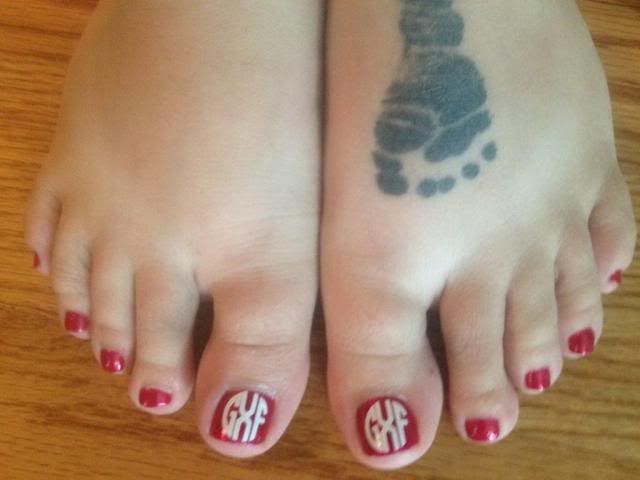
I saw this in a few places online recently, and yesterday I hit a pretty big wall of procrastination.  I'm taking 4 classes to be done with my degree in June, in the middle of buying a house, a PCS move to another state, and of course pregnant and taking care of my 3 year old.  Rather than do ANYTHING on my massive to-do list, I took some vinyl and monogrammed my pedicured toes.

The font is the Circle Monogram from Font Bros. and I used white Oracal 341 for the vinyl.  I wish I could get an accurate idea of the size.  The thing is, when I select an image in Silhouette Studio, the box it puts around it and measure with tends to be a little bigger than the actual design especially when using font.  I believe the total window was 1.42" wide, but the actual design is maybe .80" wide.  It'll depend on your own toes, of course!


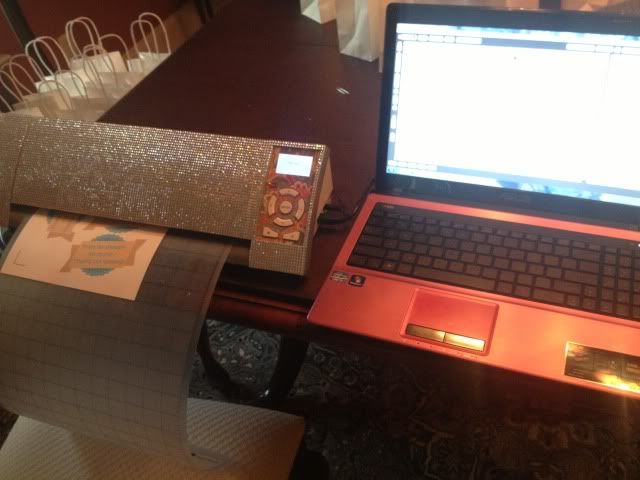
While we're on a girly topic, my workstation has gotten pretty girly lately, huh?


I bought two large sheets of self-adhesive rhinestones from Allstarco.com, cut them to size, and adhered to the Cameo.  Took maybe 10 minutes and I didn't use all of the first sheet so I have lots left over to play with :) As for the computer...pink was on sale.  Nobody wanted it.  I got a great deal.  It's growing on me.